
Introduction
In a single statement, Azure DevOps is everything you need to build your software product from beginning to end. In this post, I am going to explain the new integration between Azure Boards and GitHub. Development teams using GitHub can now take advantage of the rich project management capabilities offered by Azure Boards, including Kanban boards, backlogs, sprint planning tools, queries, and multiple work item types.
How to Link Azure Boards with GitHub Repos
We are seeing an Azure board where you can track any unit of work in your software project (Image 1). What is really cool is that now we can link Azure boards up with our GitHub repos. If you want to set up that linkage, first you need to open the Project settings located in the lower-left corner on Azure board.
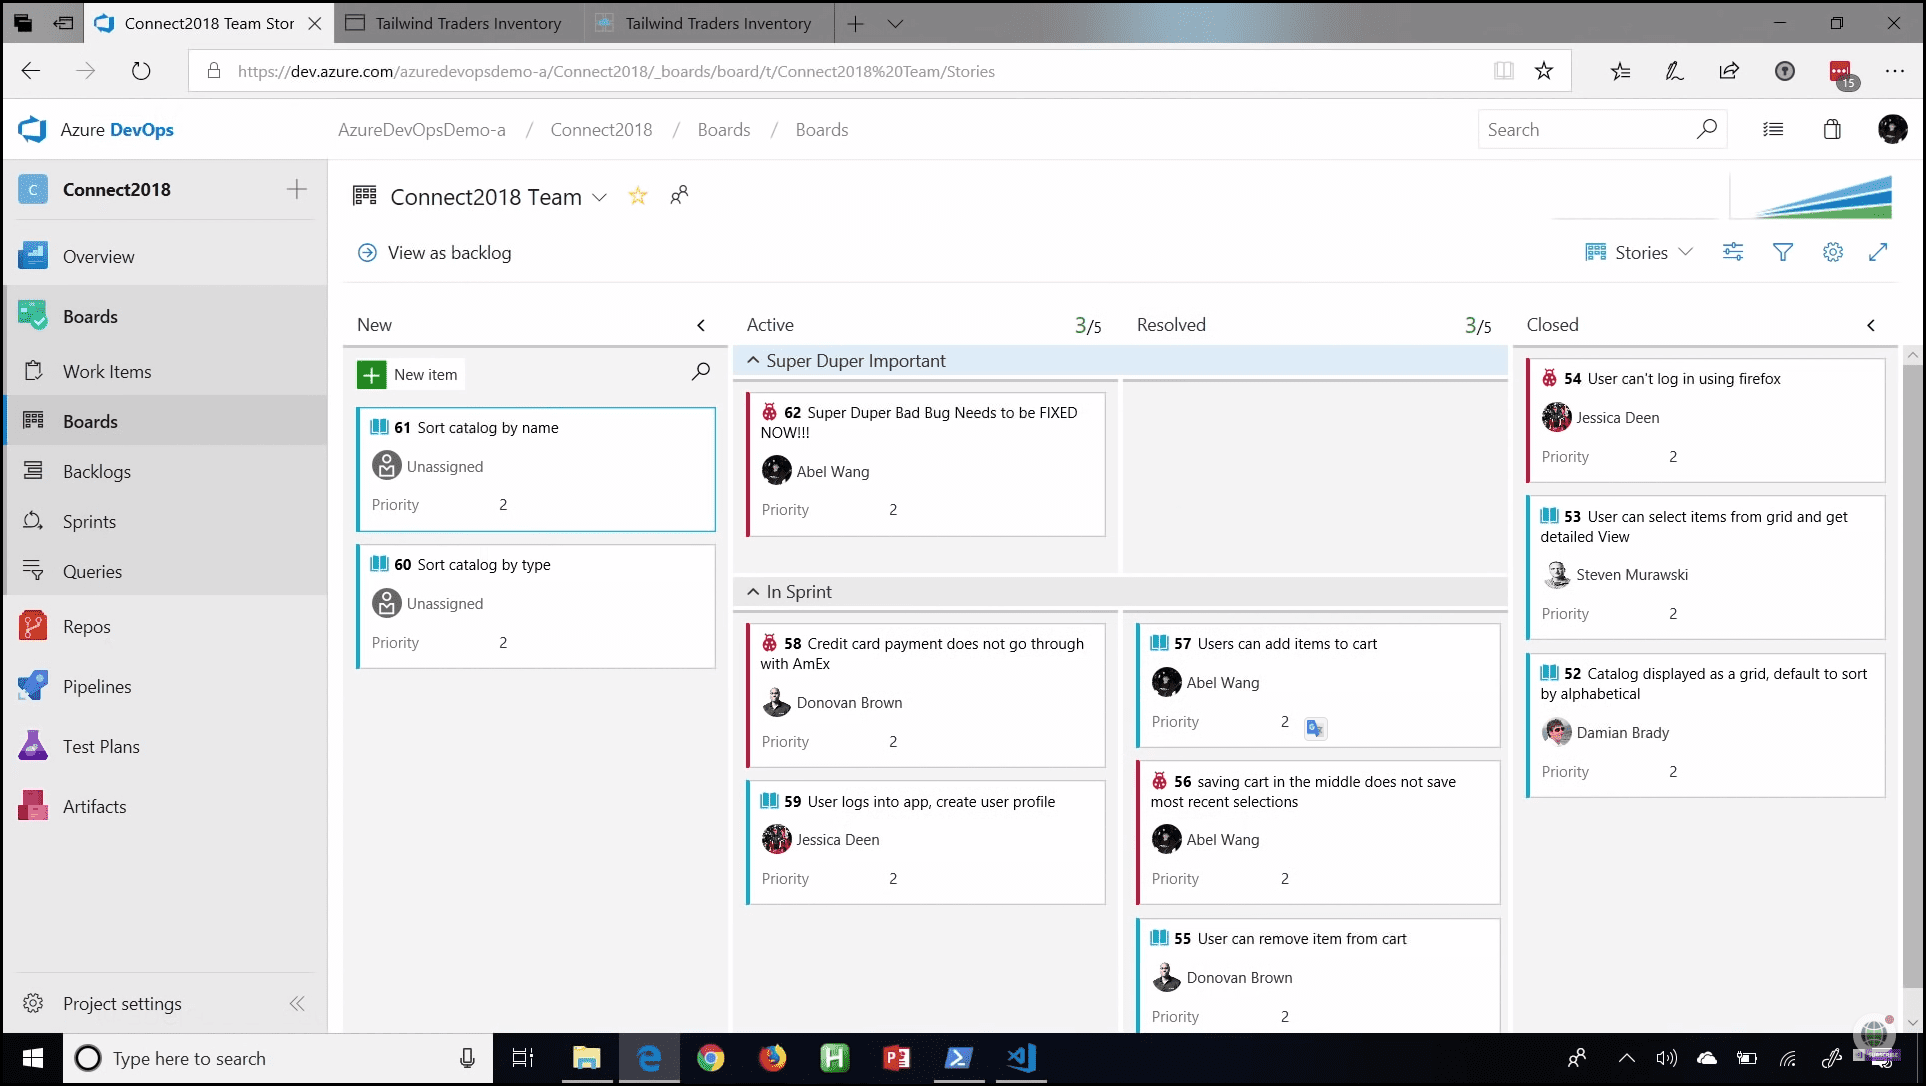 Image 1 - Azure board
From the Project Settings, navigate to Integrations, click on the New GitHub Integration button (Image 2).
Next, you should choose which GitHub repo you want to integrate with.
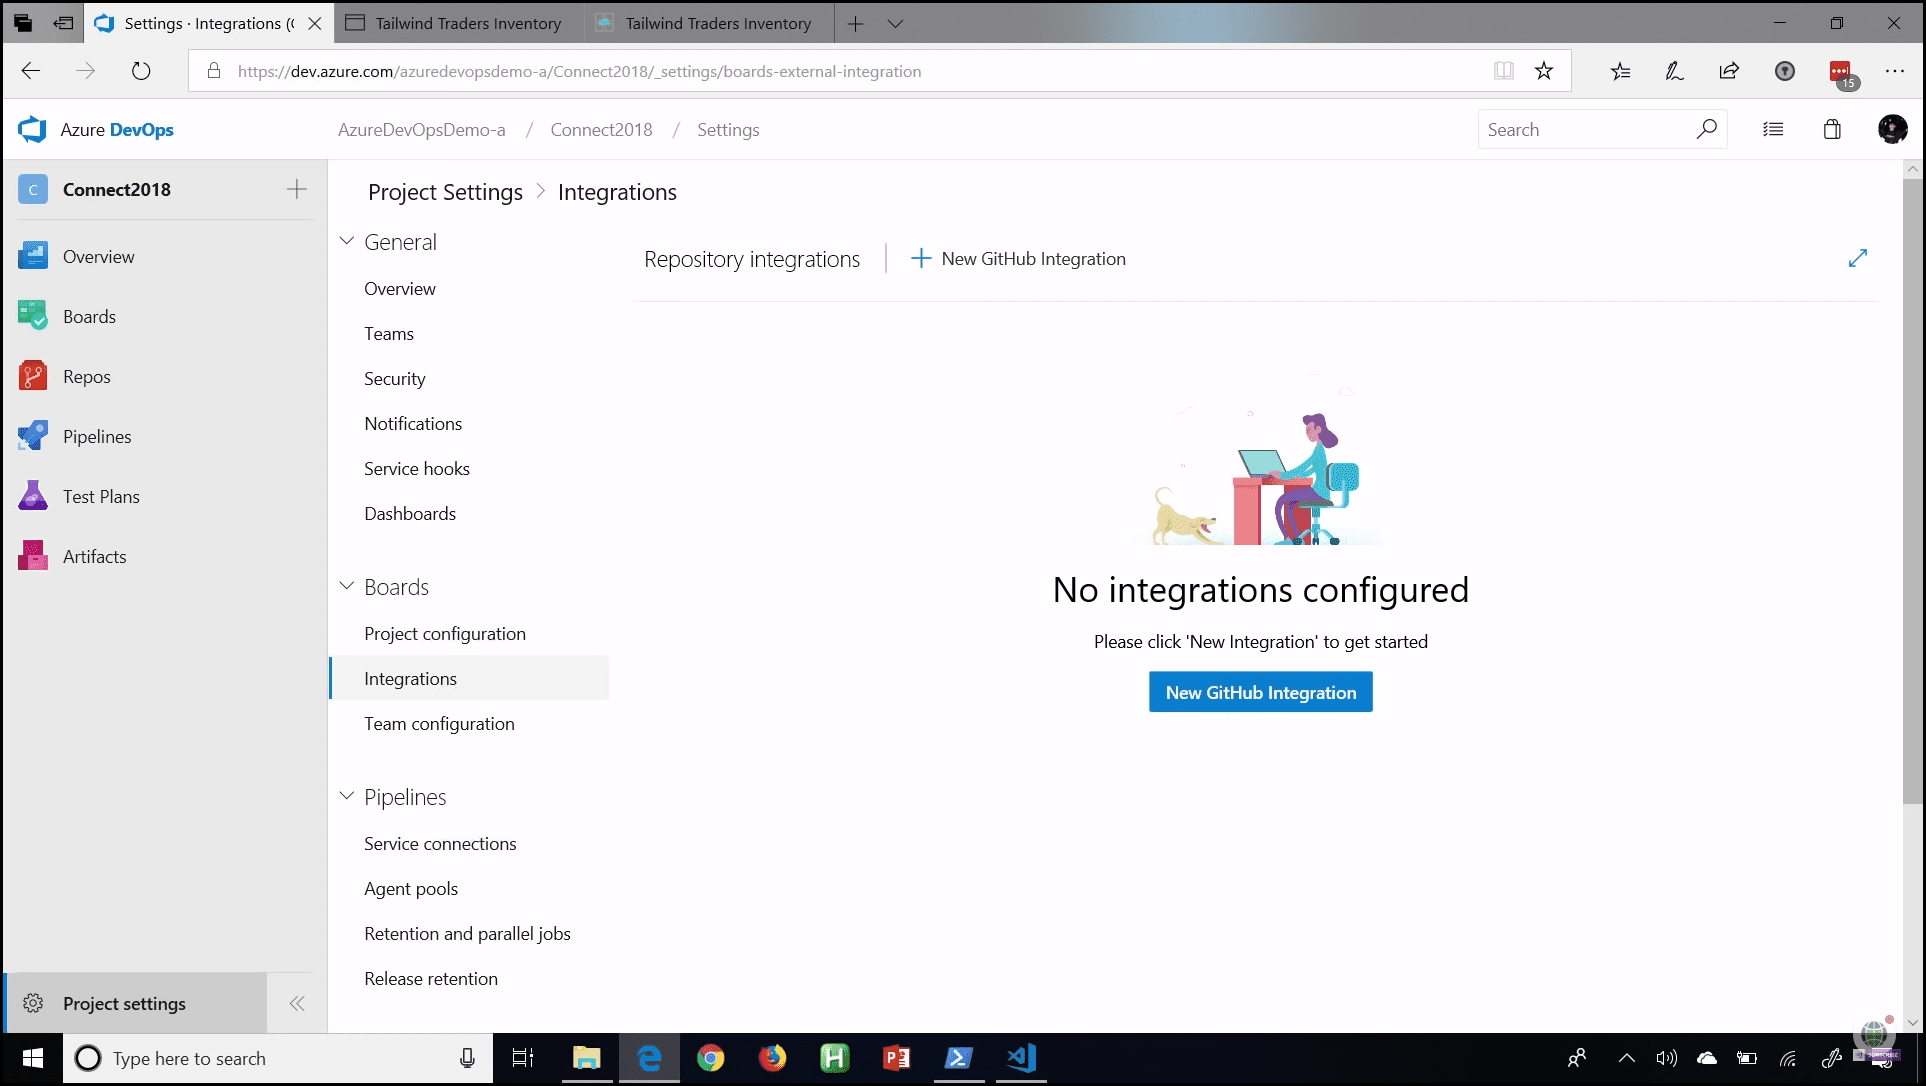 Image 2 - New GitHub integration
In this case, we are going to use a Personal access token to connect to my GitHub repo. After we are successfully authorized, all available repos will be listed, and we should choose the one we want to connect to (Image 3). After choosing one, just click on the Save button.
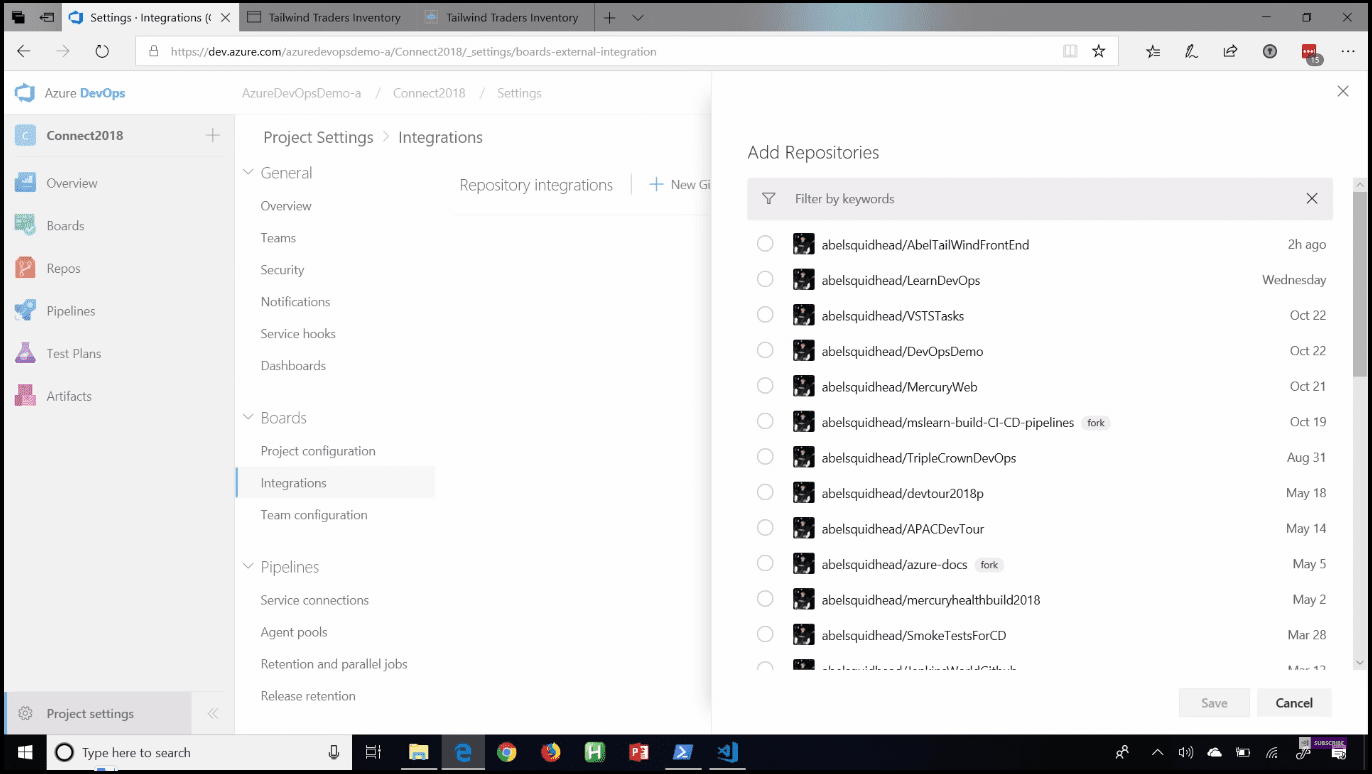 Image 3 - Choose repo to connect to
Tip: If you would like to learn more about using different environments during the realization of a software system
Have a look at the post Azure DevTest Labs Updates. Azure DevTest Labs is a service provided by Microsoft Azure which provides functionality for managing environments that contain Azure Virtual Machines. The post describes both the core capabilities of DevTest Labs and the new features of the service (as of February 2018).
Now I will make a change in GitHub and save it, and after that create a new branch for the commit and start a pull request. Add a commit changes comment (mentioning the bug which we are working on) and click on the Propose file change button. Now if we go back to our Azure board, open the bug that we mentioned in our commit changes comment, in the Development section, we can already see the link to GitHub. If we click on the link, we can see on GitHub our fix, what branch it is in, as well as what my changes are (Image 4).
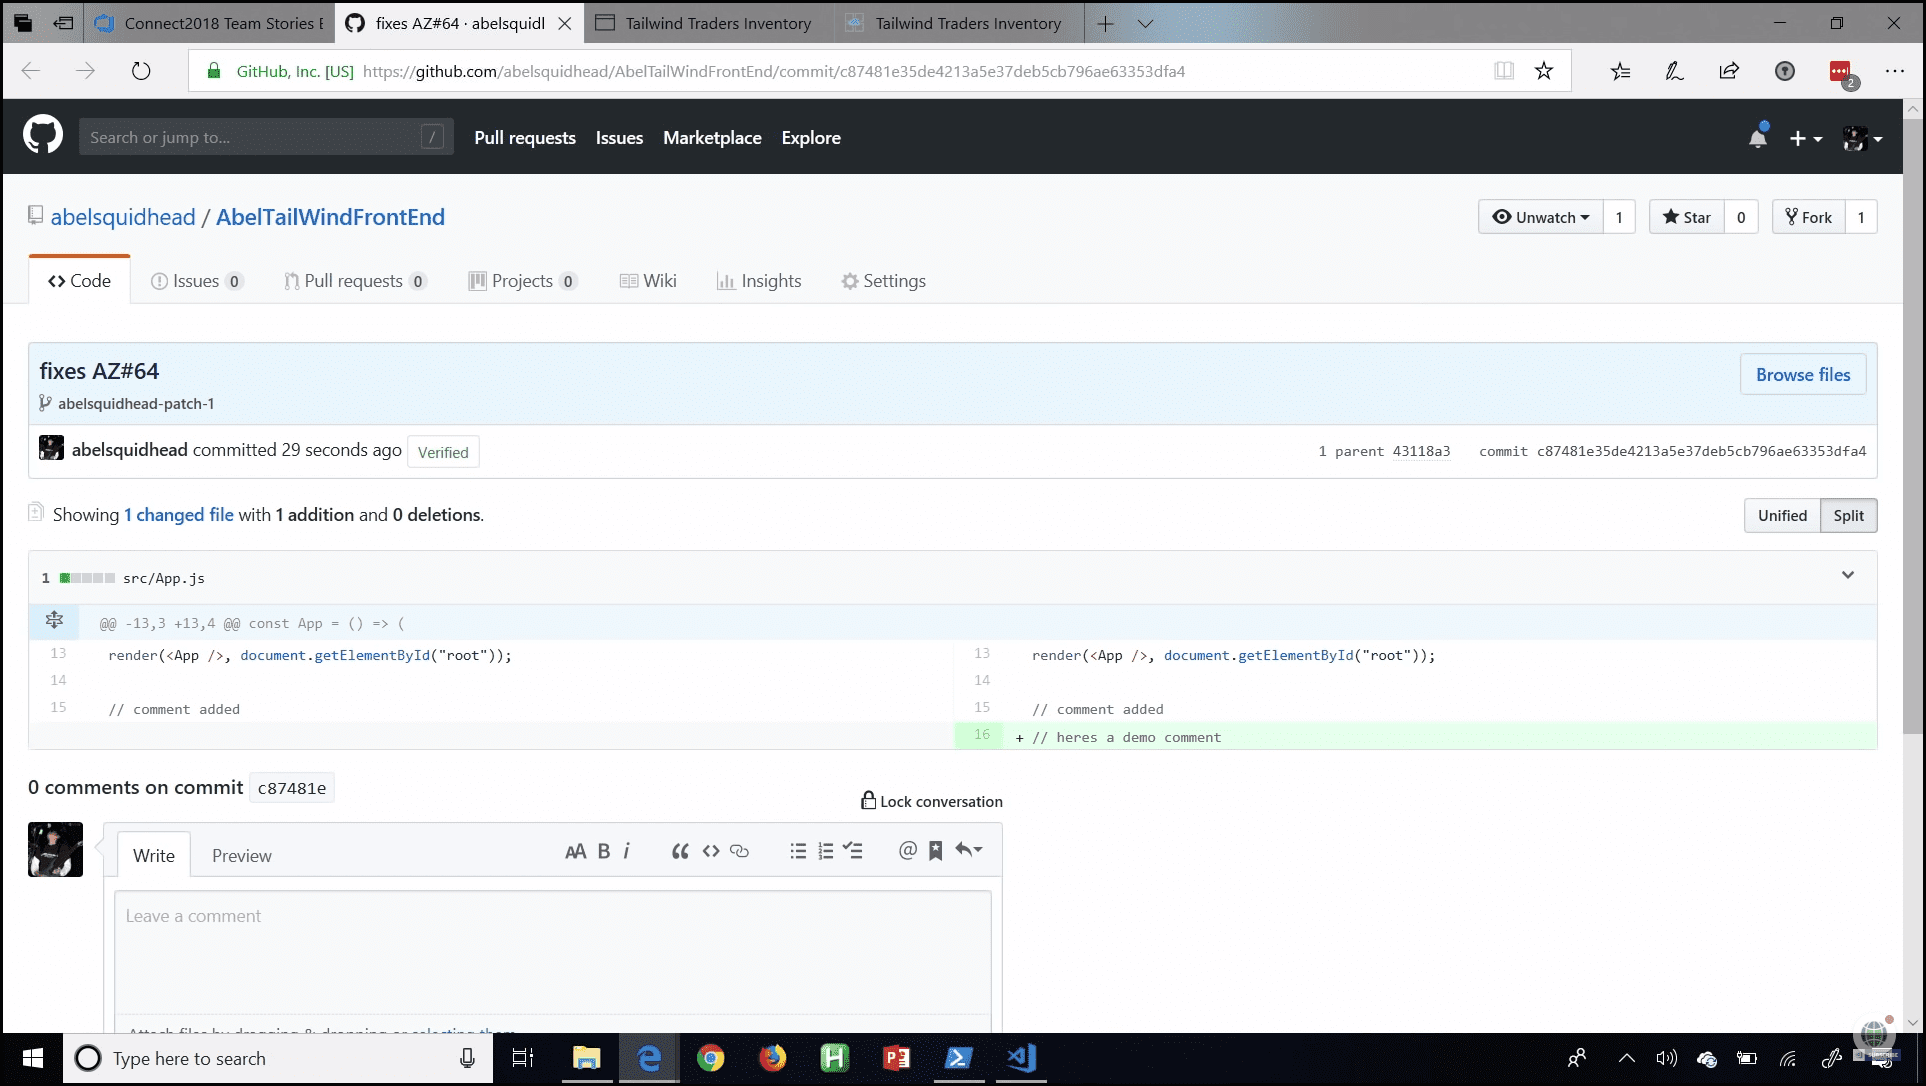 Image 4 - Changes in GitHub
Now we go back to GitHub and create a pull request so my teammates can review my code changes. If we open our bug which we are working on from our Azure board, in the Development details section we can see our Pull request (Image 5).
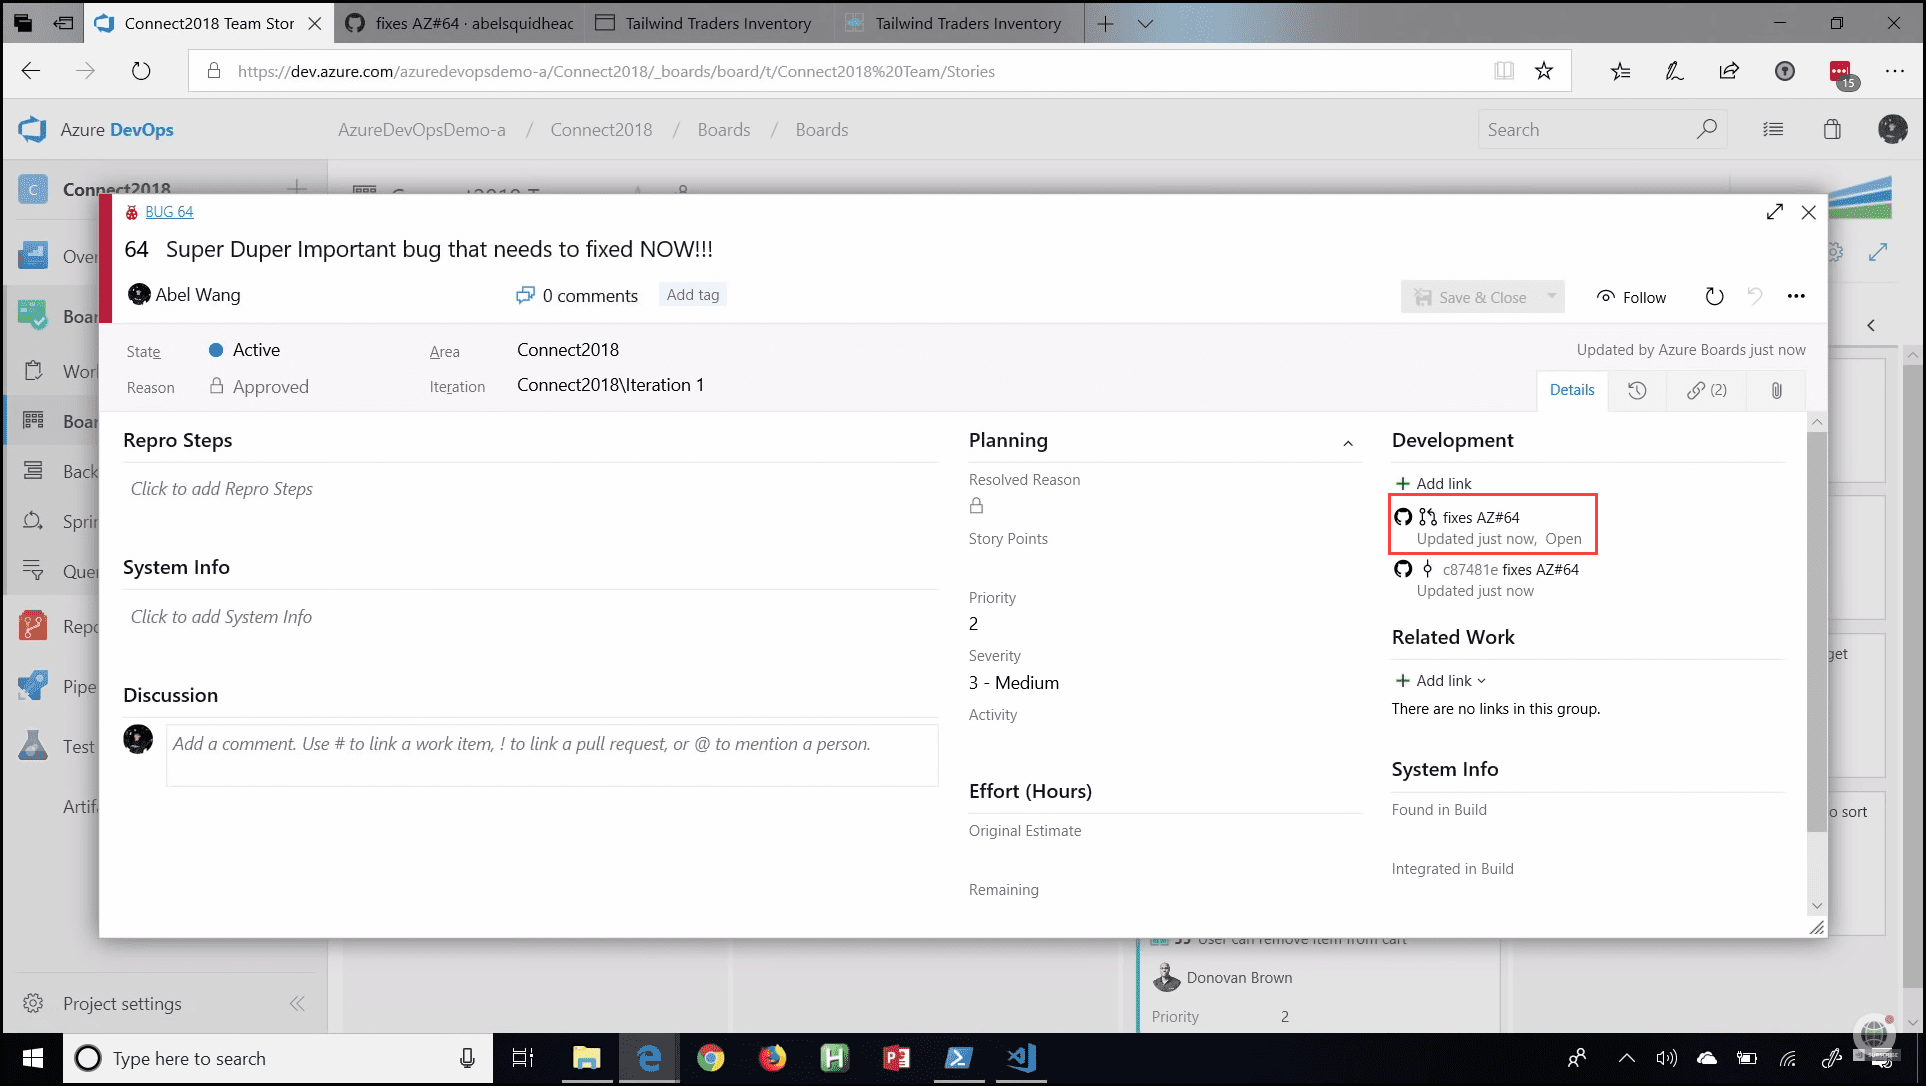 Image 5 - Pull request in Development details
Now let us merge the pull request in GitHub into the master, confirm the merge, and our pull request is finished. Now the magic happens; because we resolved the bug in GitHub, it automatically resolved on our Azure work item board as well.
Conclusion
Start with a simple, out-of-the-box workflow. Use the powerful and flexible customization engine to create the workflow that fits your team’s needs. Build tailored views of the data you need, configure the layout that makes sense for your team, and easily monitor progress throughout the lifecycle of your project. Get your work done with simple and modern agile tools like Kanban boards, backlogs, dashboards, and scrum boards. Adapt the tools to fit your team’s needs and scale up easily. Boost your team’s productivity with Boards, Backlogs, and Sprints for even the most complex projects. Simply connect your GitHub repo to Azure Boards and start linking commits and PRs to work items.
You can see this video, If you would like to find more information about a walkthrough introducing the Release Management and Build Automation using TFS 2017/2015. Step-by-step about all processes, starting from creating the project, checking in the code in the source control, creating a build definition, triggering the build, and also creating a release pipeline. Learn how to properly configure the build steps, including Copy Files and Publish Build Artifacts. See how to create a new release definition, add environments, and link to the build definition. Afterwards, see how to add tasks to the release definition, like Windows Machine File Copy and configure it properly.