
Introduction
In this post, we are going to learn what Azure Functions is, how you can build your very first serverless function, and all the capabilities about developing, publishing, and monitoring using Visual Studio Code. With Azure Functions, you can easily build the apps you need using simple serverless functions that scale to meet demand. Use the programming language of your choice, and don’t worry about servers or infrastructure.
What is Azure Functions?
Azure Functions is serverless compute, which is the ability to run custom code on demand and at scale in the cloud. Whether it is written in C#, Java, or even Python, you give your code to Azure, and it will manage and run it for you all dynamically based on events. To help you accomplish this, there are various options for integrated development using tools such as Visual Studio, VS Code, Maven, Eclipse, or even just a cross-platform CLI. In this post, we are going to see one such example for functions using VS Code.
[More Info]{.ion-info} If you would like to know more about Azure deployments, have a look at the post How to Deploy to Azure Using Team Services Release Management. The post describes how Azure deployments are made easy by using Visual Studio Team Services (VSTS) Release Management. You will see a step-by-step tutorial on how to configure and deploy to Azure in Release Management, and, moreover, how to configure an end-to-end pipeline for deploying applications on Azure.
Demo: Develop Using Visual Studio Code
We are going to see how anyone can get a function up and running in just a few minutes. To accomplish this, I am going to use VS Code and the Azure Functions extension. The Functions extension enables us to create new functions projects, add new functions to the project, and even publish to Azure directly from within VS Code, just with a click of one button (Image 1).
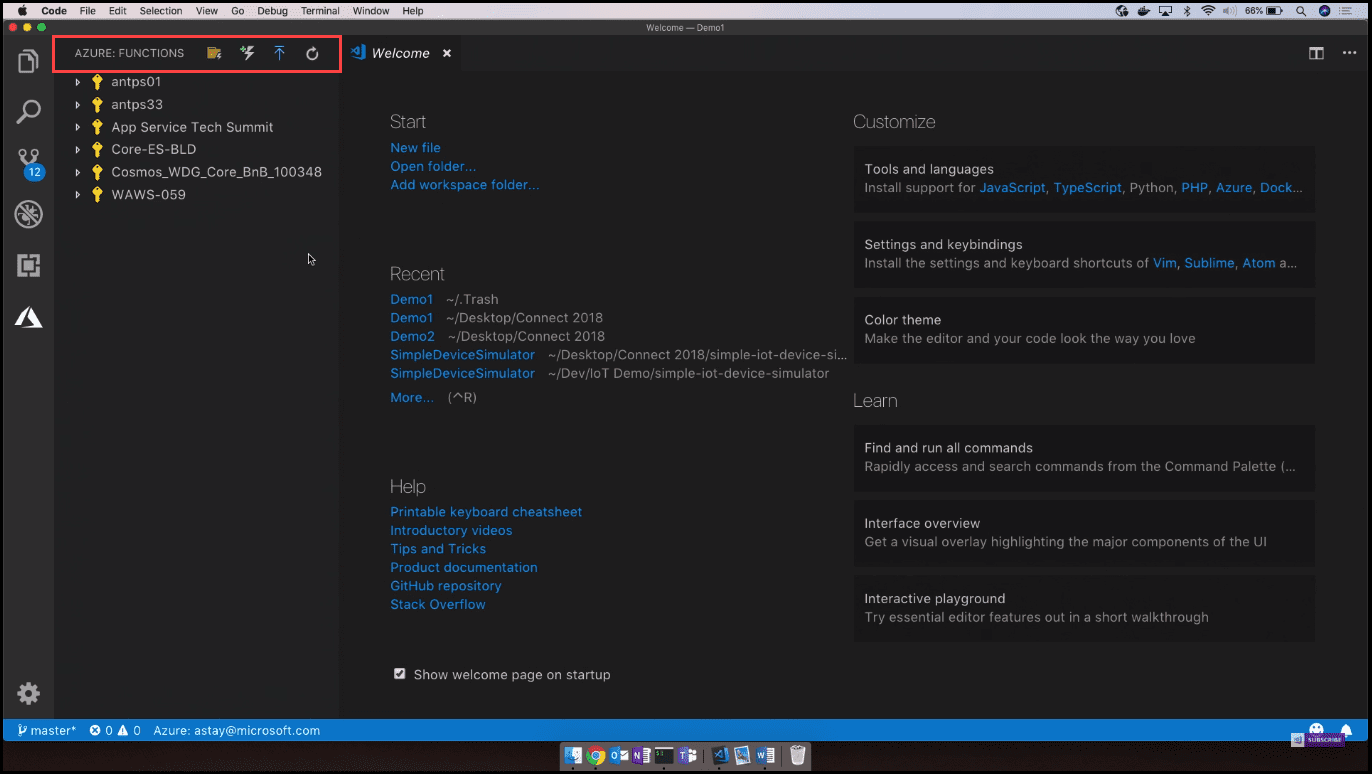 Image 1 - Azure functions
Now I am going to create our very first function. For the purpose of this demo, I am going to use JavaScript. By choosing a language, we will have initialized functions projects with a couple of files, namely, the local and the hosting configuration. Now, we can go back to the Azure Functions extension and add a new function to this project. In the menu (Image 2), templates are presented that we would like to use to create a function.
 Image 2 - Templates to create a function
If you would like to know more about this new developer service available on the Azure platform, you can have a look at the following post; More about Azure DevTest Labs. If you prefer a more concise description of the same feature, - have a look at Quick Overview of Azure DevTest Labs.
These templates directly correspond to the triggers available to us in order to execute the function. I will pick HTTP trigger provided with a friendly name and secure the HTTP endpoint with a function or an API key. Going back to our directory, we can see that it created a new subdirectory with the name we gave for the function, with a node script and function JSON configuration file (Image 3).
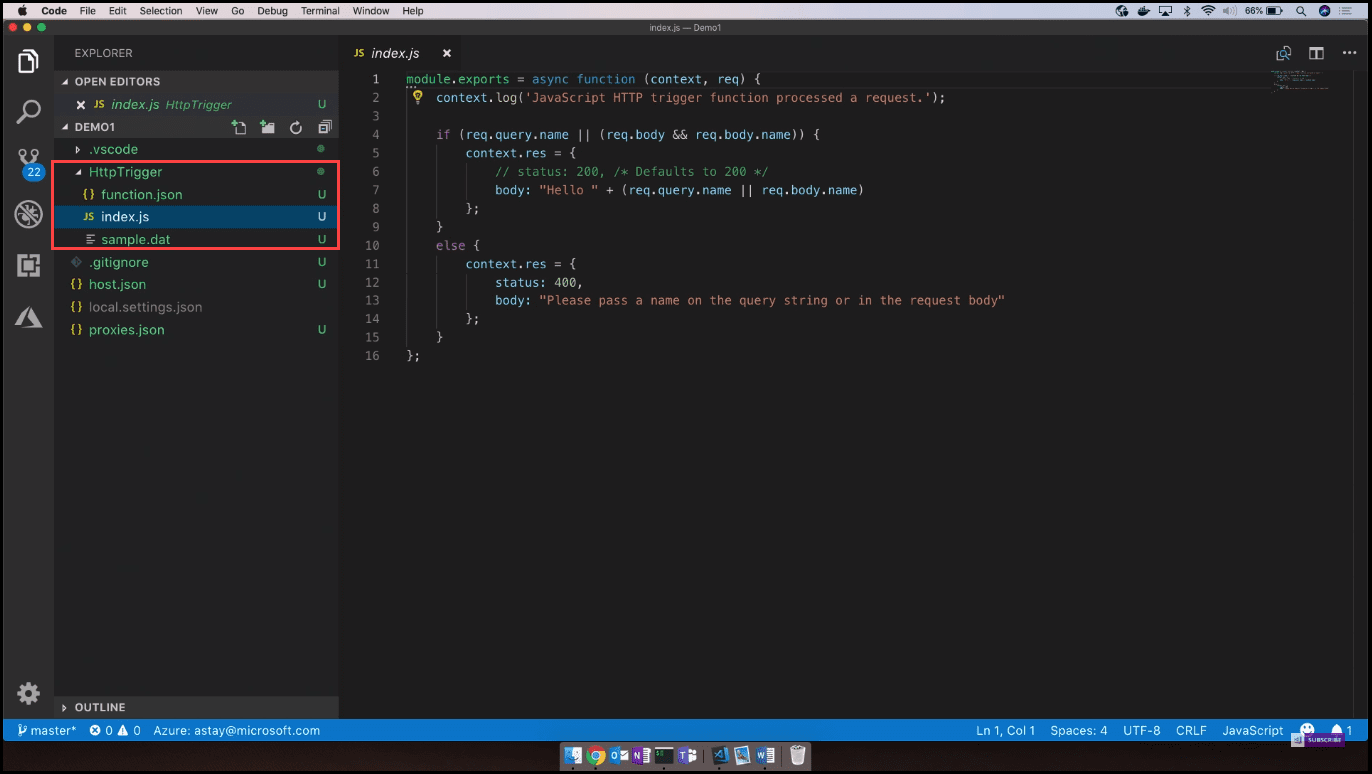 Image 3 - HttpTrigger subdirectory
If we look at the node function, we can see that it consumes an HTTP request input and parses the content of that input in order to find the name property in the body of the query string. Then, it uses the name property to construct an HTTP response, which is returned back from the function (Image 4).
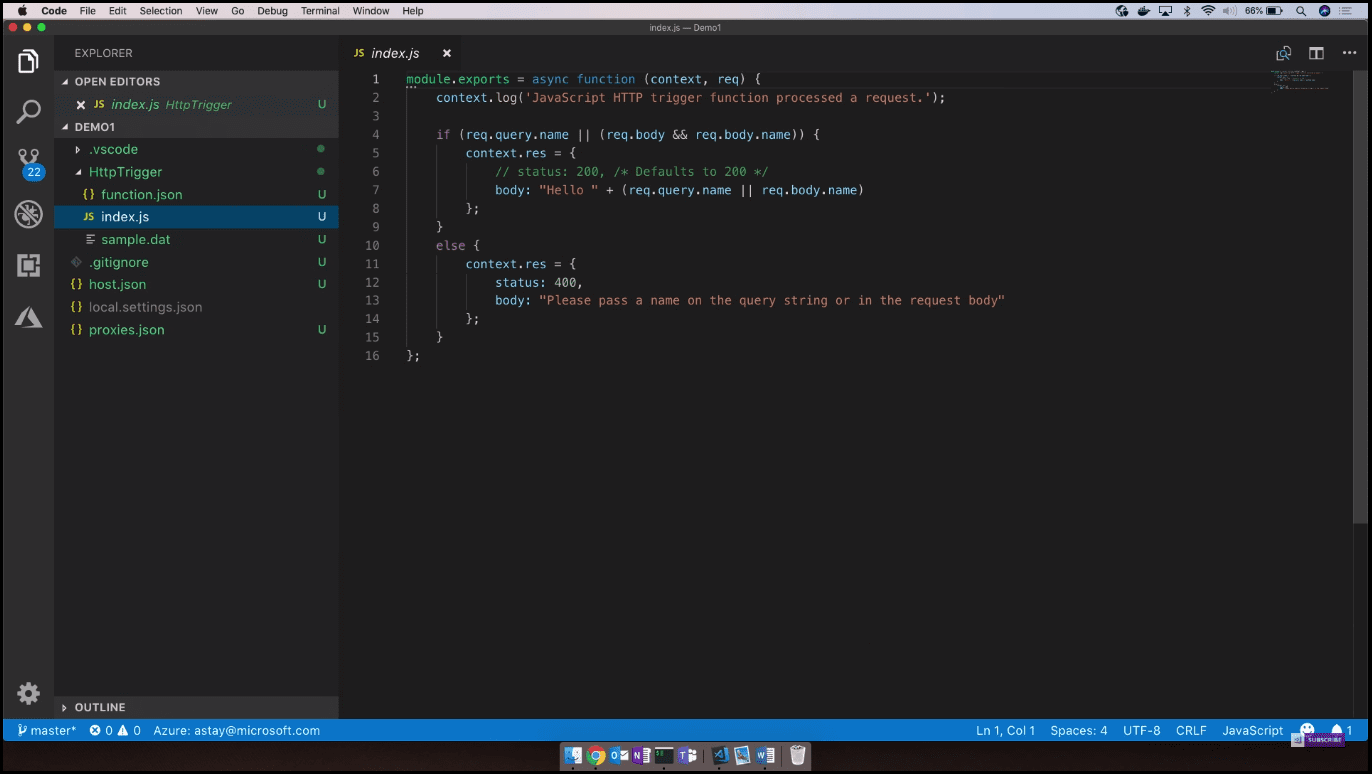 Image 4 - Index.js
If you would like to know more about the best practices for DevOps, Continuous Integration, and Continuous Delivery, you can have a look at the following post: Configure CI (Continuous Integration) and CD (Continuous Delivery Pipeline).
The JSON configuration describes the HTTP request input and the response output binding (Image 5).
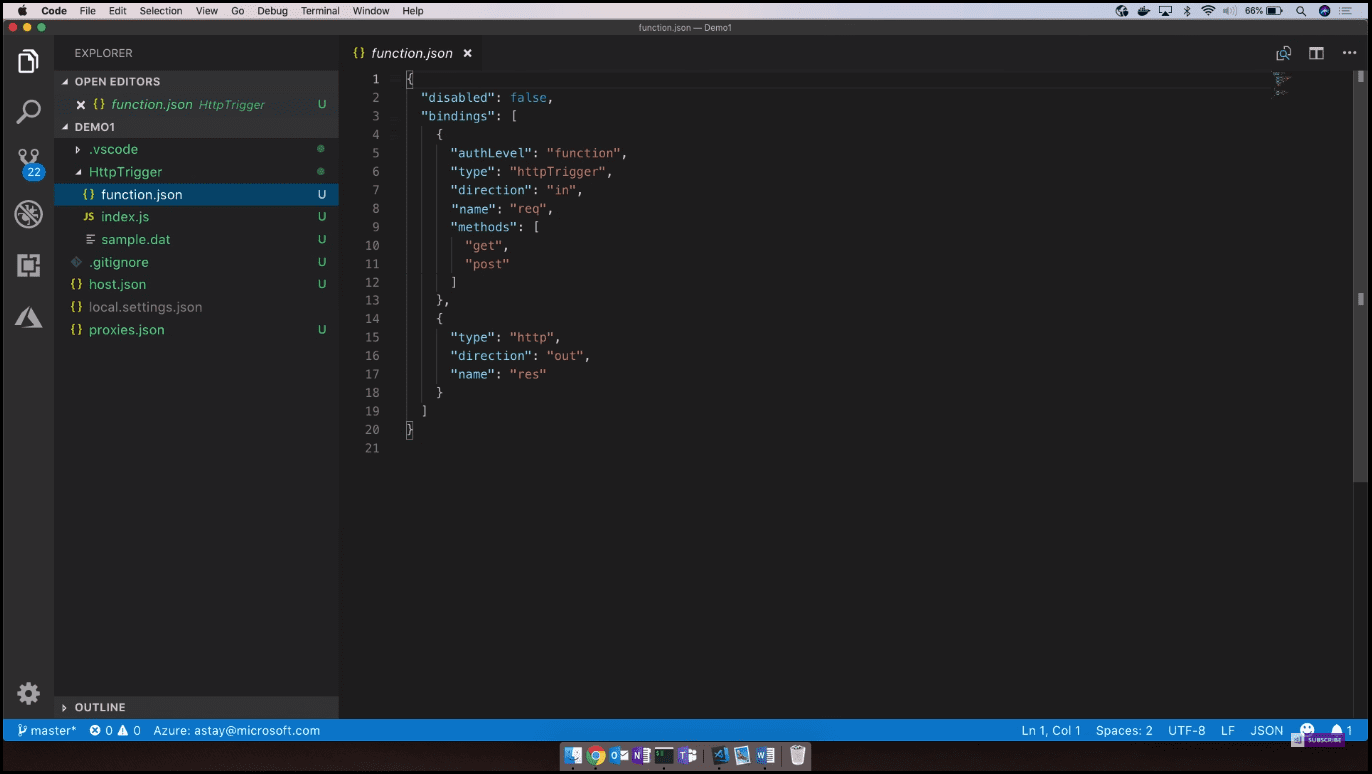 Image 5 - Function.json
Now we have our function and we can publish to Azure or we can use the open-source Functions runtime to debug and test locally. VS Code enables you to do all of this simply by clicking F5, but if you have the Node extension installed, you can even go ahead and set breakpoints in your code in order to debug. Now I am going to show another example of a node function that triggers off a message or an event received on an IoT hub, then grabs the content of the message and outputs it to the console (Image 6).
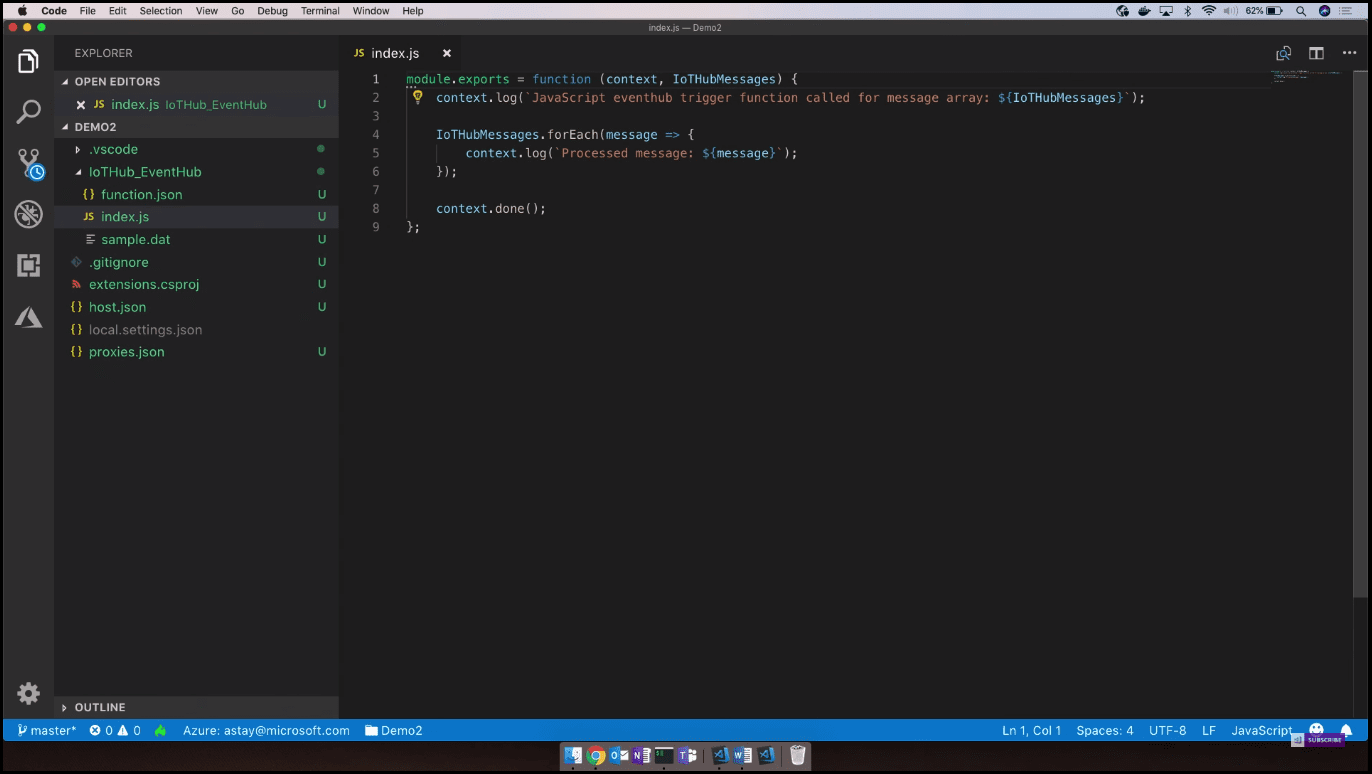 Image 6 - Function that triggers off a message
Now let us look at how to publish the app. We can go ahead, pick a subscription, and create a new app with a unique name. After we give it a unique name, we can pick a resource group for this function app as well as a storage account to contain the content of the app and the files. After a while, we will have our function app provisioned and we have one more step to configure any settings for the function app. For a function to connect to IoT hub, we need to configure the IoT hub connection string (Image 7) in order to provision it as an app setting on the function app.
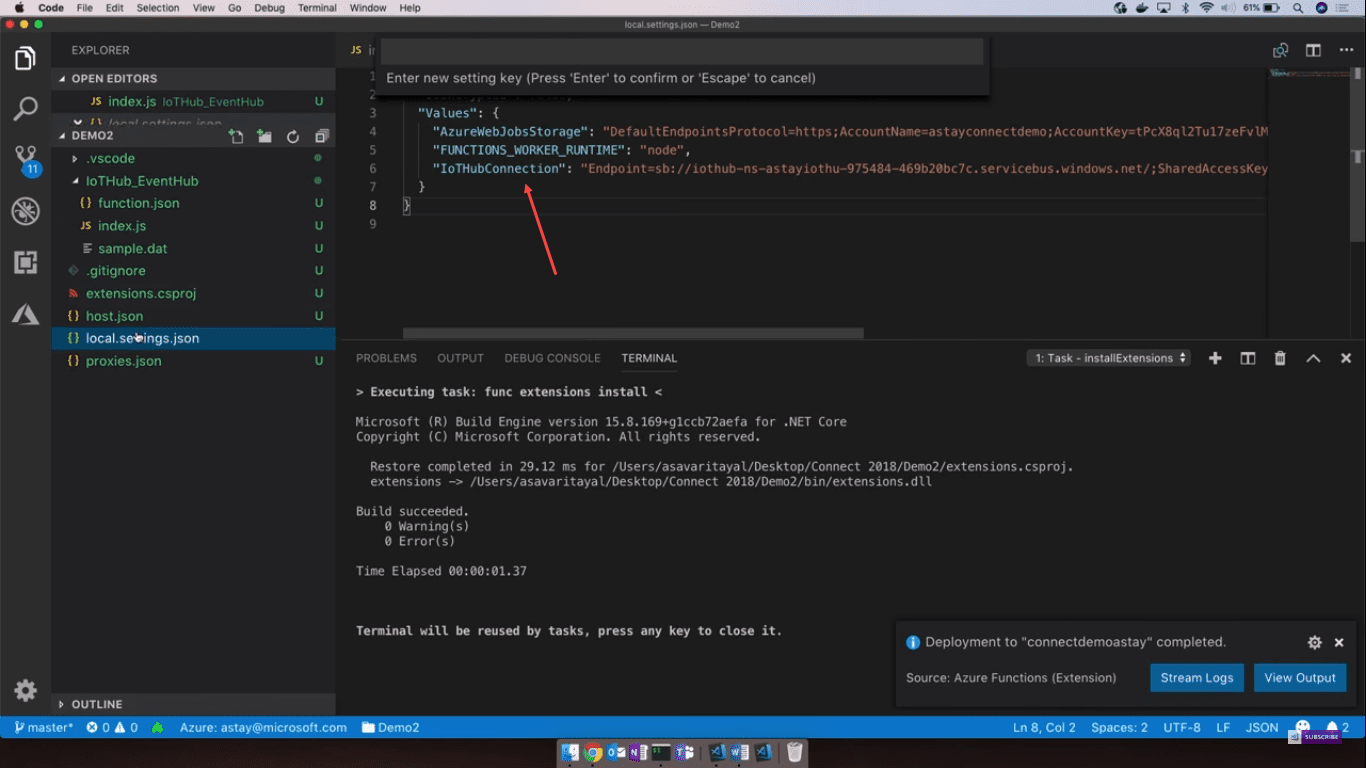 Image 7 - IoT hub connection string
After that, we can go ahead and test our application running on Azure. I will connect to the streaming logs for our function app. After that, we can start seeing the app inside logging. In order to simulate these events on the IoT hub, I got an app that will register multiple devices and start sending notifications to the IoT hub. Shortly, we should notice that our function started to pick these up and output those events or messages back to the console (Image 8).
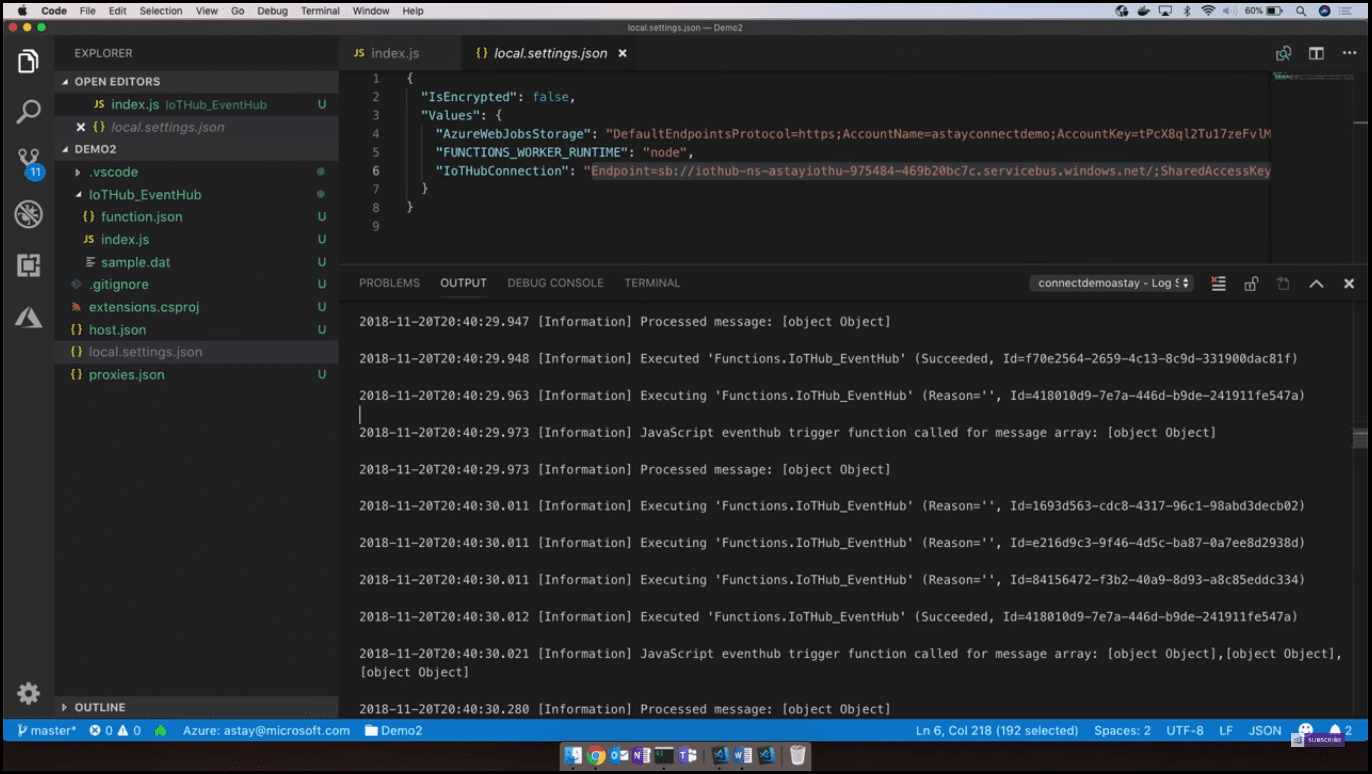 Image 8 - Console
We developed an end-to-end service application, tested it locally, published it to Azure, and even looked at the monitoring logs. All of that from the local instance of VS Code.
Conclusion
With Azure Functions, Microsoft strives to keep improving developer experiences and provide support for the languages and tools that developers are most familiar with to be more productive. With Azure Functions, you can do web application backends, mobile application backends, real-time file processing, real-time stream processing, automation of scheduled tasks, extending SaaS applications, and many more.
You can see this video, if you would like to find more information about how to get started with Release Management and its advantages. See how to create a build definition using CI/CD Tools for VSTS Extensions. (I will be using Package Extension and Publish Artifact tasks). And also using DevOps-VSTS-POC trigger in order to enable CI, all of that in order to be able to publish. Share, install and query versions. You will see how to create a release definition, choose an artifact and configure the source for the artifact and default version. See how to create different environments or clone the existing one. in my case I am going to create QA, Preproduction, and Production environments. Each with one phrase and one task. See also how to configure Publish Extension task for each environment! See an end-to-end continuous delivery pipeline using VSTS extension with Build and Release Management.