
Introduction
In this post, we are going to see more about the ultimate DevOps tool for creating your own CI/CD pipelines for any language targeting any platform: Azure Pipelines. Using this tool, you can simply go from nothing at all to a new Azure pipeline project.
Create Azure Pipeline Project
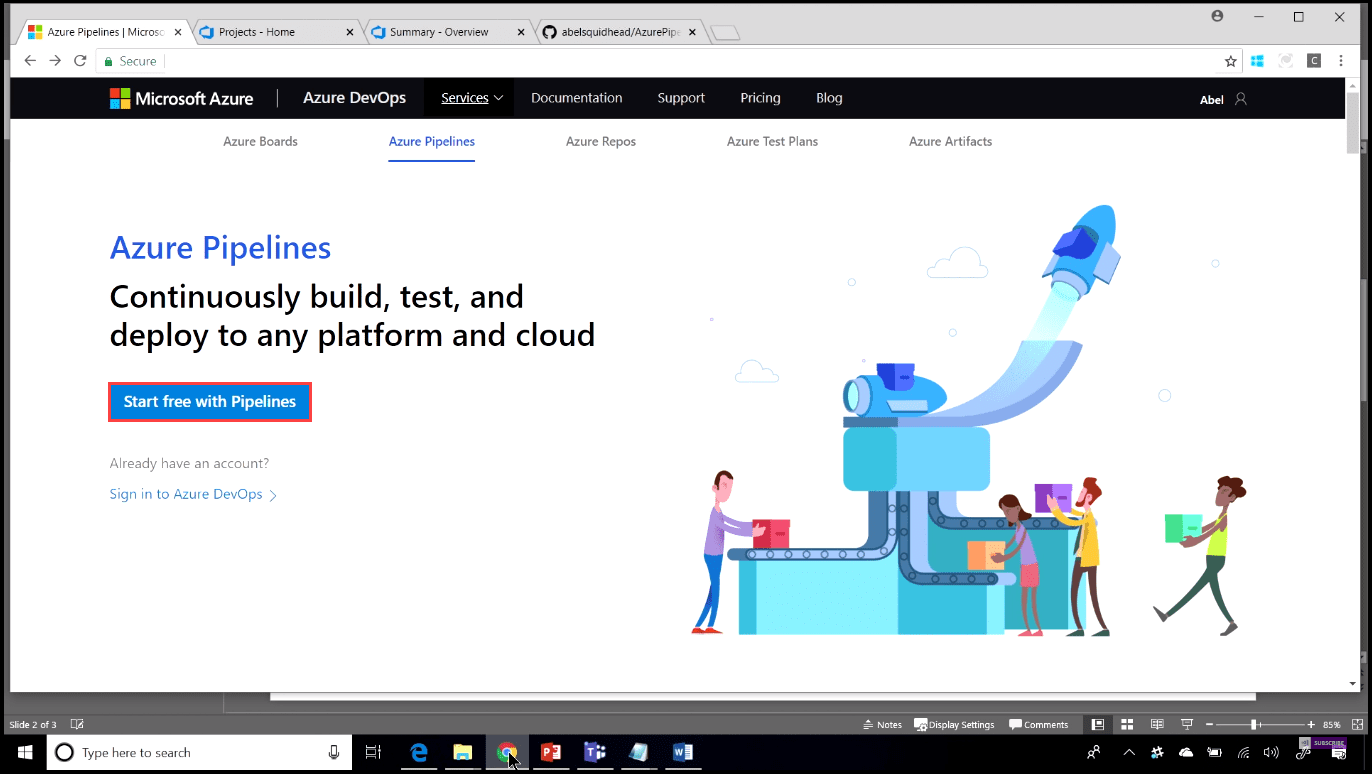
For example, let us say that your code is sitting somewhere, for example, on GitHub, but you do not have an Azure DevOps account, but you want to create a CI/CD pipeline. You just need to go to the Azure Pipelines page and click on the button “Start free with Pipelines” (image 1).
Tip: Docker for beginners
For more information about how to work with Docker, like pulling a Docker image, running a Docker image, and working with containers, see Docker for beginners.
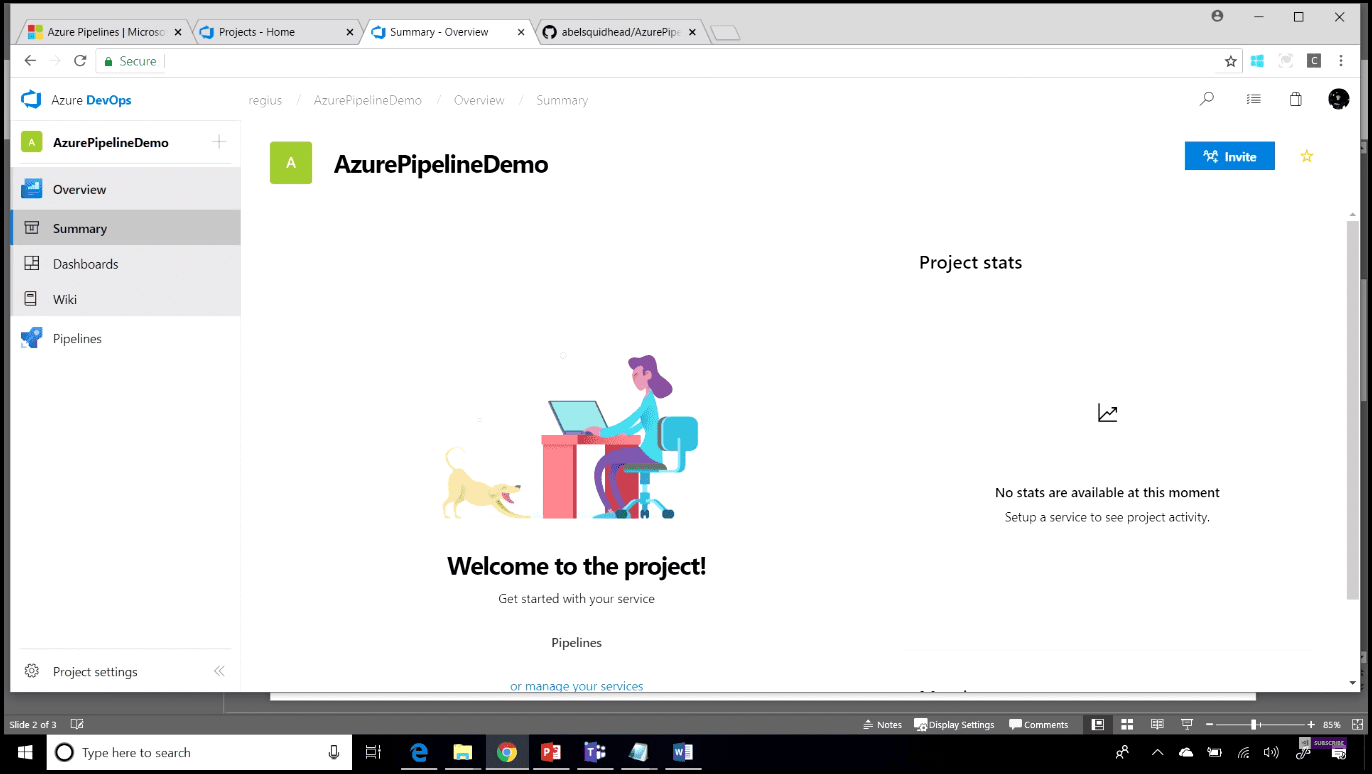
With just one click, you will have created your own organization where all you have to do is type your project name and click “Create.” Now you have an empty Azure Pipeline project.
Create your first pipeline
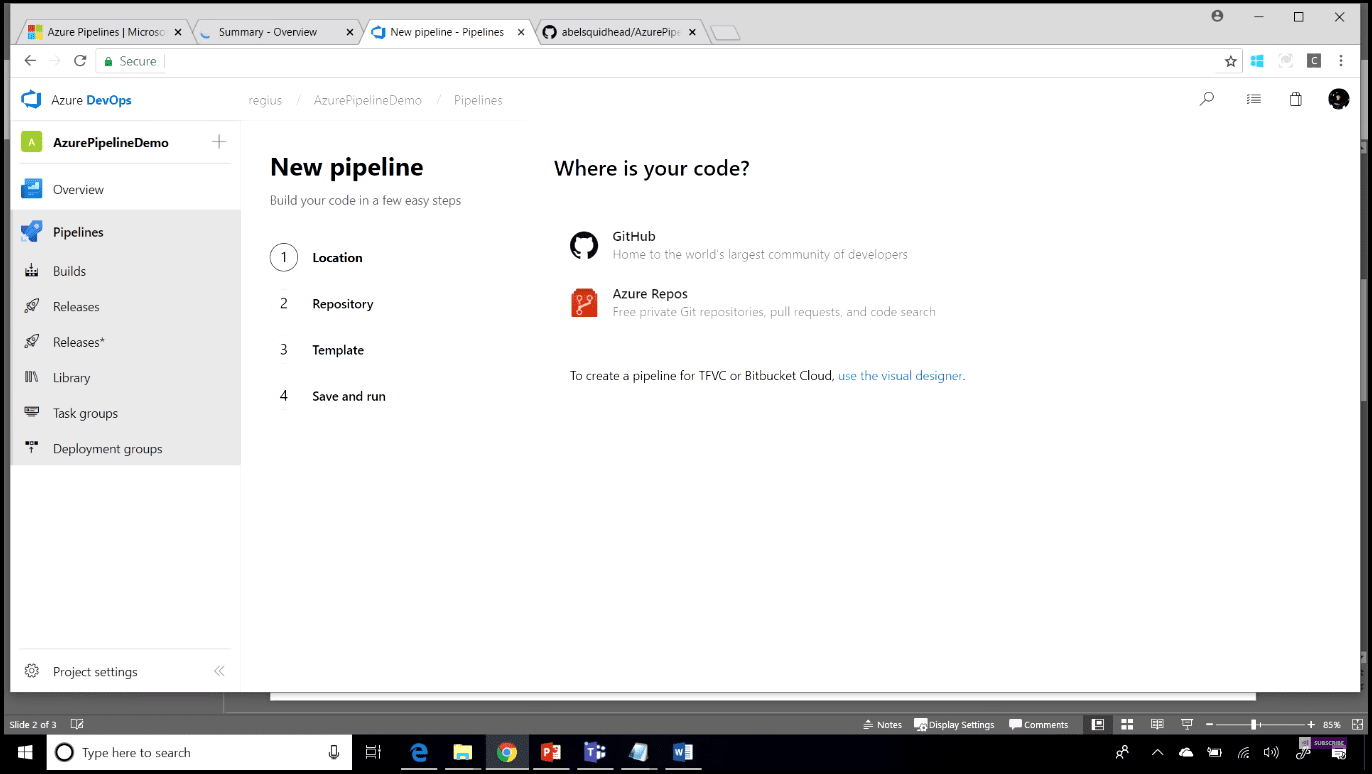
On the homepage of your new Azure Pipeline project, click on the “Pipelines” link, then on “New pipeline.” The first thing you are going to see is the most important question, “Where is your code?” (Image 3).
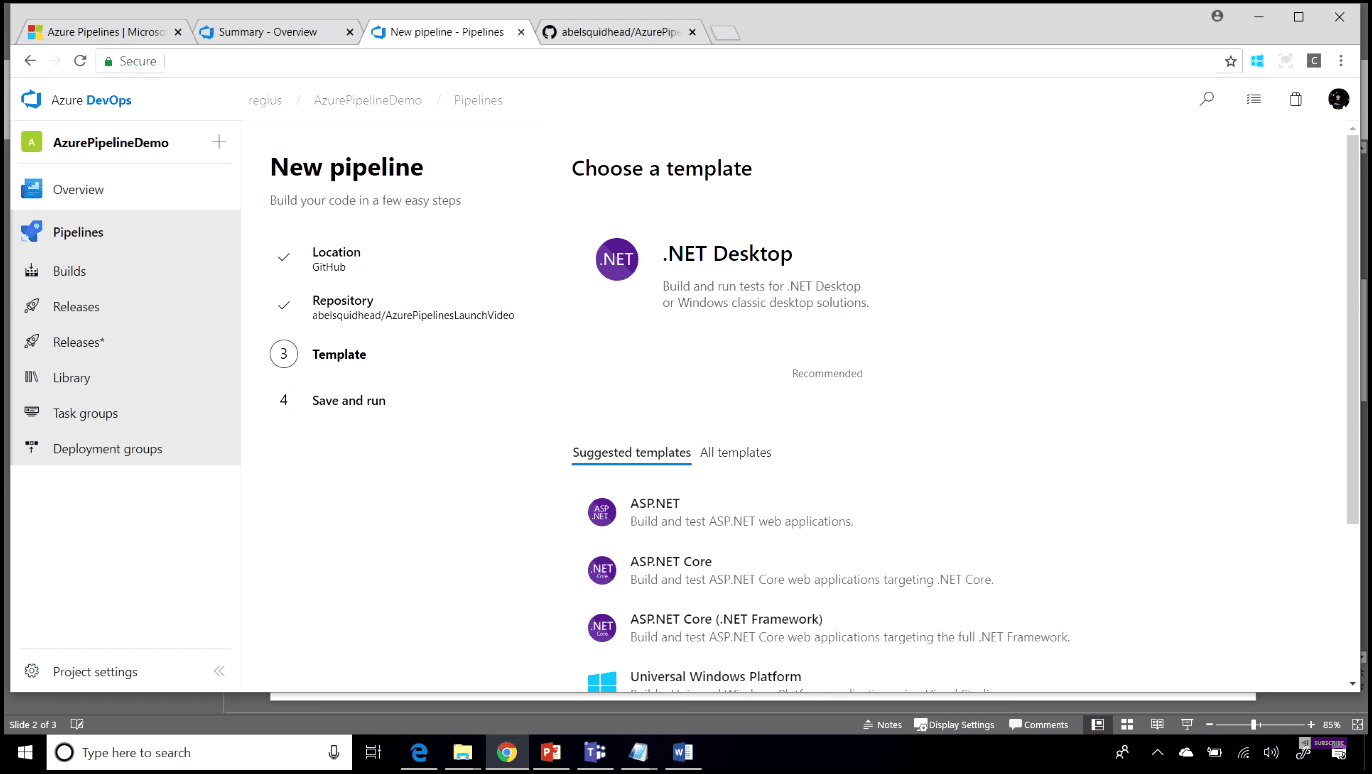
You have two options by default, GitHub and Azure Repos. TFS and BitBucket Cloud are also available, but for using them, you need to go to the Visual Designer. In our example, our code is on GitHub, so we are going to choose the first option. After that, you will need to authorize with GitHub. After authorizing, you will be able to see all your private and public repos, which are located in your GitHub account. Now you need to select your repo, which you are going to use. Next, the code and the technology used in your repo are going to be analyzed. Based on the results of the analysis, a couple of templates are going to be offered for use (Image 4).
Tip: Mastering Git with animation
For more information about how to work with Git using animation, with all commands represented in graphical animation (e.g., git branch, git merge, git rebase, git cherry-pick), see Mastering Git with animation.
Create and run a build
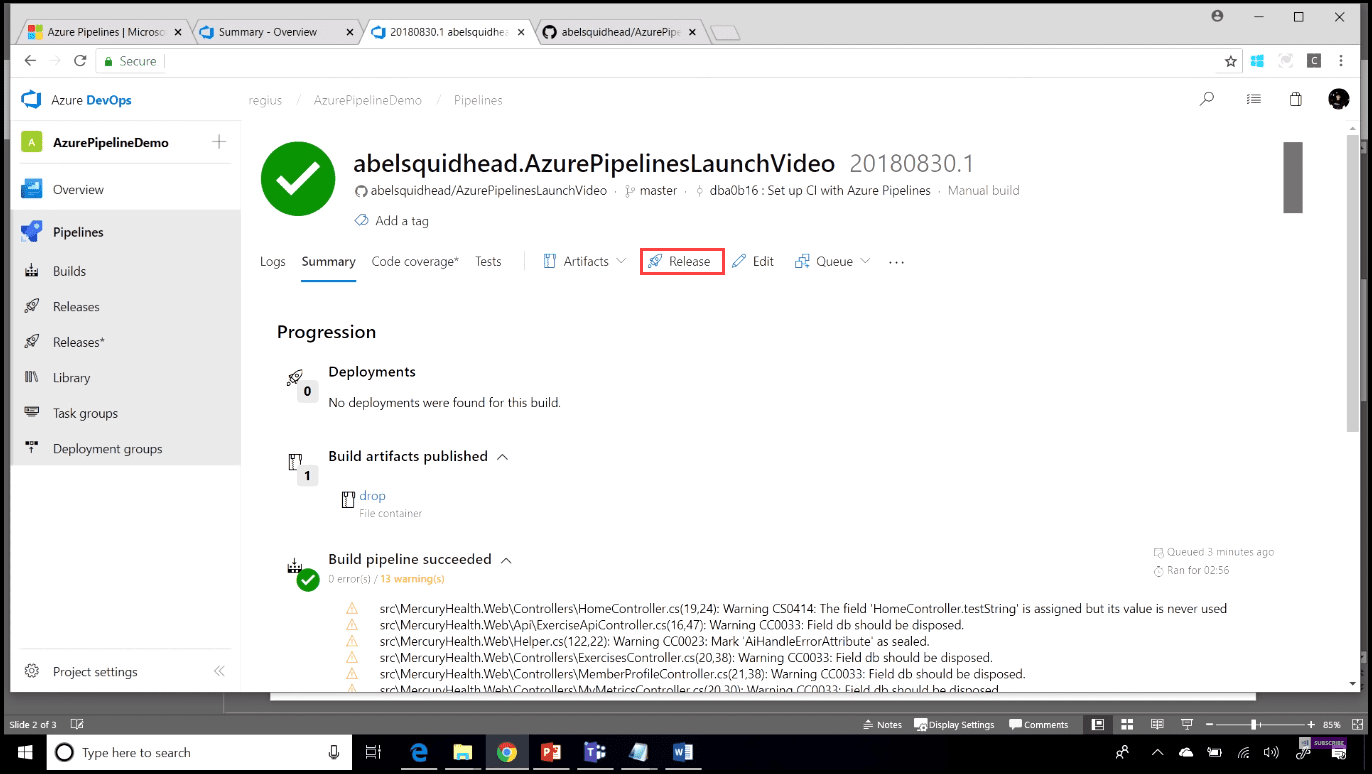
In my case, my application is ASP.NET, and I am going to create a pipeline using a YAML file. You can also edit your YAML file by adding your own additional tasks. After finishing editing the YAML file, you can save it and run it by clicking on the “Save and run” button. Now an agent is going to be prepared for the job, the code is going to be downloaded from GitHub, and everything is going to be compiled using Visual Studio. The unit tests are going to be run. After a while, your build is going to be finished. If you go to the Summary tab, you can see a timeline of everything that happened during the build, including all the tests that were run (Image 5). Now let us release our code by just clicking on the “Release” button.
Release your code
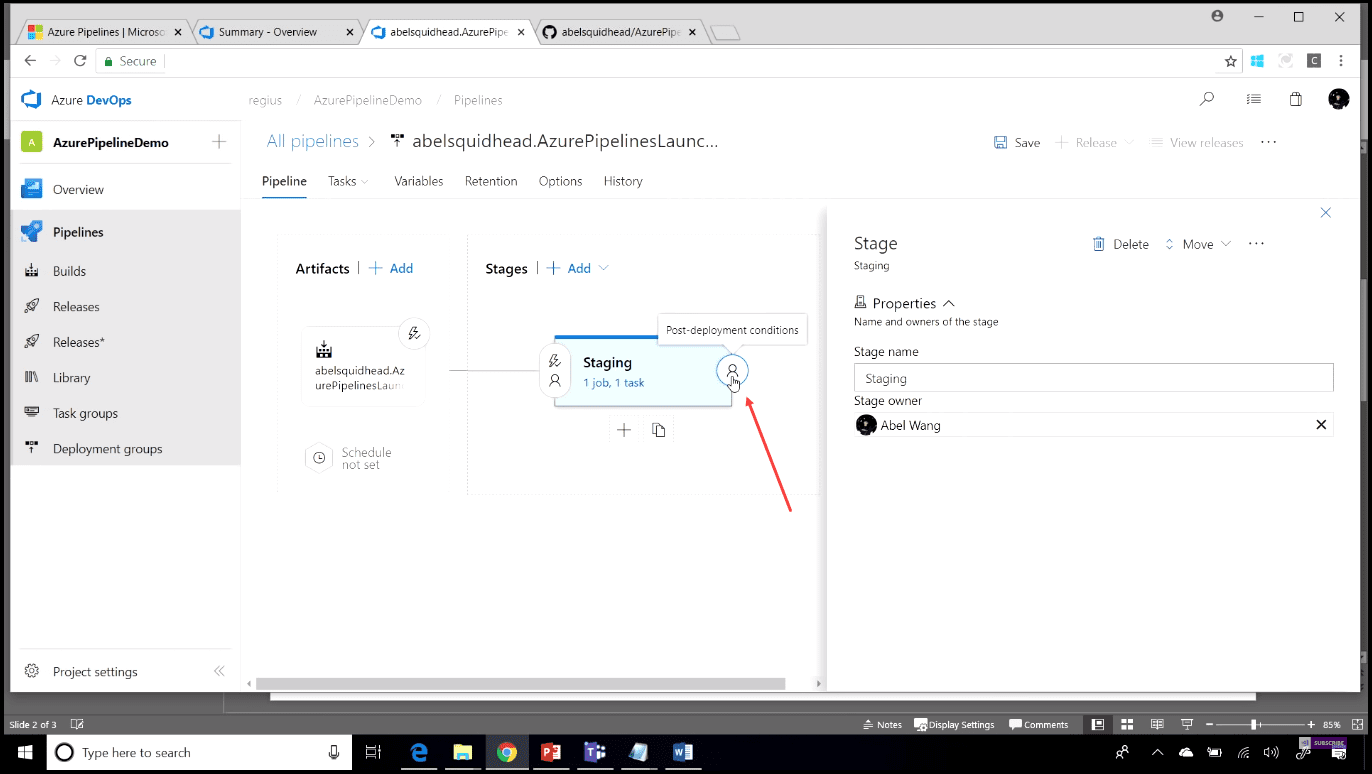
The “Release” button will take us to the visual editor for the release pipeline. I am going to use the Azure App Service deployment template. The next thing we need to do is define the stages and the tasks that are going to run for each stage. Now I will connect my Azure Pipelines account with my Azure subscription. Now I can also choose the app service that I am going to deploy to (in my case, I am using Azure DevOps Launch). In addition, I am going to choose the option “Deploy to slot,” select my resource group, and then choose my staging slot. You can also customize your release pipelines by adding or removing tasks. You can use some of the offered tasks, or if you cannot find what you want to use, you can always go to the Marketplace, where you can find over 700 build and release tasks that you can just download and start using. Additionally, you can create your custom tasks in PowerShell or Node.js. After creating your stage, you have the ability to add approvers before and after each stage. You can add pre- and post-deployment approvers (Image 6).
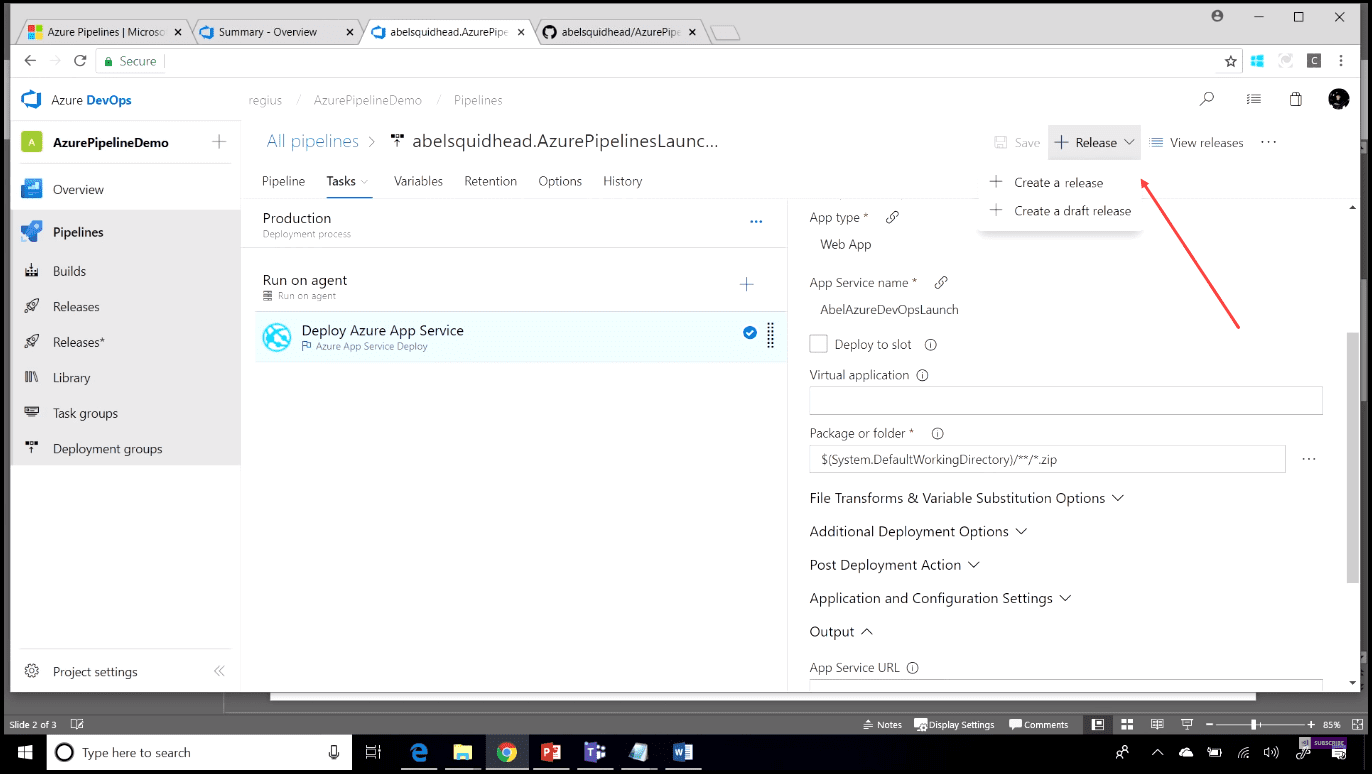
After this, your stage is complete, and you can create other stages based on your needs. In my case, I am going to clone my first stage in order to use it for Production. For that purpose, I am going to remove the option to deploy to a slot because I am just going to deploy the Production to my app service. Next, I am going to create a release just by clicking on the “Release” button (Image 7).
Conclusion
In this post, we have shown how to go from nothing to a full CI/CD pipeline for any language targeting any platform, with your code from your own repository of choice, deploying to wherever you need it to be deployed (Azure, behind or in front of your firewall). If you have an open-source project, you get all of this for free, including 10 parallel pipelines out of the box. Go out and check your pipelines now by going to dev.azure.com.