Introduction
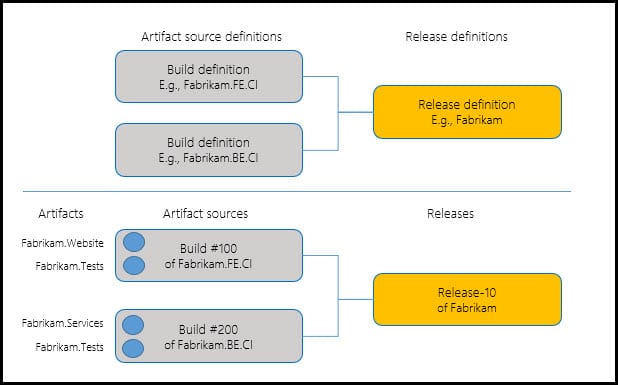
I’ve described already in some previous posts what Artifacts are. They can be different items such as actions that you want to run on the VM, tools that you want to install on a VM, or some applications that you want to test. When you are authoring a release definition, you must link the right Artifact sources to your release definition. You will have the possibility to link a release definition to a Jenkins project or to a Team Build definition. When authoring a release definition, you link the appropriate artifact sources to your release definition. For example, you might link a release definition to a Team Build definition or to a Jenkins project. In the process of creating the release, you must specify the exact version of these artifact sources, like how many builds are coming from Team Build. For a Jenkins project, you will have to specify the version of the build that is coming from a Jenkins project. You must know that once a release is created, there will be no possibility to change these versions. One single release definition can be linked to many artifact sources; you will just need to specify individual versions for each of these sources in the process of creating the release.
Step 1: Connect to public GitHub Repository to find Artifacts folder
You can create Artifact to deploy different actions on your Virtual Machine, such as installing software or applications on the Virtual Machine, so that you will be able to test the software or application directly on the Machine. You will see that your created Lab will already have some installed Artifacts, which are sourced from a public GitHub Repository.
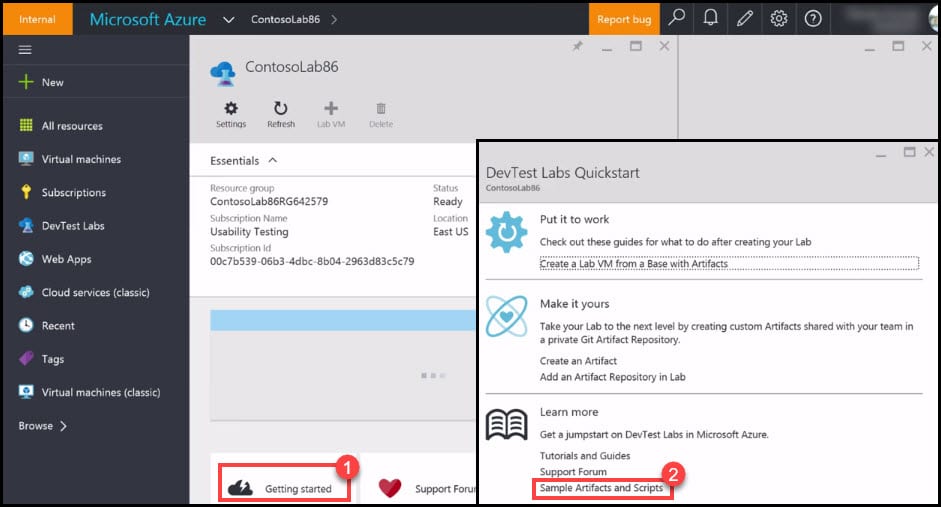
- Navigate to your Lab and click on the Getting Started button.
- In the new blade on the right side, click on the Sample Artifacts and Scripts link.
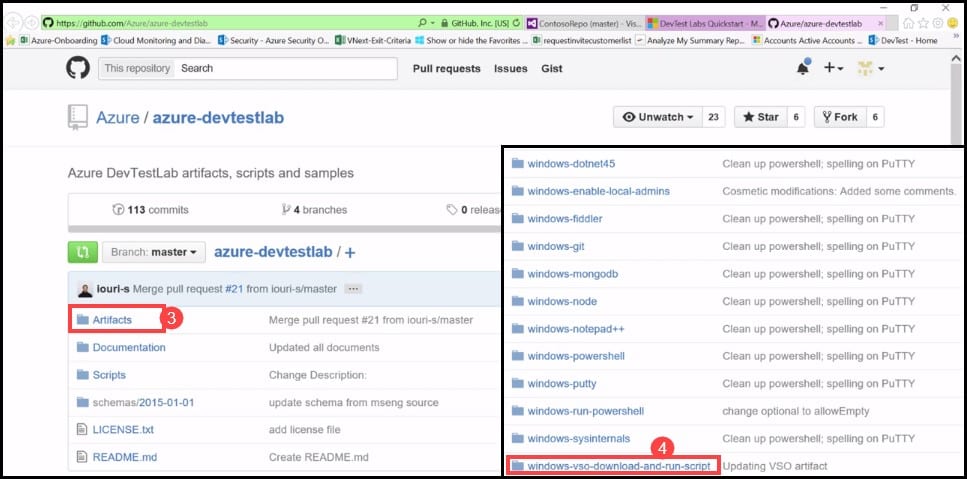
- The link will take you to a public GitHub Repository. Click on the Artifacts folder.
- You will see that each Artifact is saved in its own folder. Click on the Windows-VSO-download-and-run-script folder.
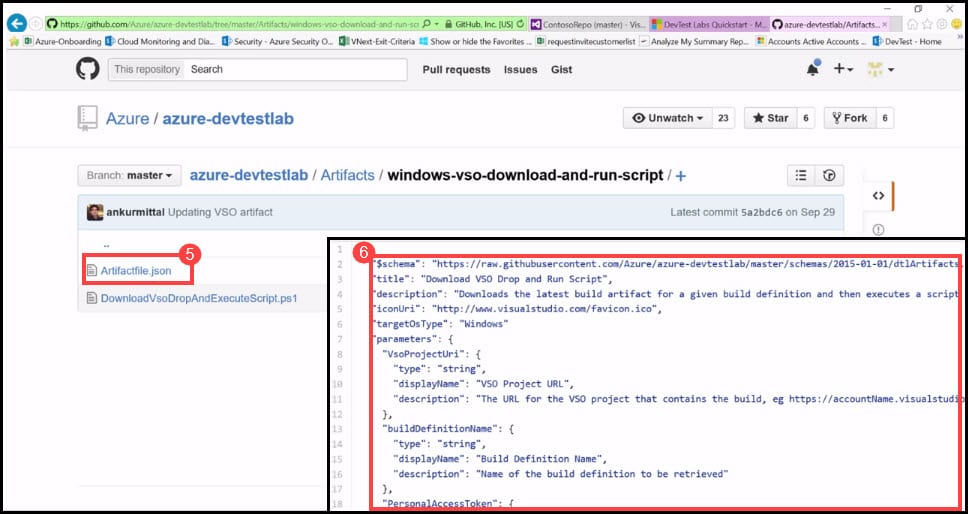
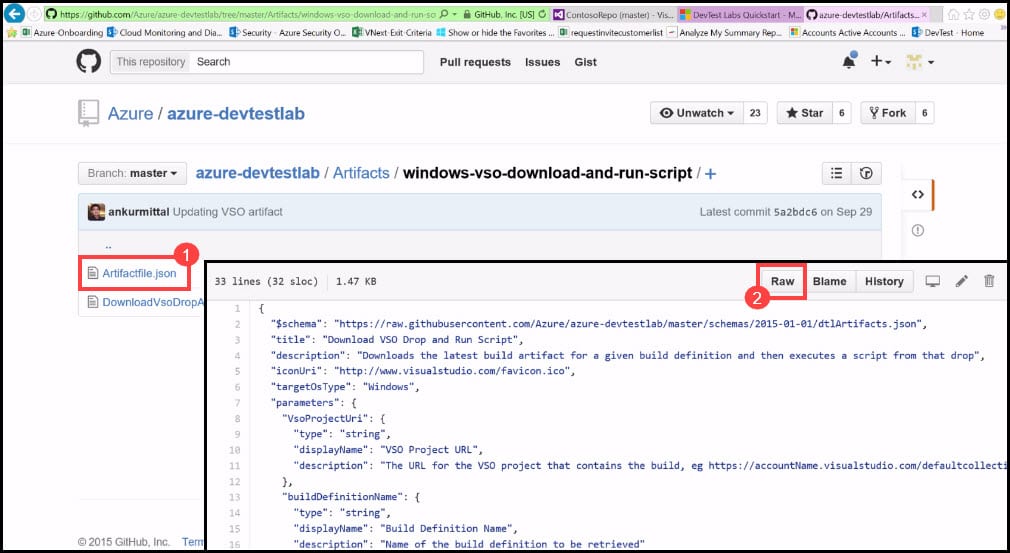
- In this folder, you will find an artifact file .json, which is the Artifact definition file that contains all metadata that makes the Artifact. JSON (JavaScript Object Notation) is a lightweight data-interchange format, which is based on a subset of the JavaScript Programming Language and is a text format that is completely language-independent but uses conventions that are familiar to programmers of the C-family of languages, including C, C++, C#, Java, JavaScript, Perl, Python, and many others. It also contains the script file that you want to refer to within your Artifact definition. Click on the Artifact definition file Artifactsfile.json.
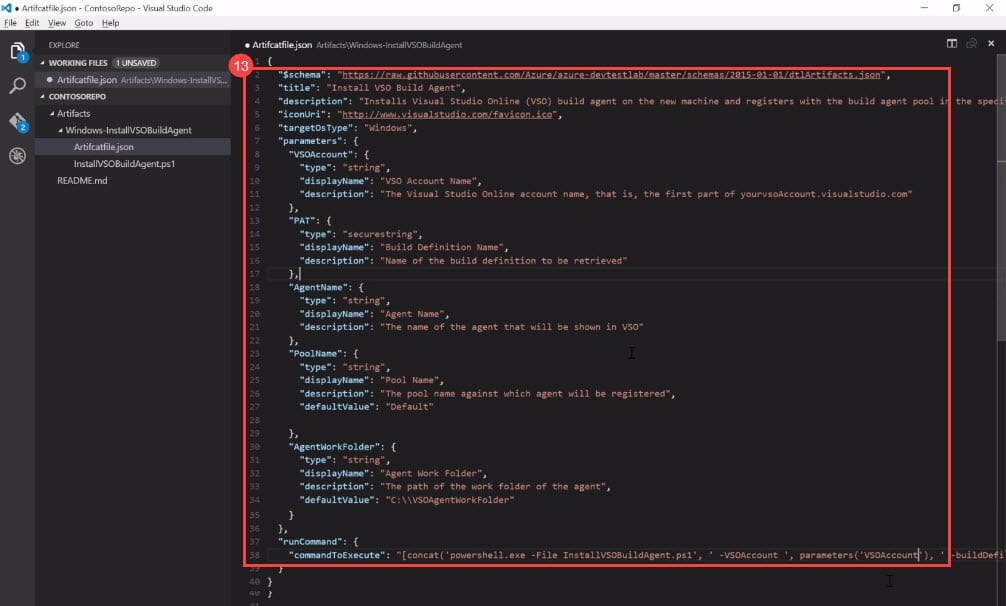
- In the Artifact definition file, you will see that it contains the Title, Description, and other Parameters.
Step 2: Clone VSTS Repository on your local Machine
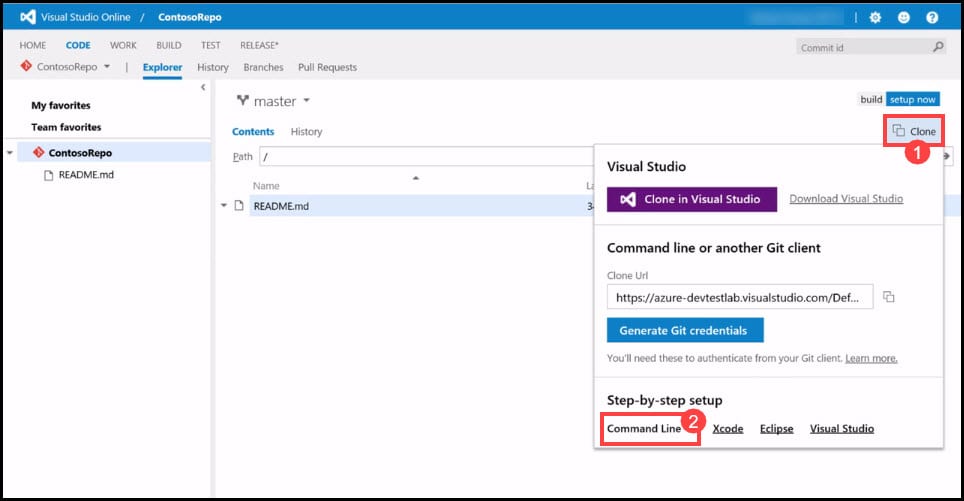
- Navigate to your VSTS Git Repository and click on the Clone button.
- In the window that appears, click on the Command Line button.
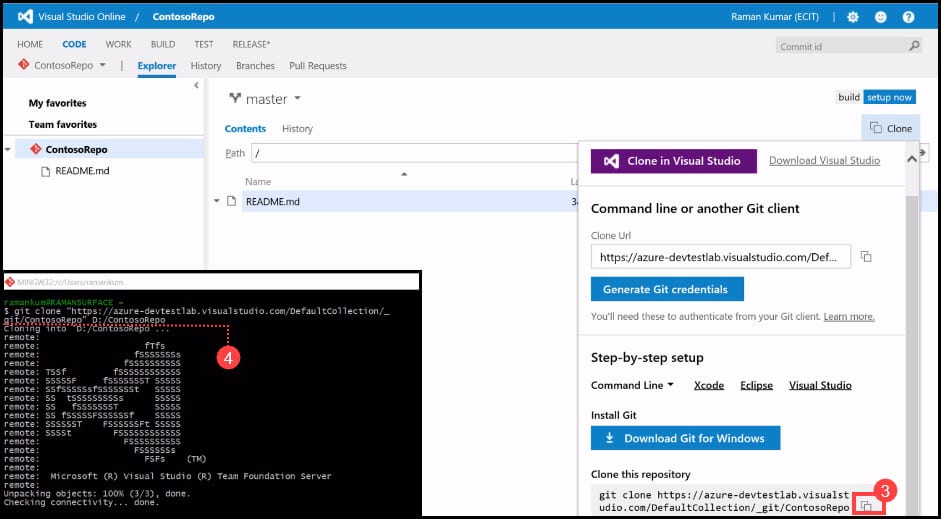
- In the new window, click on the Copy button.
- Open GitBash, which you need to have already installed. To clone the VSTS Git Repository, you will need to run the copied command. Paste the command and specify the path of the local folder in which you will clone this Repository.
Step 3: Getting Artifact definition file
In this step, you will use the Artifact definition file of the existing Artifact in the public GitHub Repository. You will need to edit this file later to meet the requirements of your custom Artifact.
- Navigate back to the public GitHub Repository and click on the Artifactfile.json file.
- In the new window, click on the Raw button.
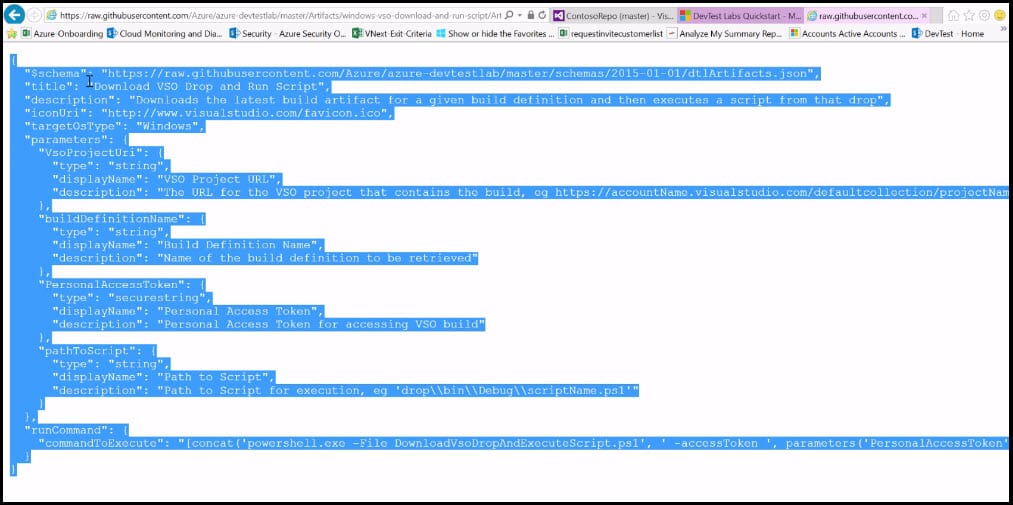
- In the new window, select all text and copy it.
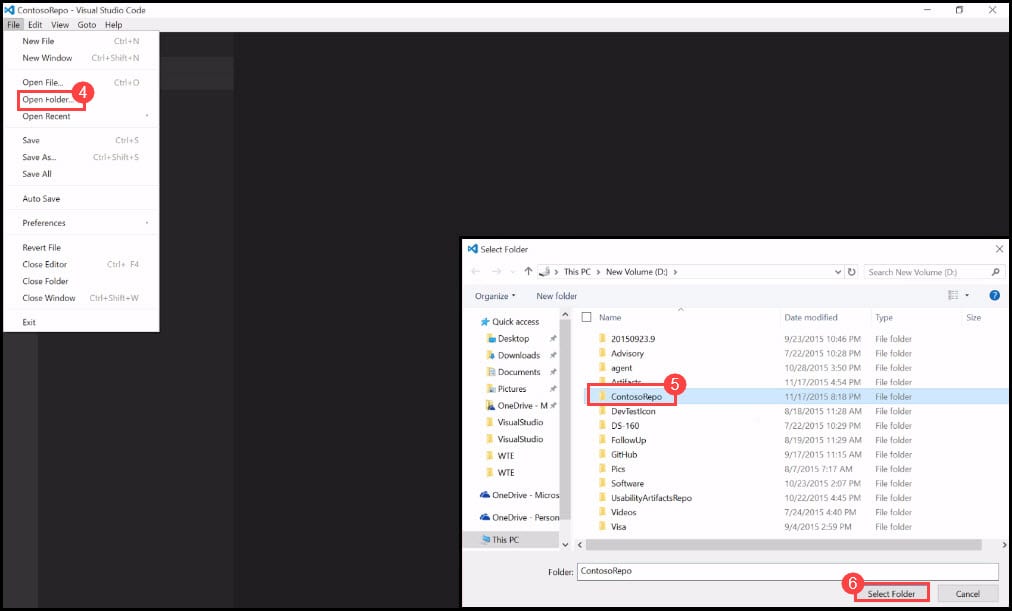
- You will need a code JSON editor to edit this file. I’d recommend using Visual Studio Code, which is a free tool and available on all platforms, such as Windows, Mac, and Linux. Navigate to Visual Studio Code. Click on File and then on Open Folder.
- Click on the Contoso Repo folder.
- Click on the Select Folder button.
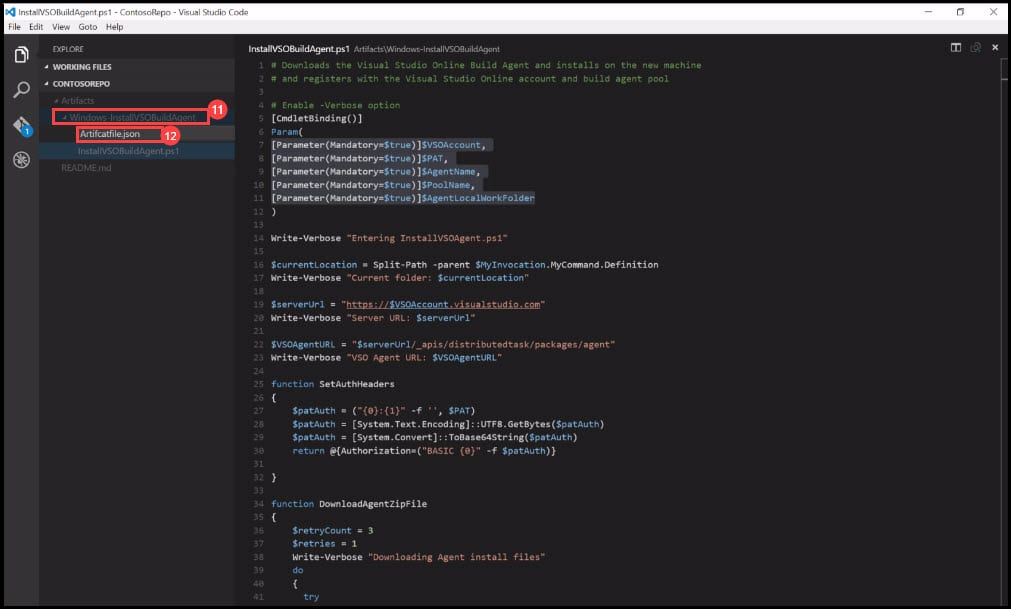
- Then you will need to create a folder which will contain all the Artifacts that you will create. Click on the Add icon.
- Type the name of the folder, which is in this example Artifacts.
- Click again on the add icon and add beneath of Artifacts folder for Artifact that you are going to create now.
- Go to your folder, which contains that file and drag and drop it in this panel.
- Now you will need to create the Artifact definition file. Right-click on Windows-installVsoBuildAgent and choose Create a new file.
- Type the file name Artifactfile.json and it is very important to type that exact file name.
- Paste the content from the Artifact definition file. Change the title and description and update your parameters. When you are done with the update, just click on the Save button.
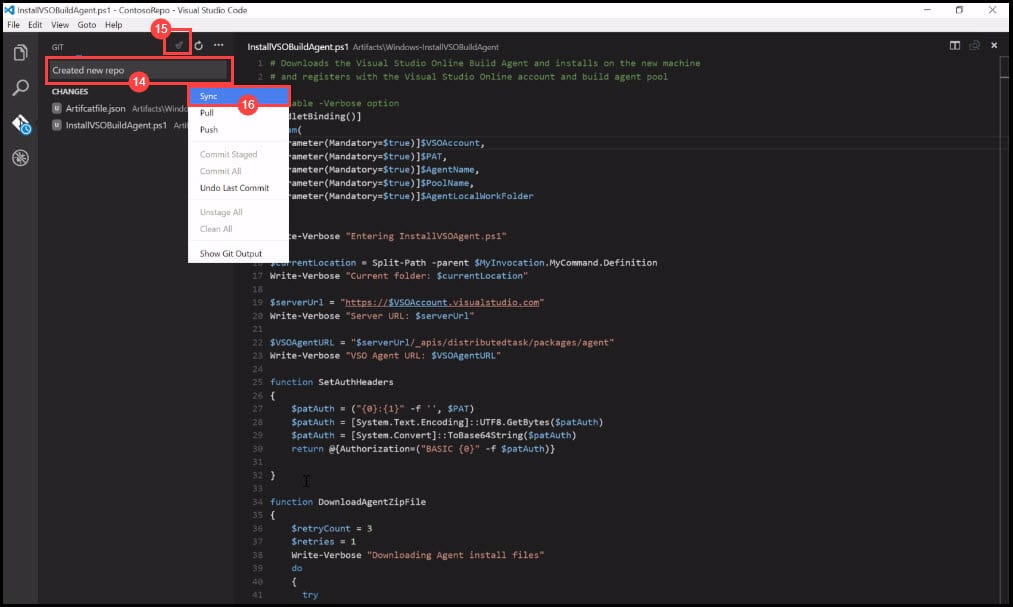
- Before you sync the Remote Repository with the Local Repository, you will have to commit the changes. Type Create new repo.
- Click on the Okay symbol to commit the changes locally.
- Right-click and click on the Sync button.
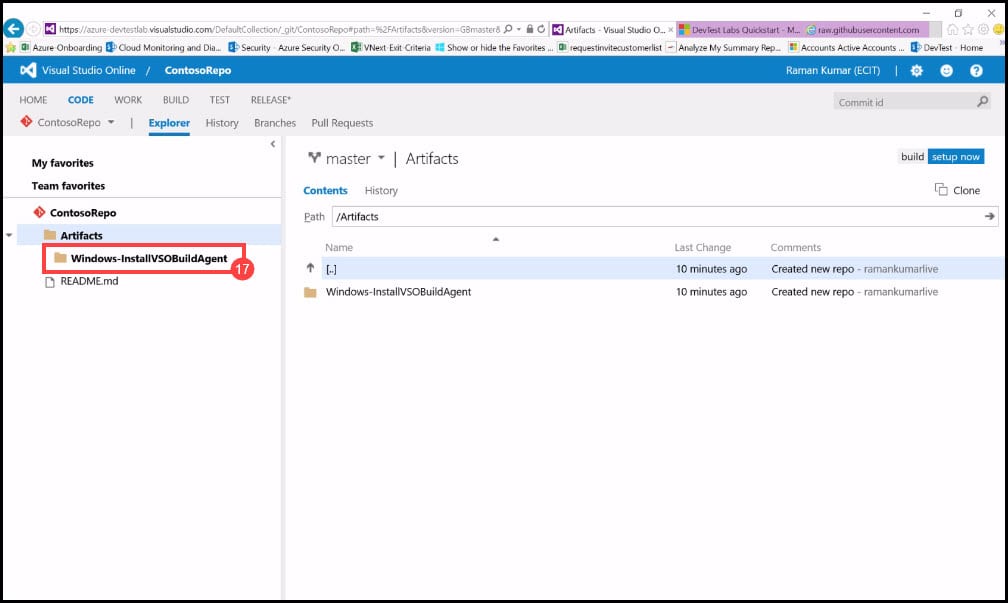
- Navigate back to VSTS Git Repository and refresh the page to see if the changes are synced.
Conclusion
Artifact definition files are made from JSON and Expressions, which enable you to define what exactly you want to install on VM. In this post, I’ve described how easily you can create a Custom Artifact by using an existing script for Artifact installation and save it in your private Git repository. You can expose all required parameters so that Lab users can modify the value of each parameter when they create a VM with Artifact.
You can see this video, if you would like to see how to create a Windows virtual machine on Azure. I will use a Windows 10 machine, connect remotely to it using remote desktop, install Docker for Windows in Linux mode, verify that Docker installation succeeded and fix some errors. We will also pull the docker hello-world image from Docker-Hub and run a container from it, pull a SQL Express image as well as nginx, run many containers from the same images, and see how we can verify that and many others.

