
Abstract and Introduction
DevOps empowers your organization to be more responsive, enabling you to delight your customers and stakeholders by delivering the value they want faster-not just once, but consistently and sustainably. No matter what your primary business may be, it runs on software, and using DevOps to accelerate your software delivery and improve application quality is a key step to sustained profitability. When it comes to databases development, we must apply the same principles and practices in order to achieve the same result, in this post, I will explain in detail how you can apply DataOps or DevOps for Snowflake database using Azure DevOps and Liquibase, but first, let's understand some the most important best practices and considerations that you must take into account.
Updating Database using the Database Configuration Management approach
When working with database development, there are some important considerations to take into account.
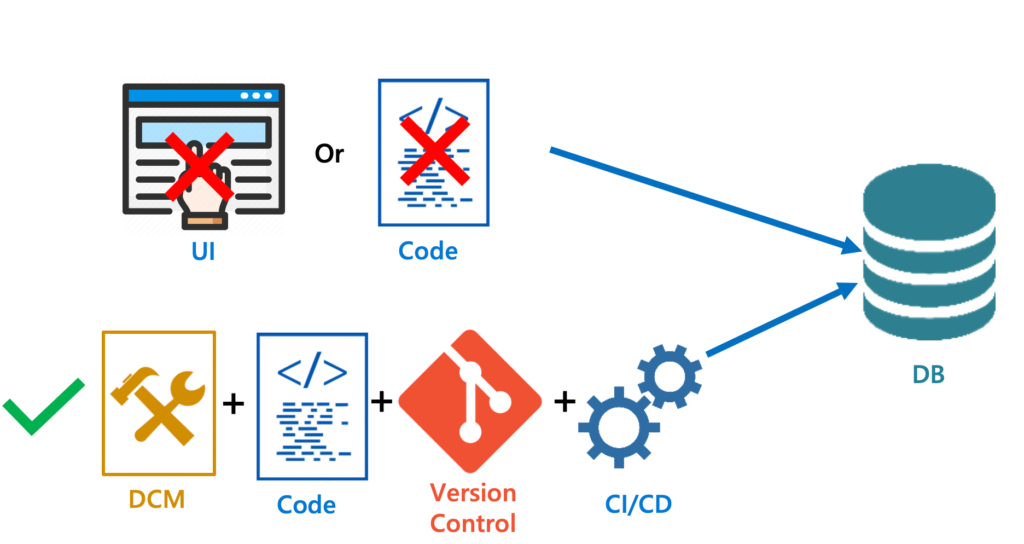
- Developer should no longer use either the user interface or code to update the database directly. Doing so will prevent tracking the changes as well as deploying those changes to other environments.
- Instead of updating the database directly, the database must be updated based on changes made by the Database Configuration Management (DCM) tool, version control and the Continuous Integration/Continuous Deployment (CI/CD) pipelines.
Database Configuration Management High Level Workflow
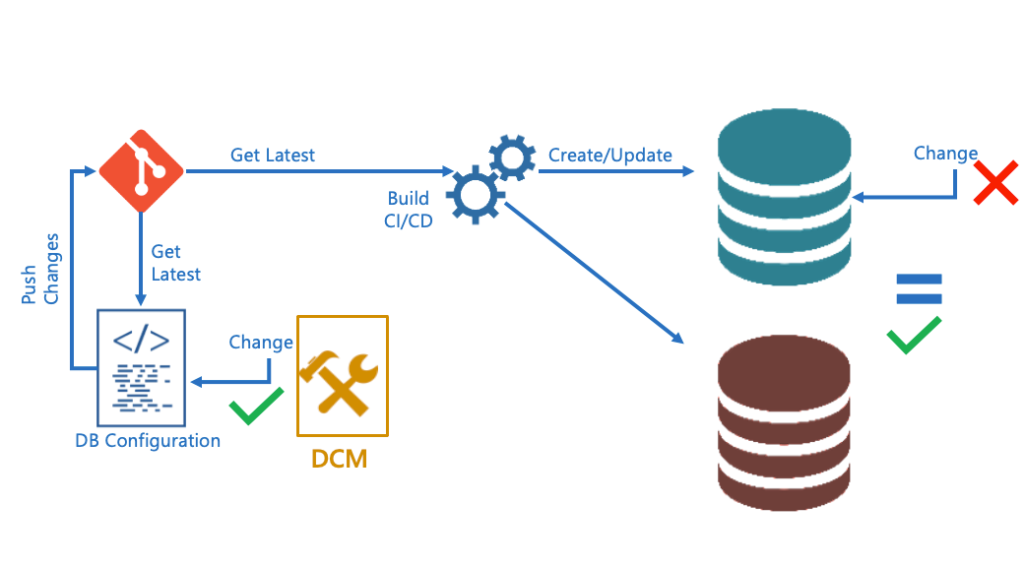
Before any new changes are pushed to version control on the remote repository, every developer should always get the latest changes. This is essential to ensure the new changes are aligned with the last changes pushed by other developers. Developers start editing database scripts with the DCM after they pulled the last changes from the remote repository. Once developers are ready, they will push their changes to the remote repository. ** ** After the new changes are committed and pushed to the remote repository, a CI/CD pipeline will start running, getting the latest changes on the build agent and start executing database create or update changes. Developers should never update the database directly. All updates should come from version control and the CI/CD process. This will be managed through permissions so that only the CI/CD process uses the service account that has updated permissions. Direct update permissions can only be used for exceptions to resolve an issue that cannot be resolved following the process above.
Database Configuration Management Detailed Level Workflow
Developers making changes to the database should follow the detailed level configuration management workflow as follows:
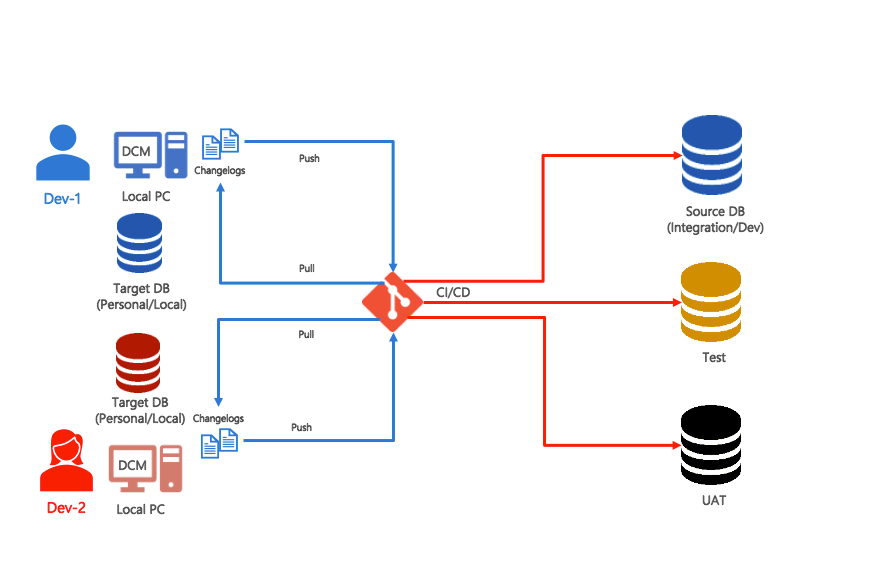
- Every developer has their own local database
Every developer will have their own database called a local or target database. They use this database to develop/deploy new changes and usually, this database is updated using DCM or direct update.
- There is only one integration database
There is only one integration database for all developers. It is also known as source database/dev environment or master database. This database is only updated from version control and the CI/CD process.
- Developers start by comparing their local database to integration database
The process starts with a database comparison between the local database and the integration database. If the compare result shows changes in the integration database, there are new changes that have been pushed by other developers to the integration database through version control and CI/CD.
- Developers pull the changes for the integration database
As the integration database is only updated from version control and CI/CD, if there are any changes in the integration database which do not exist locally, these will be mapped to changes in version control. Developers therefore must pull those changes from the remote repository and adjust their code accordingly.
- Developer pushes the changes to the remote repository
Once developers are happy with their changes, they can push them to the remote repository, updating it with the latest changes required to update the integration database.
- CI/CD runs to apply the changes to the integration database
Once the new changes are pushed to the remote repository, the CI/CD will run to apply those changes to the integration database.
- Updating Test, UAT, Pre-Prod, and Production
Updating the other environments should follow the same process. Updates are only made from version control and CI/CD but these will be based on different branches of the repository. This will be explained in more detail in the Branch and Merge Governance Process section below.
Database Configuration Management Governance Process
In order to apply governance to the database configuration management update process, specific user access control and permissions will be applied to different roles. For example:
- The developer role will not have edit/update access to any database environment except their local/target database.
- The DevOps role will have edit/update permissions for all databases.
- The CI/CD process will be configured to run using a service account that has edit/update permission.
Direct edit/update permissions can only be used for exceptions to resolve an issue that cannot be resolved following the process above.
Database Schema Compare
- The Need for Database Schema Compare
Developers need to compare their local database with the integration database or any other databases for other environments. The reason for the comparison is to understand the changes that have been applied for each environment.
- Database Schema Compare Using DCM
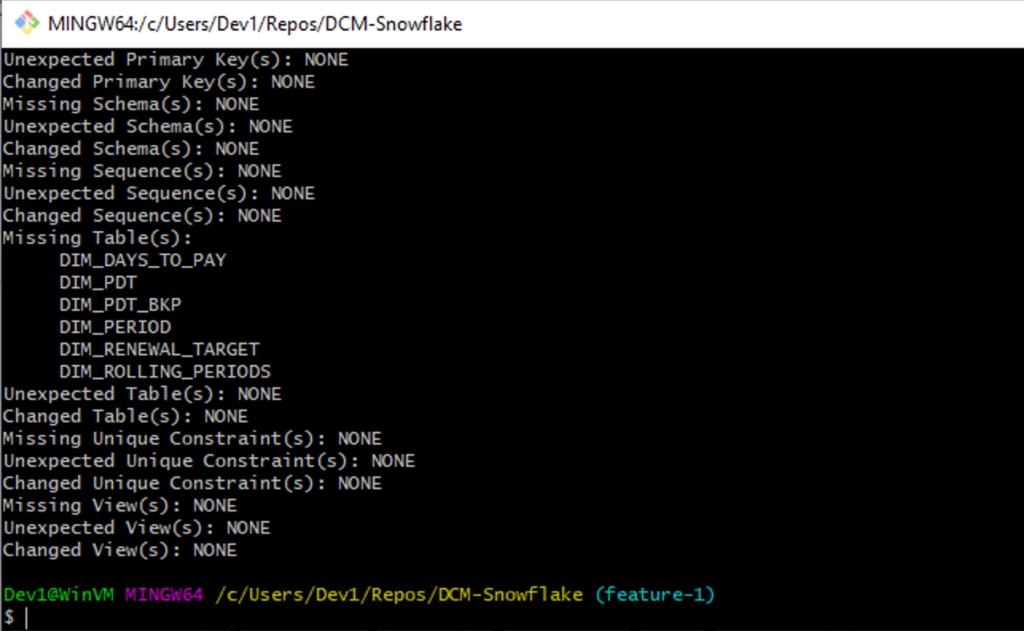
Developers can compare their local database to the integration database (or any other database for other environments) using the DCM configuration. In the DCM there is an option to identify which database will be the target (local) database and which one will be the source (integration) database and you can change or override these as needed. The following example (figure 4) shows the result of a schema comparison using DCM (Liquibase) and there are 6 missing tables.
Database Schema Compare Using Version Control
Since all databases for all environments can only be updated from version control and CI/CD, the database schema comparison can be done using version control as well as the DCM tool. This is so we can use version control to understand what changes have been applied to which environment. The result should be always the same. If the version control shows a different result from the DCM tool for the actual database, there has been configuration drift meaning someone has broken the process and updated the database directly without updating the version control and the CI/CD. The following example shows the result of the schema compare using version control (git) and there are 6 missing tables which is the same compare results as the DCM in the previous example. So, this comparison shows that there is no configuration drift between version control and the actual database.
Regularly Check for Database Configuration Drift
The database must be checked for configuration drift on a regular basis. To do that, we need to compare the database schema using version control and also using the DCM tool and make sure the compared results are the same. If there is any configuration drift, it should be investigated to understand how the process was broken and why.
Overview about Liquibase and most used commands
Liquibase is an open-source database schema change management solution that enables you to manage revisions of your database changes easily. Below are listed several of the most used commands:
- **liquibase diff **is used to compare the target (local) database with the source (integration) database. After using this command the following data will be listed: missing column(s), unexpected column(s) and changed column(s). If there are some columns to be shown they will be listed, if there isn't None will be shown. In missing columns will be listed columns that are present in the integration database but not in the target database. Unexpected columns are the ones that are present in the local database but not in the integration database.
- liquibase status -verboseidentifies the changeset in the changelog which is not yet executed in the target/local database and shows its details.
- **liquibase diff -changelog **is used in order to generate a changelog file, which will include every diff element as a changeset with auto generated number. The generated changelog will be based on the schema compared between the local database and the integration database.
Install Liquibase
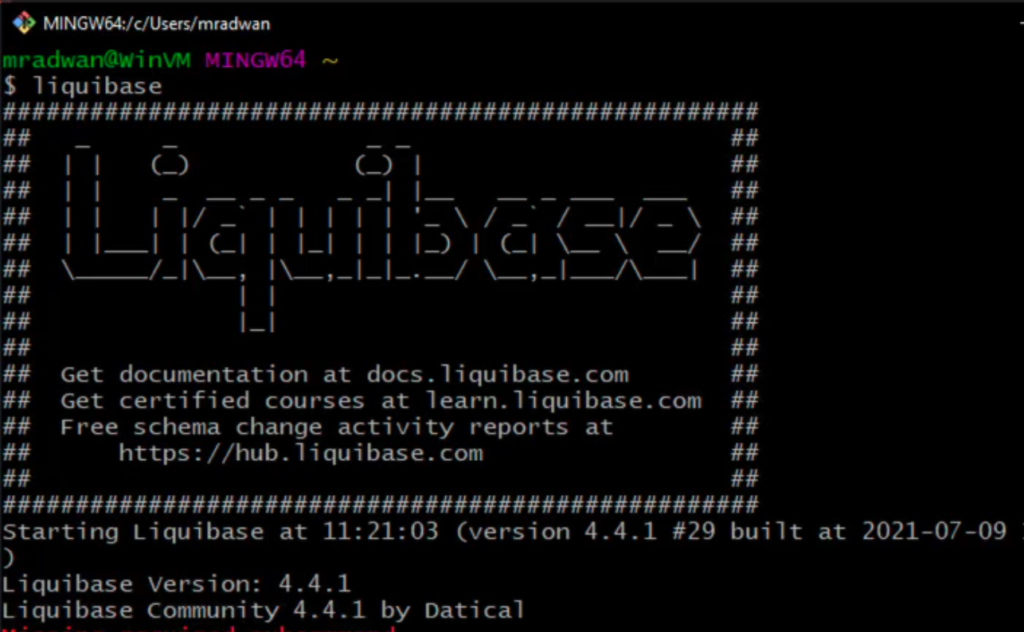
In order to download the Liquibase, navigate to https://www.liquibase.org/download page. Also, a snowflake driver is needed, in my case JDBC the latest version, which I downloaded from this page. Also, an extension is needed in order for Liquibase to communicate with Snowflake. Don't forget to put both jar drivers into the Liquibase lib folder. The next step is to update the environment variable. Set the path user variable and the path system variable to point to the Liquibase location(C:/Program Files/Liquibase). Type `liquibase' from the git bash or from the command line in order to check if the Liquibase is installed correctly (all commands that can be used should be listed).
Configure Liquibase and run some commands
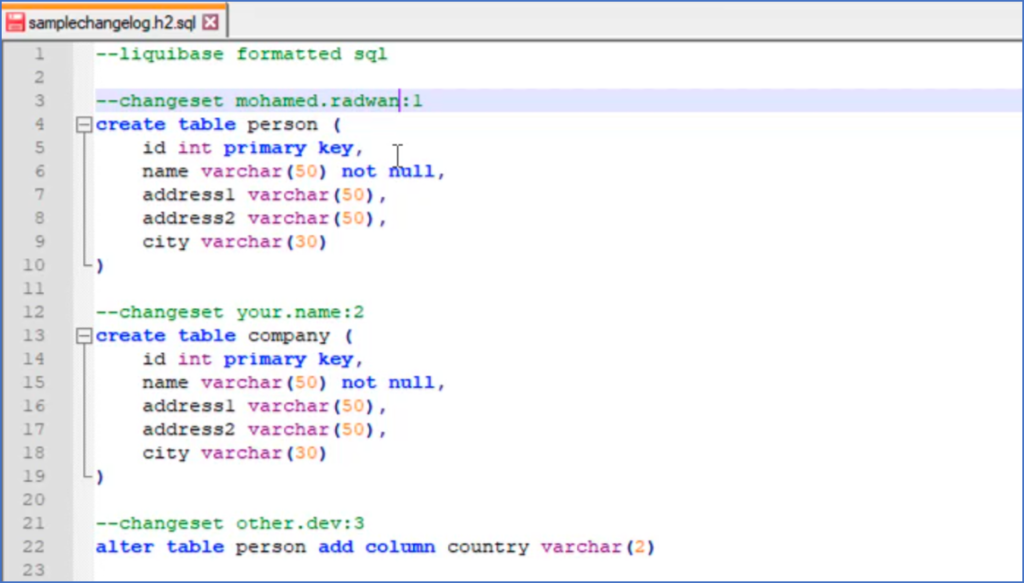
There is an example that comes with the Liquibase installation itself, which can be found in SQL and XML as a language for tracking the changes. The example of the changelog for SQL inside the SQL folder, which lists the name and the unique id of the sequence. In the liquibase.properties file has listed the database that is used, the type of the database, and also the name of the changelog file. Liquibase supports various databases, for example, PostgreSQL, Oracle, SQL Server, H2, Azure SQL, Snowflake etc. In the properties file is listed the type of both databases used (in this case . Snowflake and .sql). Also, the username and the password of the database are listed, the reference URL of the integration database with its username and password. Next thing, start the local/dev database and integration database and run git bash. Navigate to the location of the changelog and run liquibase status command. By running this command, it will be displayed what is inside the changelog which is not yet committed or applied to the local database.
the verbose **command, the details of the changeset will be displayed (the name of the developer, the number of the changeset, and more details about the changes). By running **liquibase update command, all changes that are not applied to the target or local database will be taken and the local database will be updated. After running this command the integration database will be empty, but the local or target database will have the changes. Besides the regular tables in the database, there is also a very important database table called database changelog which tracks all previously applied changesets. For each change, there is an id of the change set, author, filename, date when the change is executed, description, comments, and several other details. By running the state command again could be checked if the database is up to date and if all the changes are already applied to the local database. By running the **liquibase diff **command can be seen the schema compare between the local database and the integration database. All items that are unexpected will be listed since the comparison is from the integration database to the local database. If the comparison is made from the local database to integration database, then the same items will be listed but this time as missing.
Overview about Snowflake
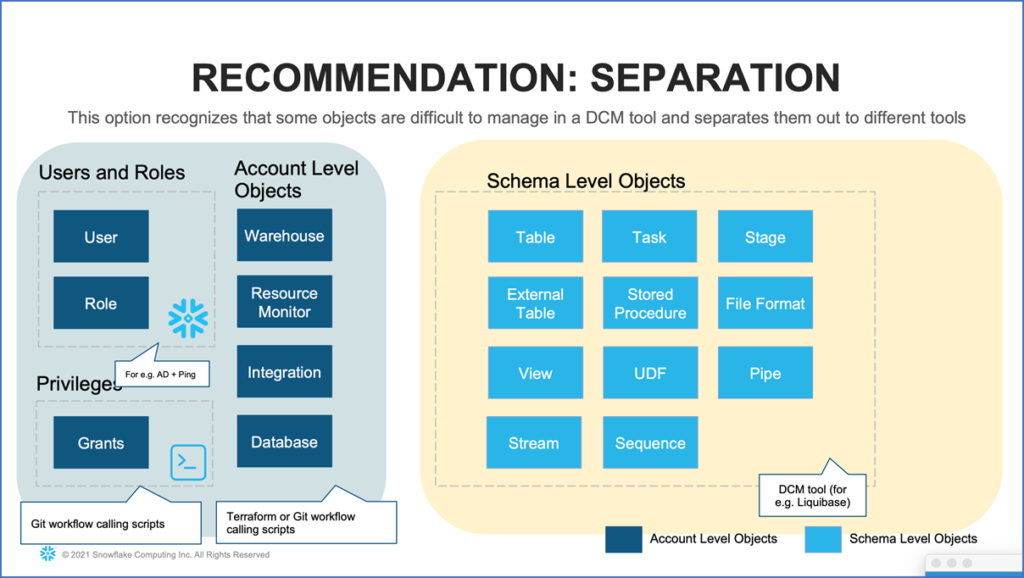
Snowflake is a cloud-based data storage and analytics service generally termed "Data Warehouse-as-a-Service (DaaS)". It allows corporate users to store and analyze data using cloud-based hardware and software. In simple words, it is just a cloud solution for databases with business intelligence and a data warehouse. There are several types of Snowflake Objects divided into two groups: Account Level Objects and Schema Level Objects. Account Level Objects are the following:
- User
- Role
- Grants
- Warehouse
- Resource Monitor
- Integration
- Database
And Schema Level objects are:
- Table
- External Table
- View
- Stream
- Task
- Stored Procedure
- UDF
- Sequence
- Stage
- File Format
- Pipe
Recommended is to have a separation between how are managed the Account Level Objects and how are managed the Schema Level Objects. For example, the Account Level Objects can be managed using infrastructure as code as Terraform configured also with CI/CD pipeline. The other side is the Schema Level Objects to be managed with proper DCM or Database Configuration Management tool
Updating Snowflake using Liquibase command line
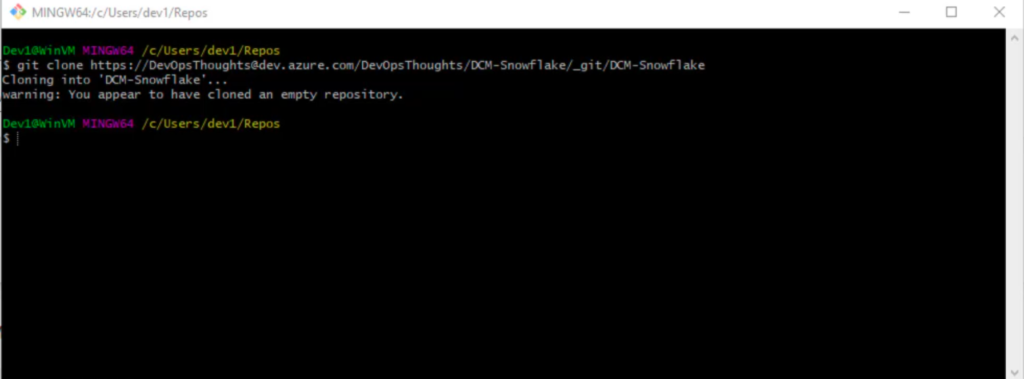
In the next example, since we are using Snowflake, we must first have the Snowflake extension for Liquibase and the driver also. When navigating to Snowflake you will notice that there is already a Snowflake sample data that comes with the Snowflake account and it is free for 30 days. Snowflake sample database has several schemas and, in this example, I will use it in order to create three databases: dev1_dev, dev2_dev, and server integration with the default public schema. Simultaneously should be created an Azure DevOps Project with a repository and copied an empty clone. First, we are going to work with the developer one, so we should navigate to dev1 repos and run git bash as dev1. Next in git bash navigate to dev1 repository and clone the remote repo into our local git repository, which now is an empty repo.
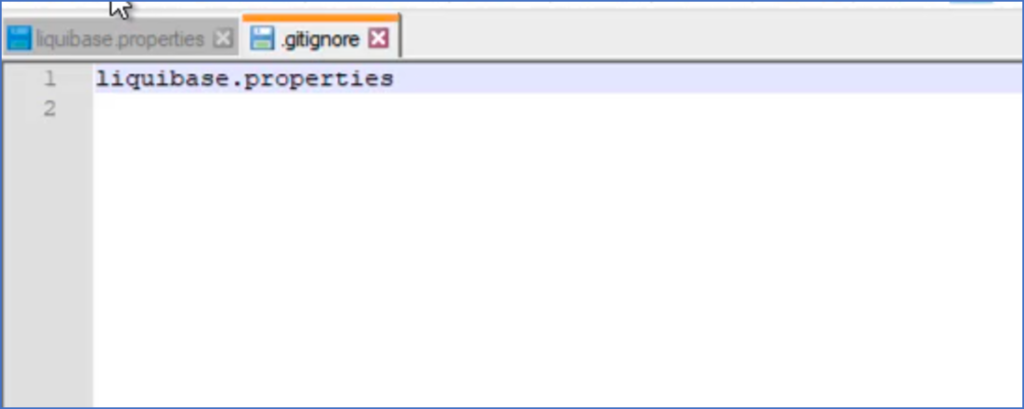
Next, we should add the liquibase property file there. In the property, the file is listed the target/local database and also the integration/source database. Also is listed the type of database which is Snowflake and the database language which is SQL. But in this example, I like to use the sample database of Snowflake, so I will comment the current integration database and uncomment the sample database of Snowflake and of course save the file. Next, I will compare my local database and the sample of Snowflake. In git bash, I will run the liquibase status command which will give as a result that the changelog does not exist. Next by running the liquibase diff command we can see the comparison between the sample database of snowflake and the dev1 database. All changes here will be shown as missing changes. Next, we need to make a changelog with all these changes so we can deploy them to the dev1 database. Generating the changelog file we can do with running the command snowflake diff-changelog. Next, I will uncomment the integration database and comment the snowflake sample database since we already pulled the schema. After changing the properties file, if we run the liquibase status command, the 25 changesets in the local changelog which are not applied yet to the local database will be shown. If we run liquibase status -verbose command we can see the details of the changelog. If we run **liquibase update **command all changes will be applied to the local dev1 database. So currently the changes are in the local repository, but still not in the remote repository which we created earlier. Since liquibase property file should not be part of the source control, a gitignore should be created in order to ignore this file.
Automate Snowflake deployment using Azure Pipeline
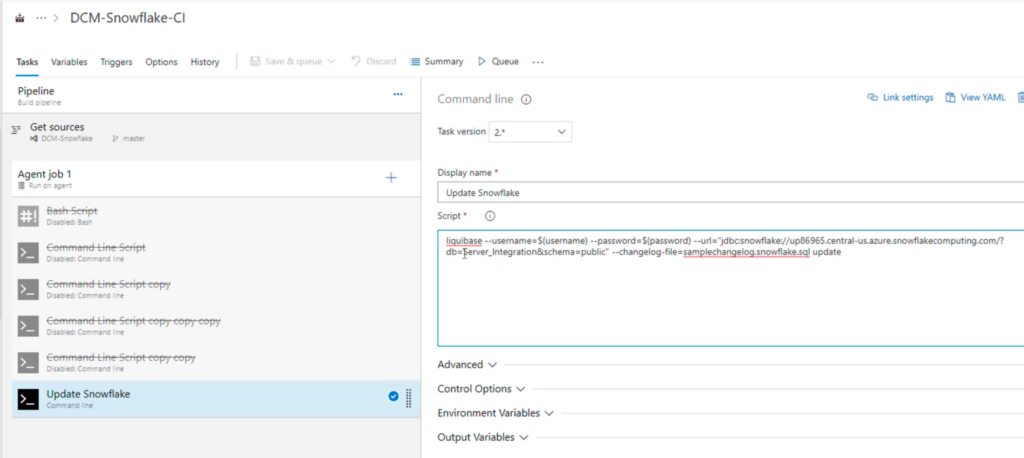
Next the changelog should be committed to the local repository. After that we should just push all the branches to the remote repository. In Azure DevOps, I configured an Azure pipeline to automate the deployment. When clicking on edit on the pipeline we can see the Update Snowflake.
I will run the pipeline in order to get all the changes in the version control and apply the changes in the Snowflake integration database. After running the pipeline, all the schema and tables will be present in the integration database.
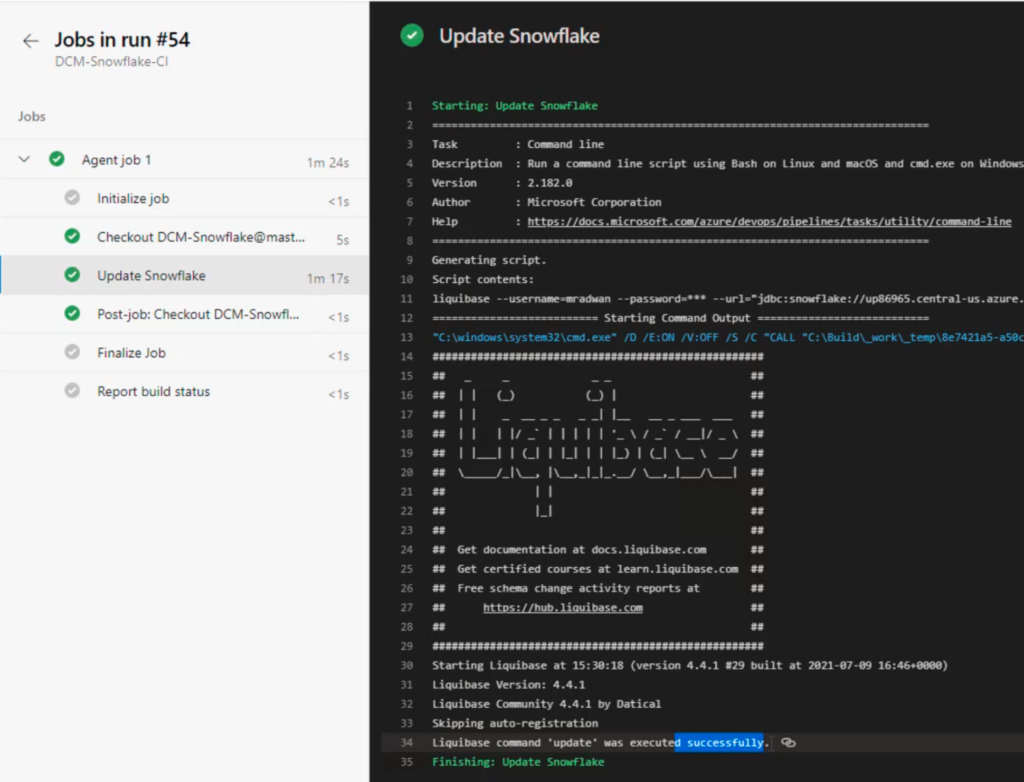 Remember, the integration database always must be updated from CI/CD and version control and never to be updated directly.