
Introduction
With the help of Visual Studio you can create software using a complete development life cycle, including planning phase, UI design, coding, testing, debugging, analyzing code quality and performance, deploying to customers, and gathering telemetry on usage. Many applications can be created using Visual Studio, including but not limited to:
- Apps and games that run not only on Windows, but also Android and iOS.
- Websites and web services based on ASP.NET, JQuery, AngularJS, and other popular frameworks.
- Applications for platforms and devices as diverse as Azure, Office, SharePoint, Hololens, Kinect, and Internet of Things, to name just a few examples.
- Games and graphics-intensive applications for a variety of Windows devices, including Xbox, using DirectX.
For anyone still using Visual Studio 2015 or would like to start with Visual Studio 2015
I will explain in this article the basic installation and setup steps.
More Info
If you prefer to use Mac, see how it looks in Visual Studio for Mac post.
Part 1: Installing Visual Studio
- You can download Visual Studio by visiting the Visual Studio Downloads. If you need any help regarding the installation process, you can learn more by visiting the Microsoft Developer Network website.
- Now that you have downloaded the Visual Studio installer, you can double-click on it and start initializing the setup.

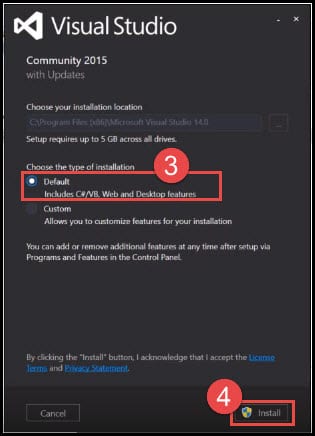
- It shows you the location where the Visual Studio IDE is going to be installed and the different types of installs available. Let’s start with the default install option that is pre-selected. You can also select custom install. A custom install will show you a list of features that you can include in your install.
- Click on Install. Installing Visual Studio might take a while.
You can see this video if you would like to find more information about how to install Visual Studio 2017 and point to some tricky components. See which Workloads need to be installed and which Individual Components need to be selected additionally. See how to install another Edition of Visual Studio and just put a different nickname in order to distinguish installed editions.
Part 2: Launch Visual Studio IDE
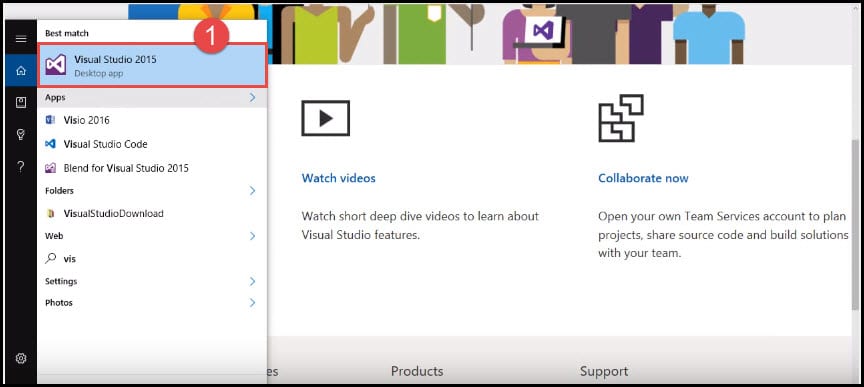
- After installing Visual Studio and once your computer has restarted, you can now launch Visual Studio IDE for the very first time. Type visual studio into your search menu and then click on it.
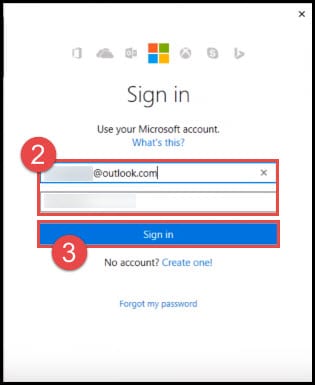
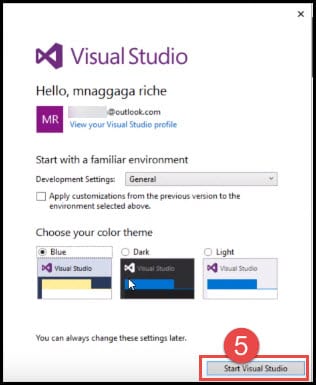
- You need to sign in with your Outlook account. Type in your email address and password.
- Click on Sign in.
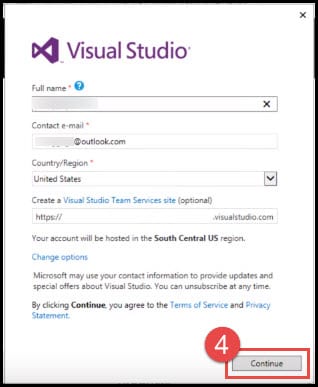
- Once you have signed in, you will be presented with your full name, contact email, region, and the option to create a team service site. You can do whatever you need, but for now click on Continue.
- Let’s start with the default theme and click on Start Visual Studio.
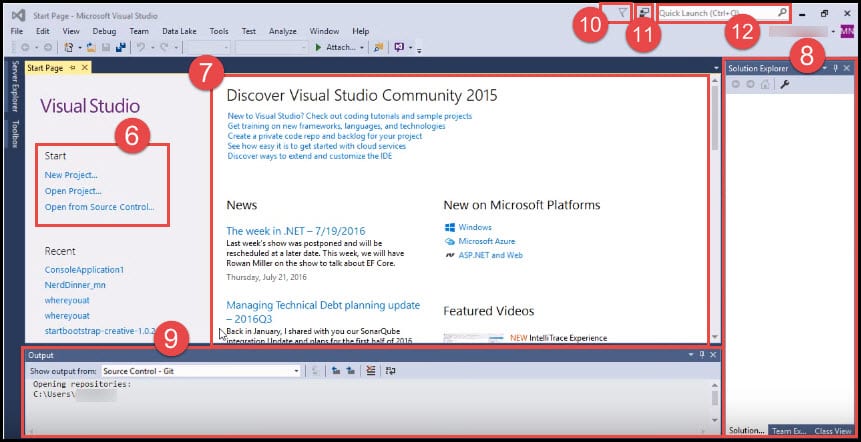
- Visual Studio has got a start-up page made up of how to start a project by starting a new project, opening an existing project, or opening it from source control.
- In the middle of the page, there is Discover Visual Studio Community resources. This consists of a bunch of resources that could help you get started.
- To the right, we have a solution explorer.
- At the bottom of the page, there is an output window.
- In the top right corner, there is a notification icon, send feedback icon, and the quick launch search box. Notification provides you with any extension or product updates.
- Feedback is a great way of telling how we are doing.
- Quick launch is a fast way to access menus and features in Visual Studio.
You can see this video if you would like to find more information about Visual Studio Code, which is part of the Visual Studio family. The marketplace for the supported extensions is demonstrated, as well as the process of installing, disabling, and reloading the extensions, and starting a new project - a new console application - and debugging this new project.
Part 3: Create a New Project
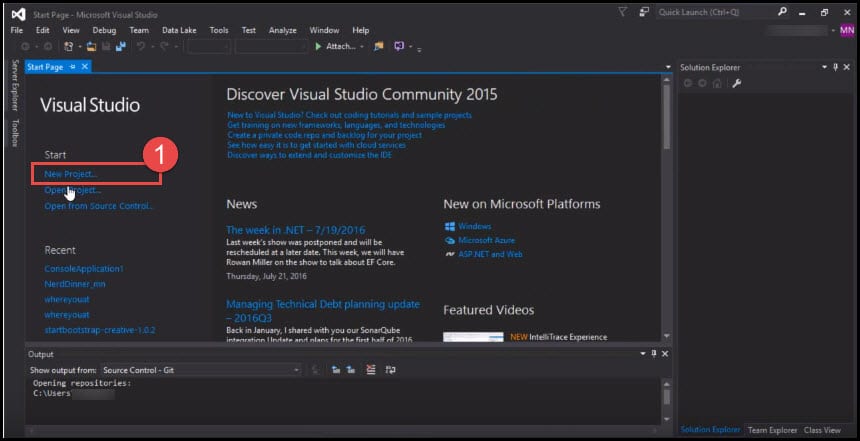
- Go to the Start Page and select New Project.
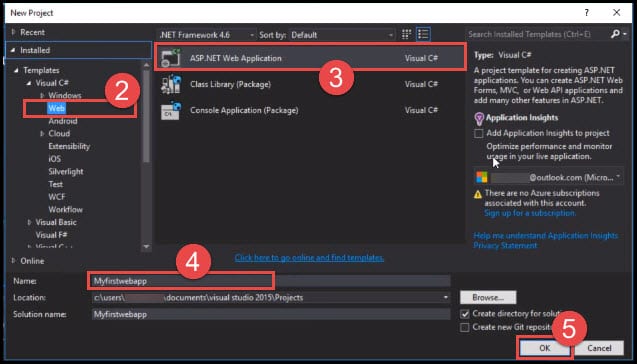
- Select Web under Templates.
- Select ASP.NET Web Application.
- Assign it a suitable name.
- Click on OK.
- Select an empty template.
- Click OK.
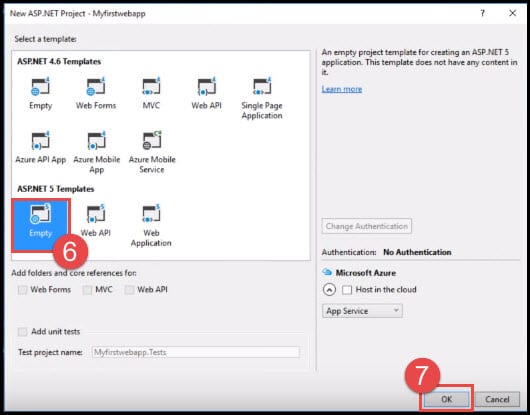
- We have created our very first Visual Studio Project!
You can see this video If you would like to find more information about the new tools and enhancements for Continuous Delivery (CD) and DevOps with Visual Studio 2017. See how to download and initiate the Continuous Delivery Tools for Visual Studio extension. Create a new team project on VSTS or connect to an existing project. Clone a project to a local Git repository, create a simple web application, and finally how to configure the CD extension. Allowing you to create a Build definition, run that Build, trigger a Release and complete app deployment to the cloud. The process of making changes to the CD and DevOps pipeline is also demonstrated, as well as managing Build failures with the help of the described extension.
Conclusion
If you want to find out about new features in Visual Studio, see What’s New in Visual Studio. Also, you can visit the following pages that will help you get started coding:
- Make web apps
- Compose cross-platform mobile apps in HTML/Javascript (Apache Cordova)
- Adjust cross-platform mobile apps in C# or Visual Basic (Xamarin)
- Prepare native cross-platform apps and libraries in C++
- Produce games with DirectX
- Generate games with Unity
- Make Universal Windows Platform apps
- Arrange desktop applications
- Make Office applications
- Tour Visual Studio Team Services and Team Foundation Server