Introduction
Visual Studio Team Services is designed for all teams and enables them to track work, share codes, and ship software. It provides many tools to support managers, architects, testers, project managers, build and documentation teams, and, of course, developers. The service is available in many languages. It’s free for teams up to 5 users and for additional users is payable. The pricing calculator is available right here. In this post, I’m going to describe one of the latest implemented features of VSTS process customization that was completed in the first wave. This feature allows users to modify fields of existing work item types.
Tip: If you would like to learn more about enhancing Frontend development code quality
It includes understanding different types of JavaScript unit testing frameworks like Jasmine, Mocha, Jest, different types of task runners like Grunt and Gulp, different types of linting tools like JSHint, ESLint, JSLint, CSSLint, different types of code formatters like Prettier and Tidy, how to write your first JavaScript test using Jasmine standalone version, how to run JavaScript unit tests using Grunt, Command Line, and PhantomJS, how to calculate code coverage for JavaScript unit tests using Istanbul, how to run JavaScript unit tests using Visual Studio Test Explorer using the Chutzpah extension, how to lint JavaScript code using JSHint and how to run that from Command Line using Grunt. Finally, it shows how to integrate all the quality practices with Visual Studio Team Service Build automation so it can be part of CI/CD or Continuous Integration and Continuous Delivery. Have a look at this post.
For more information about how to work with Kubernetes clusters and deploy them to Azure Kubernetes Service (AKS) and work with Azure Container Registry, see Kubernetes cluster for beginners.
Step 1: Creating an inherited process
This feature enables you to extend the work items from any of your processes, such as Agile, Scrum, and CMMI and to add your own custom fields to them. Before you can modify the fields on work item types, you will need to create an inherited process.
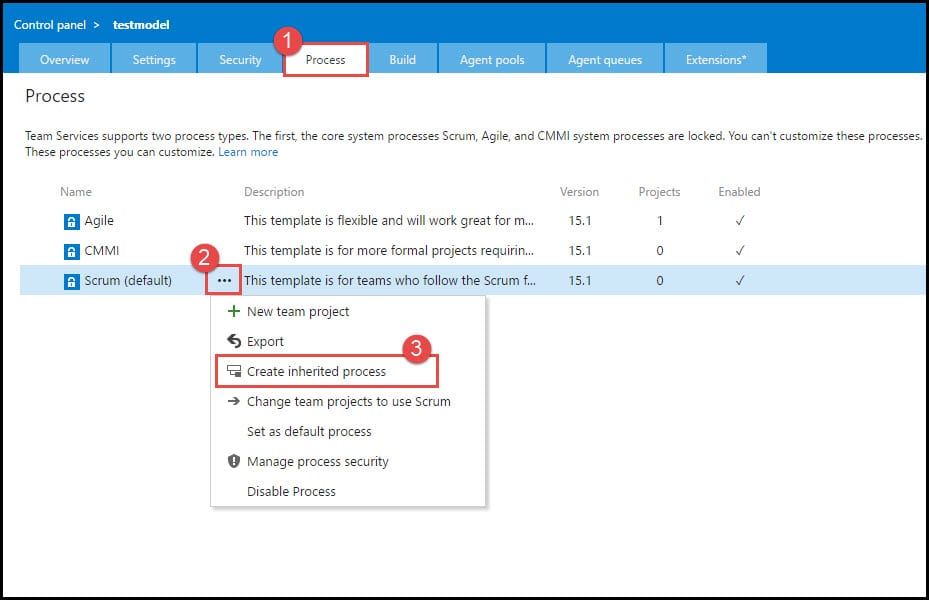
- Navigate to your VSTS admin panel and click on the Processes button.
- On the selected process, click on the dots to open the drop-down menu.
- Click on the Create inherited process option.
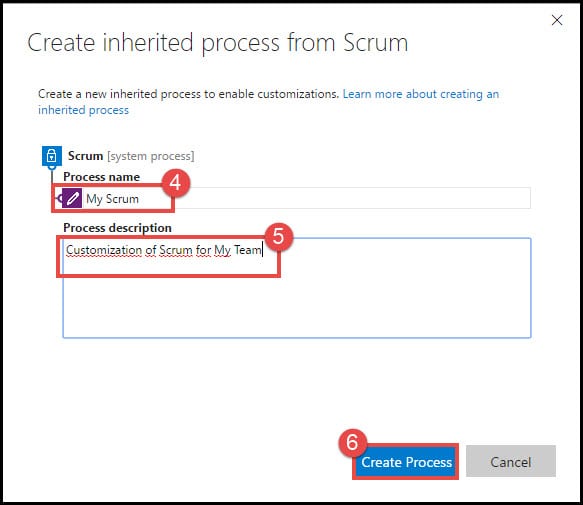
- In the Process name field, type the Name of your process.
- In the Process description field, type the Description of your process.
- Click on the Create Process button.
For more information about how to work with Docker like pulling docker images, running docker images, and working with containers, see Docker for beginners.
Step 2: Setting process security
You can set process security settings for creating, editing, and deleting the process. This can be set by a team project administrator, who will choose which processes can be inherited from and by whom.
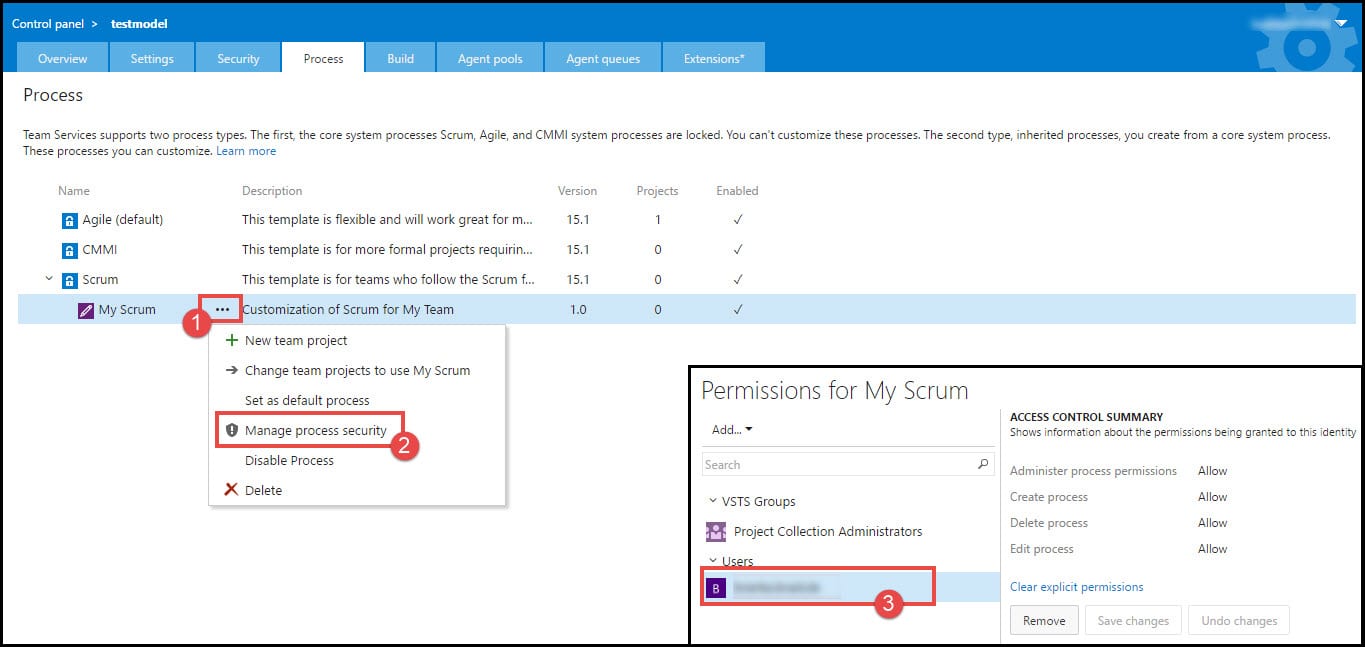
- You’ll see your created process in the process tab. Click on the dots to open the drop-down menu.
- From the Drop-down Menu, choose the option Manage processes security to set individual ACLs for which users and groups can edit and delete the process.
- In the new window, click on the User and on the right side of the window you will have the options for Modification of Permissions.
Step 3: Adding New Field
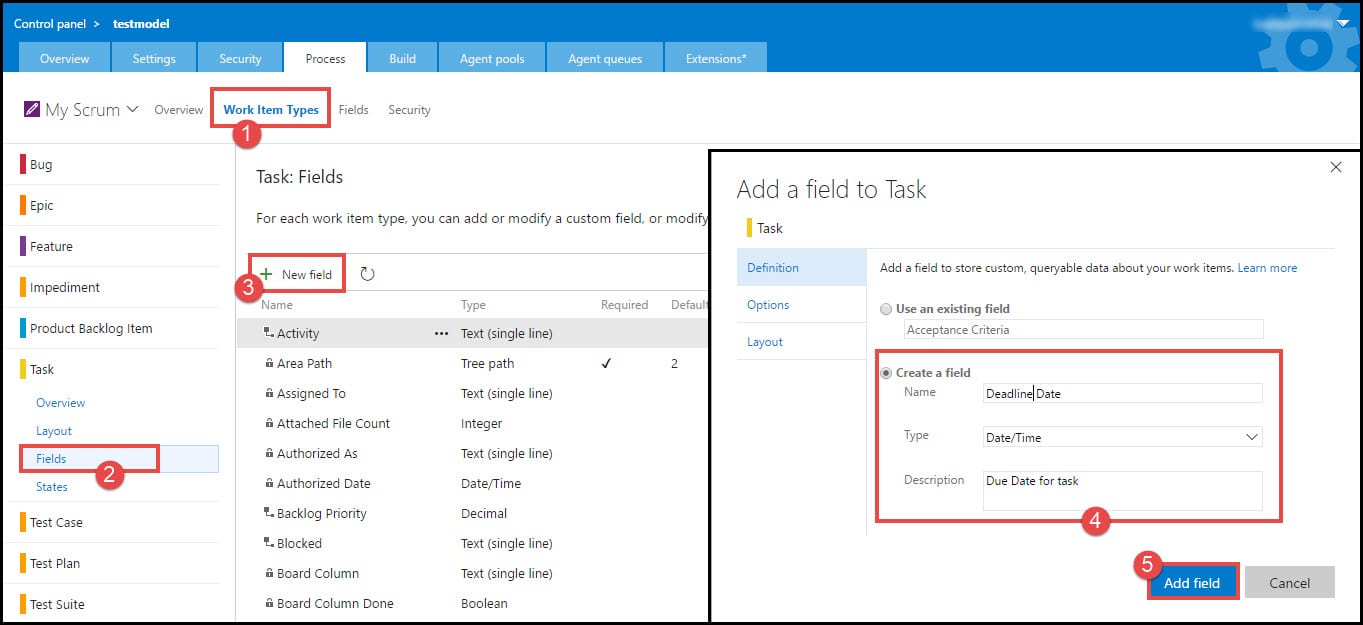
- Navigate back to the Processes tab in the settings area and click on Work Item Types.
- Click on Fields under the Task section to add a new field to a task.
- Click on the New Field button.
- In the new window, define the New Fields parameters. In this example, I will add a field for <Deadline Date> of a task.
- Click on the Add Field button.
For more information about how to work with Git with animation. All commands will be represented in graphical animation. E.g. git branch, git merge, git rebase, git cherry-pick, and many others, see Mastering Git with animation.
Step 4: Adding custom fields to existing work item {#Step 4}
In this step, I’m going to show you how we will add the field that was created in previous steps to a task.
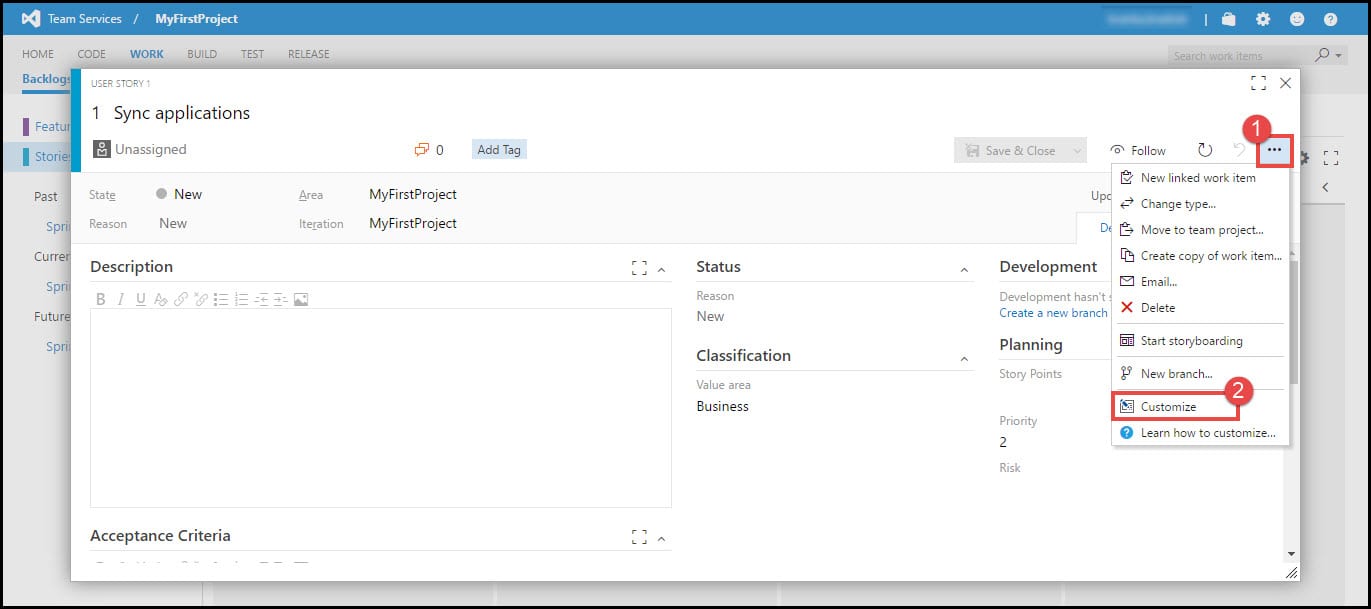
- Navigate back to your Board and open a task. In the upper right corner, click on the dots to open the drop-down menu.
- From the drop-down menu, choose the option Customize.
 {.alignnone .wp-image-6354 width=”763” height=”339”}{rel=”attachment wp-att-6354”}
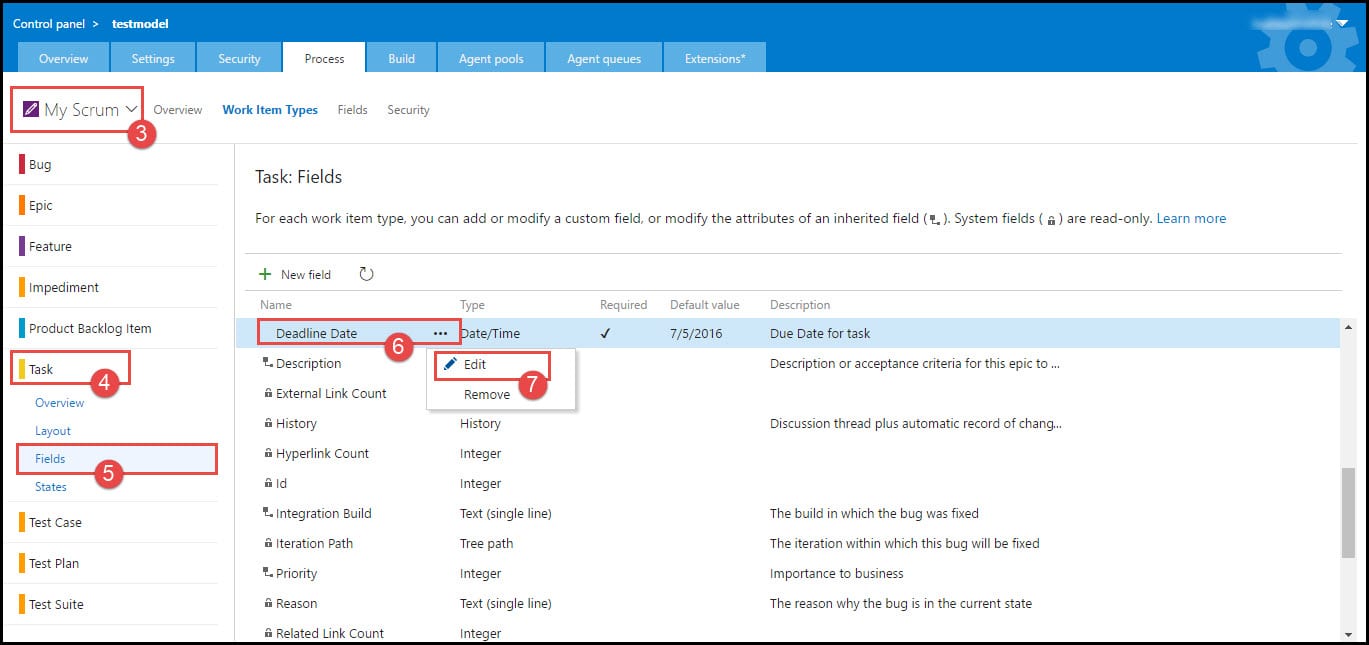
- In the new window in the upper left corner, choose the process that was created in previous steps <My Scrum>.
- Navigate to Task and click on it.
- From the menu, click on Fields.
- In the right window, scroll down to the previously created Field, which has in this case the name <Deadline Date>. Click on the dots to open the drop-down menu.
- From the drop-down menu, click on Edit to define the parameters of the new field.
 {.alignnone .wp-image-6355 width=”763” height=”359”}{rel=”attachment wp-att-6355”}
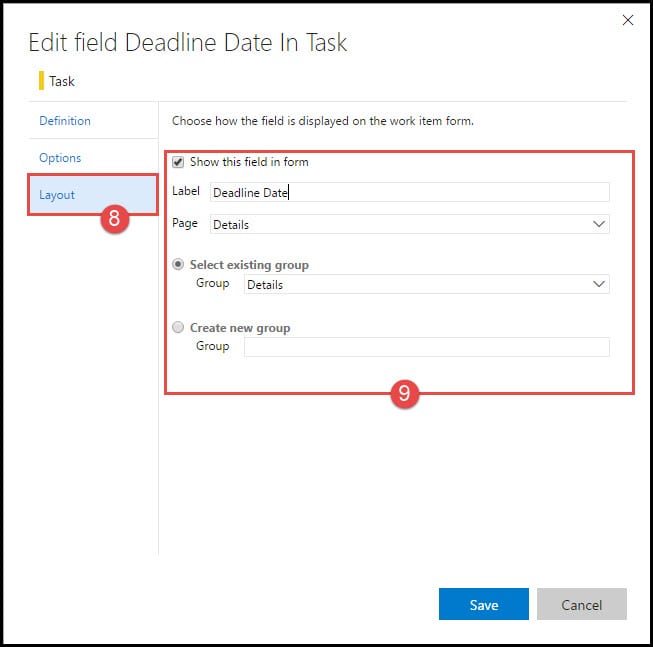
- In the new window, you will have the chance to define Definition, Options, and Layout. The most important is Layout, so click on that field.
- On the right side, you will have the chance to define the exact layout of the new field. You can correct the Label Name and choose the Layout of the new Field in the task.
If you would like to learn more about how to change the credential of the IIS Application Pool using PowerShell, we will also use PowerShell to restart the Application Pool - have a look at this post.
If you would like to learn more about how to use PowerShell to change some values for Microsoft Dynamics 365 - have a look at this post.
Conclusion
These new features are really amazing and were implemented to improve user experience and design. In the coming months, we can expect even more great work from the VSTS team, which should allow users to create custom work item types that can be used on the backlog, share custom fields between different processes, and improvements for custom states. I’m sure that we can expect some other great features as well.

