Introduction
Step 1: Setting the global settings in Git command line
Step 2: Opening the file with appropriate exit
Conclusion
Introduction
This post will describe how to work with Git from command line in Windows. It’s very important to know the commands behind the UI in Visual Studio, so this post will explain the basics of what you need to know to work with Git from command line. The Git command line is the only place you can run all Git commands. If you know how to run the command line version, you can probably also figure out how to run the GUI version, though the opposite is not necessarily true. To run the command line version, you need to have at least a basic understanding of how to open Terminal in Mac or Command Prompt or Powershell in Windows.
In order to ensure Continuous Integration, we need to use proper deploying strategy. Read more about deploying with Feature Branches and Feature Toggle in the following post: Deploy from Branches with and without Feature Toggle
Step 1: Setting the global settings in Git command line
After installation of Git, the first thing is to set your user name and email address. This is very significant as every Git commit is using this information and it is unchangeably baked into the commits you start creating. The first step is to set the global settings, but first display what its value is.
1
git config --global -l
- First we will display a list to show the value. Type command <git config -global -l> and if there are no settings it will show that there is no such a file. If data exists, then it will display as following:
You can see the following video if you would like to find more information about how to import Git Repository from one VSTS account/project to another VSTS account/project using the Import feature. See how to import on the existing repository or create a new one. Also see how to create a personal access token in order to be able to import the repository.
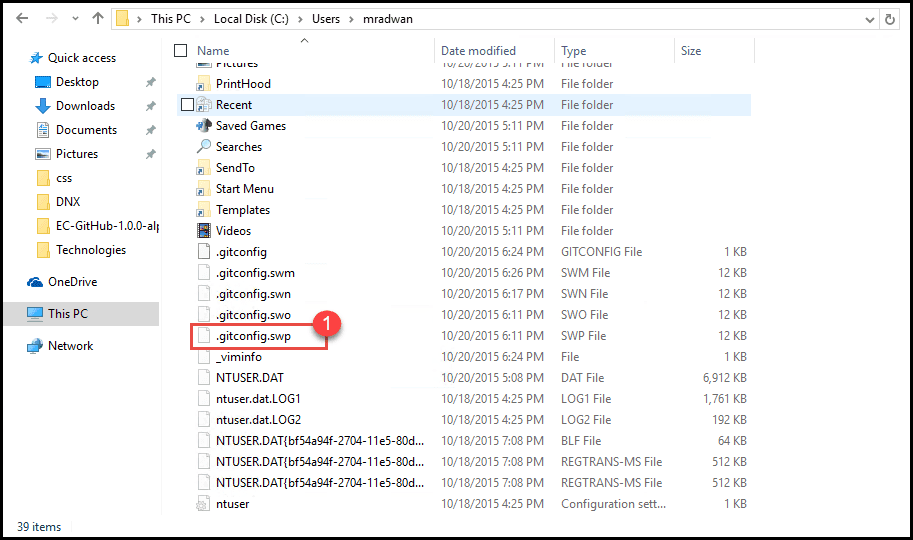
- If you open the user folder, you can see that file <.gitconfig>. You will find that this data has been set also in Visual Studio. To check that, open Visual Studio and navigate to global settings. This file can also be edited using VIM.
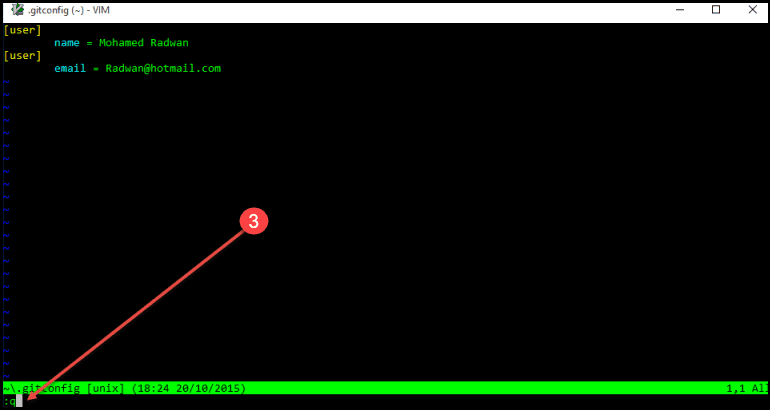
- When Unix editor window opens and if you want to quit that window, then type <q +enter>. You can press **** to start entering text and save by pressing esc and **
** and enter, this will commit with the message you typed. If you just want to come out from your current state without committing, you can type ** **.
[More Info]{.ion-info} You can find more information about DevOps in the following post: DevOps: The Three Stage Conversation - People, Process, Products which describes the basic principles of DevOps. This post will be especially helpful to those for whom DevOps is still a new concept. If you prefer a deeper view on this topic, have a look at the following guide: quick guide about Basic Principles of DevOps, which presents an overview of DevOps process and practices, describing “the big picture”, while still maintaining the high level of detail.
Step 2: Opening the file with appropriate exit
- If you open the file without appropriate exit, it will create a swap file and you can’t open it again smoothly. You just need to delete that swap file or close the file as described in Step 1.
You can also use some other commands to achieve different actions; here are some of the most useful ones:
Navigate to the directory you want to use and type:
1
2
git init
git clone https://github.com/youraccount/rep
This will copy all files to your local files, try to add new file and then add it using
1
git add .
Try to see the status using
1
git status
Commit the changes
1
git commit -m " your message"
Change the branch
1
git checkout branchName
Push changes
1
git push https://github.com/youraccount/rep
You can see the follwoing video if you would like to find more information about how to get started with Release Management and its advantages. See how to create a build definition using CI/CD Tools for VSTS Extensions (I will be using Package Extension and Publish Artifact tasks), and also using DevOps-VSTS-POC trigger in order to enable CI, all of that in order to be able to publish, share, install, and query versions. You will see how to create a release definition, choose an artifact, and configure the source for the artifact and default version. See how to create different environments or clone the existing one; in my case, I am going to create QA, Preproduction, and Production environments, each with one phase and one task. See also how to configure the Publish Extension task for each environment. See an end-to-end continuous delivery pipeline using VSTS extension with Build and Release Management.
Conclusion
Git is a free and open source distributed version control system designed to handle everything from small to very large projects with speed and efficiency. Git allows and encourages you to have multiple local branches that can be entirely independent of each other. The creation, merging, and deletion of those lines of development take seconds. There are ways to accomplish some of this with other systems, but the work involved is much more difficult and error-prone. Git makes this process incredibly easy and it changes the way most developers work when they learn it.
In some of the posts you can find high-level descriptions of Agile principles and the usage of some Agile tools and Agile methodology.


