
I had an assignment which required migrating all TFS on-premises to VSO (Visual Studio Online), this includes TSF2010, TFS2012 and TFS2013 I will try to explain most of the process and the steps.
- Problem
- Migrating work-items using OpsHub
- Migrating work-items using TFS Integration Platform
- Migrating Source control using OpsHub
- Migrating Source control using TFS Integration Platform
- Overall Notes
- Links
Problem
VSO (Visual Studio Online) doesn’t support customization yet. The first server for my assignment was TFS-2010 and most projects were customized based on a combination between MSF for CMMI process template v.4.0, v.5.0 and also some work-items from different Agile templates.
Migrating work-items using OpsHub
Solution Summary
The free version of OpsHub required the process template of the project matching an existing one of the standard process templates (Agile, CMMI or Scrum), so in order to migrate a project we need to transform it into Agile v.5.0 (TFS2010) and migrate work-items as the following:
- Importing work-items that don’t exist (Issue) from Agile v.5.0
- Copy existing work-items that do not belong to Agile into other work-items types of Agile v.5.0
- (Change request → Issue)
- (Requirement → User Story)
- Change Categories by removing the usage of non-Agile work-items
- Destroy non-Agile work-items types (Change request - Requirement)
- Change some of the system fields’ names to match the new work-items types of the Agile v.5.0
- Import all Agile v.5.0 work-items (User Story, Bug, Test Case, Issue, Shared Steps)
- Verify that the current project matches 100% of the Agile v.5.0
- Running work-items migration using OpsHub tool
Solution Details
Importing work-items that don’t exist (Issue) from Agile v.5.0
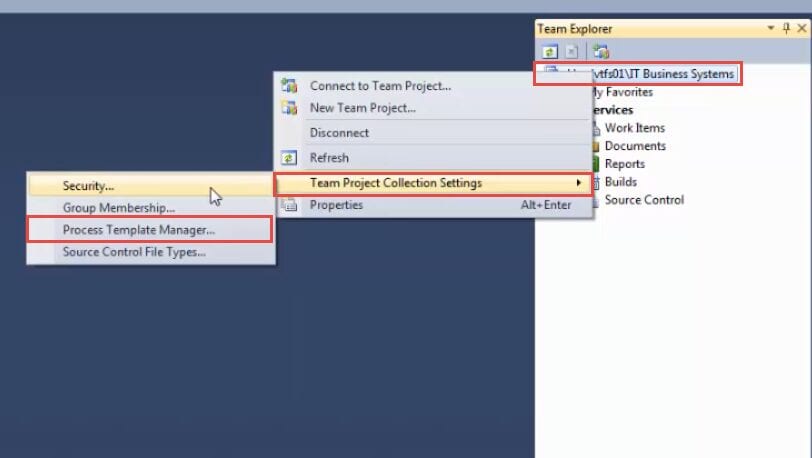
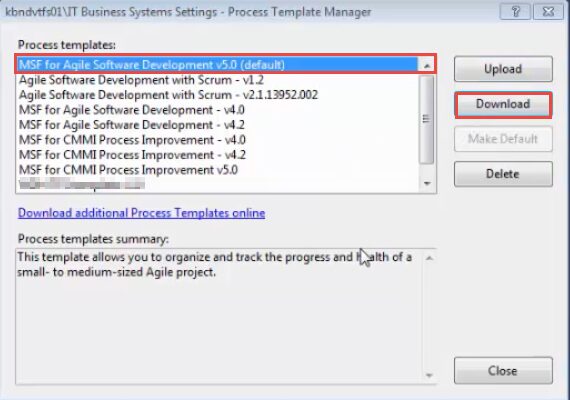
Downloaded Agile v.5.0 process template from TFS
![image001]()
![image002]()
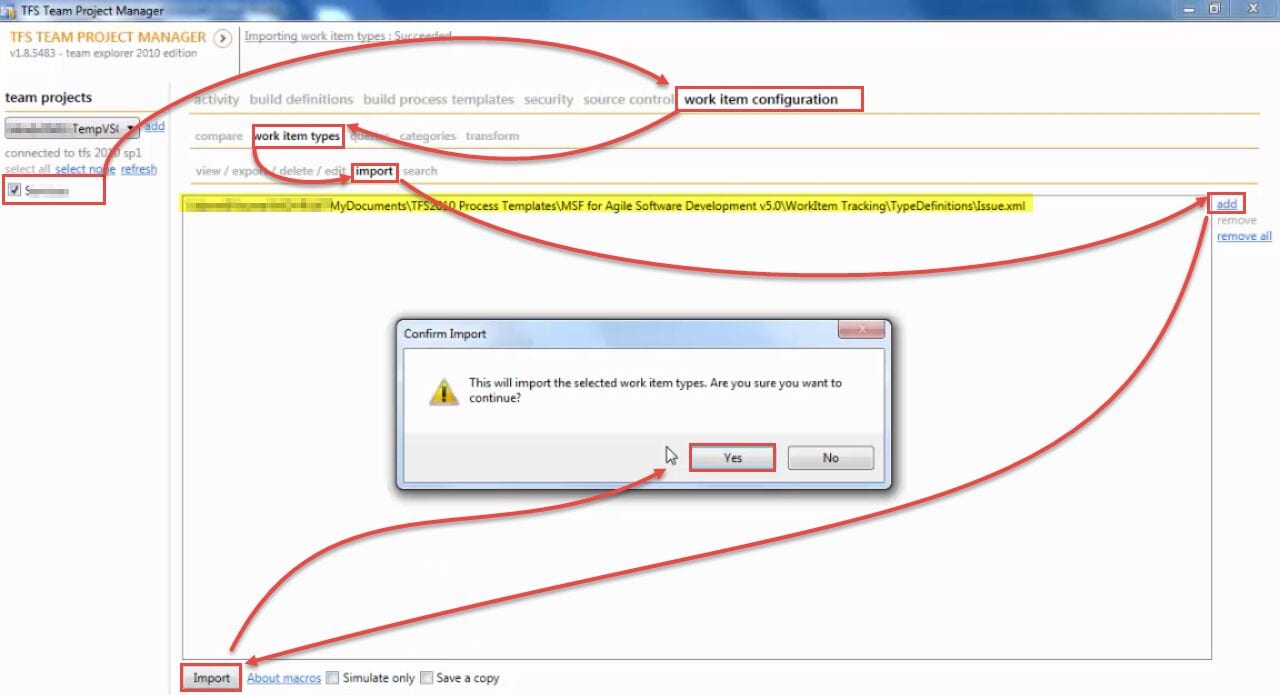
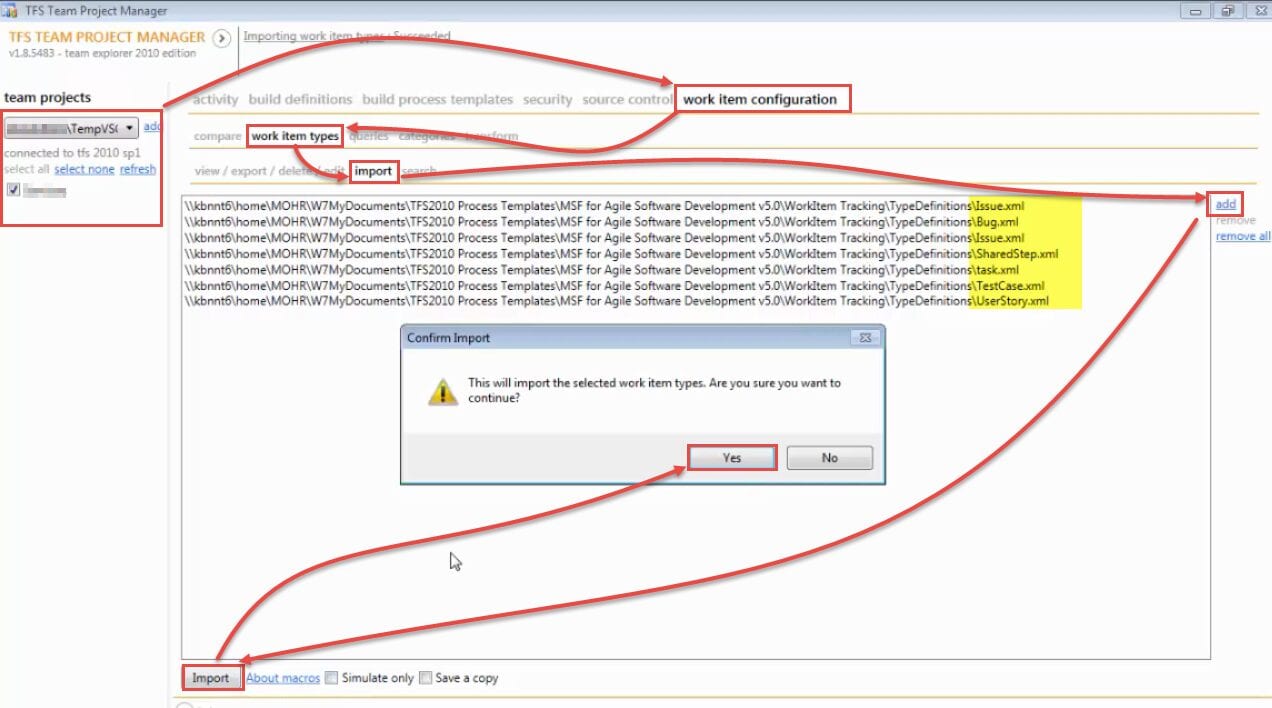
Open TFS Team Project Manager, select the project and navigate to Work item configuration/work items types/import. Click add and select Issue work-item from Agile v5.0 work-items and click on import.
![image003]()
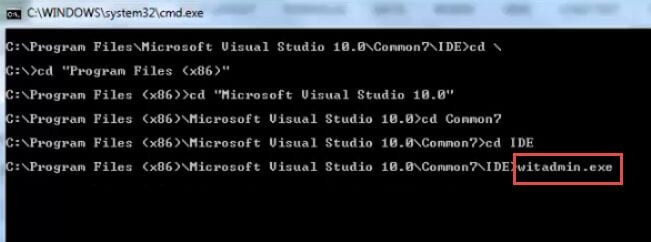
I could also import it using WitAdmin command line
![image004]()
- Copy existing work-items that do not belong to Agile into another work-item types of Agile v.5.0
- (Change request → Issue)
- (Requirement → User Story)
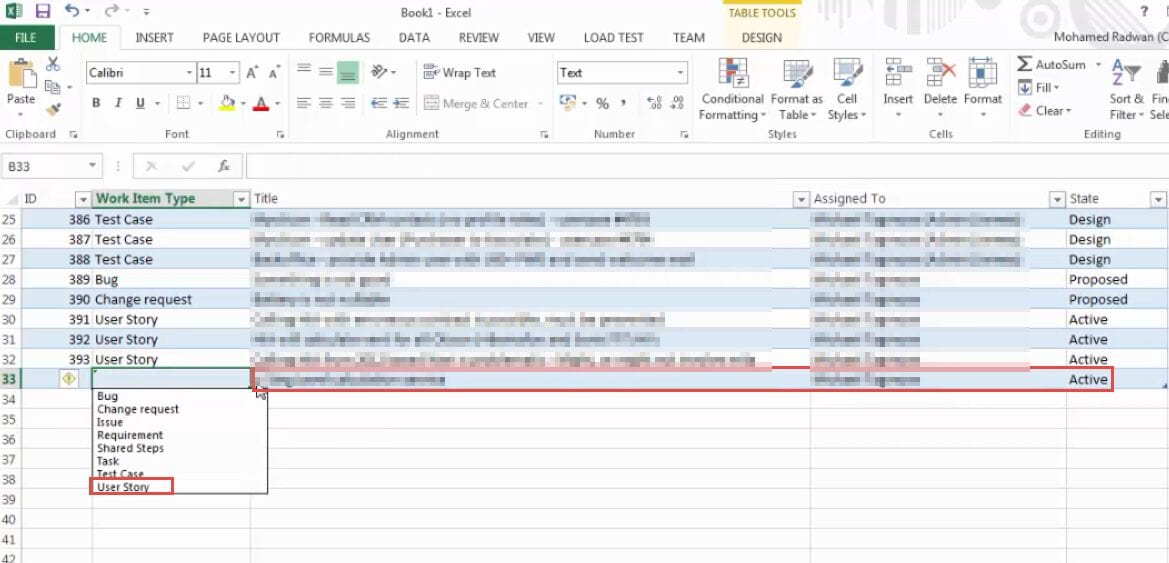
- Make a query that includes all the work-items we want to copy into other types
- Open the query result in Excel
- Copy all rows except the Work Item Type
- Change the Work Item Type into the desired type
- Click publish to publish new work-items
![image005]()
Change Categories by removing the usage of non-Agile work-items
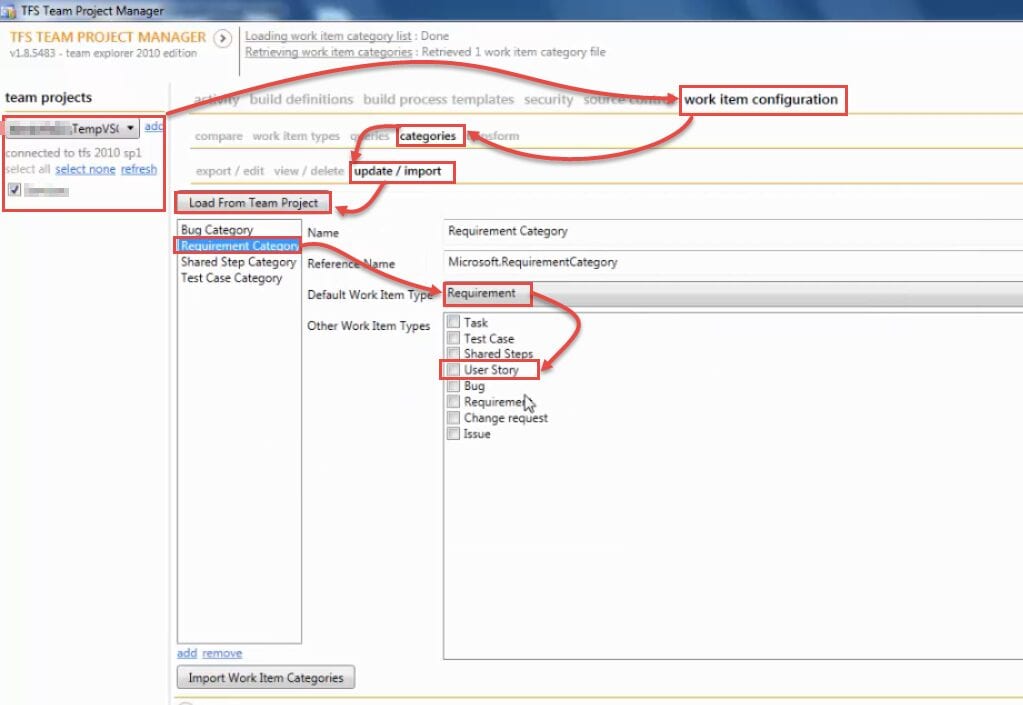
- The Requirement category was referencing the Requirement work-item as the default work-item, and since we will remove that work-item as it’s not part of Agile v5.0 and also to make the categories match Agile v5.0 process template, we had to change the category to reference User Story instead of Requirement.
- Open TFS Team Project Manager, select the project and navigate to Work item configuration/Categories/Update & import/Load From Team Project and select the current project.
- Change the default work-item for the Requirement category from Requirement to User Story.
- Click Import work-items category.
![image006]()
Destroy non-Agile work-items types (Change request - Requirement)
This also will delete all work-items from TFS DB for those types. Run the following 2 commands from WitAdmin command line tool:
1
2
witadmin.exe destroywitd /collection:http://kbndvtfs01:8080/tfs/TempVSO2 /p:ServicesVSO /n:"Requirement"
witadmin.exe destroywitd /collection:http://kbndvtfs01:8080/tfs/TempVSO2 /p:ServicesVSO /n:"Change Request"

- Change some of the system fields name to match the new work-items types of the Agile v.5.0
Test Case:
1
2
3
4
5
6
witadmin changefield /collection:http://kbndvtfs01:8080/tfs/TempVSO2 /n:"System.ExternalLinkCount" /name:"External Link Count"
witadmin changefield /collection:http://kbndvtfs01:8080/tfs/TempVSO2 /n:"System.RelatedLinkCount" /name:"Related Link Count"
witadmin changefield /collection:http://kbndvtfs01:8080/tfs/TempVSO2 /n:"System.HyperLinkCount" /name:"Hyperlink Count"
witadmin changefield /collection:http://kbndvtfs01:8080/tfs/TempVSO2 /n:"System.AttachedFileCount" /name:"Attached File Count"
witadmin changefield /collection:http://kbndvtfs01:8080/tfs/TempVSO2 /n:"System.AreaId" /name:"Area ID"
witadmin changefield /collection:http://kbndvtfs01:8080/tfs/TempVSO2 /n:"System.IterationId" /name:"Iteration ID"

- Import all Agile v.5.0 work-items (User Story, Bug, Test Case, Issue, Shared Steps)
- Open TFS Team Project Manager, select the project and navigate to Work item configuration/work items types/import
- Click add and select all Agile v5.0 work-items and click on import
- Verify that current project matching 100% of the Agile v.5.0
- Open TFS Team Project Manager, select the project and navigate to Work item configuration/compare
- Click add and select all Agile v5.0 work-items and click on Compare Team Project With Source
- Make sure it 100%
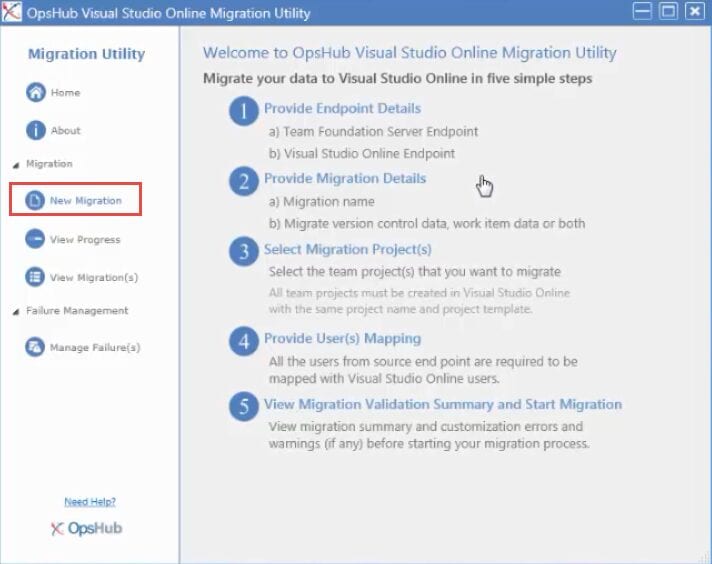
- Running work-items migration using OpsHub tool
Make sure that the account that you logged-in and will be used for the migration added in Project Collection Service Accounts group.

Make sure that you++have a project with the same name and with the process template that match the desired process template
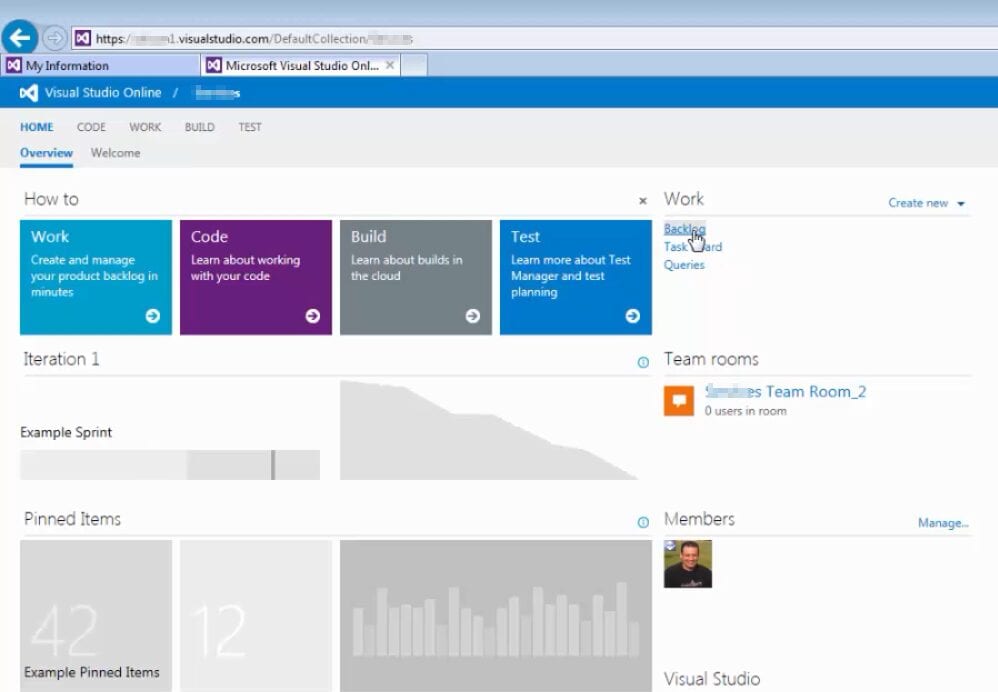
Run OpsHub and select New Migration
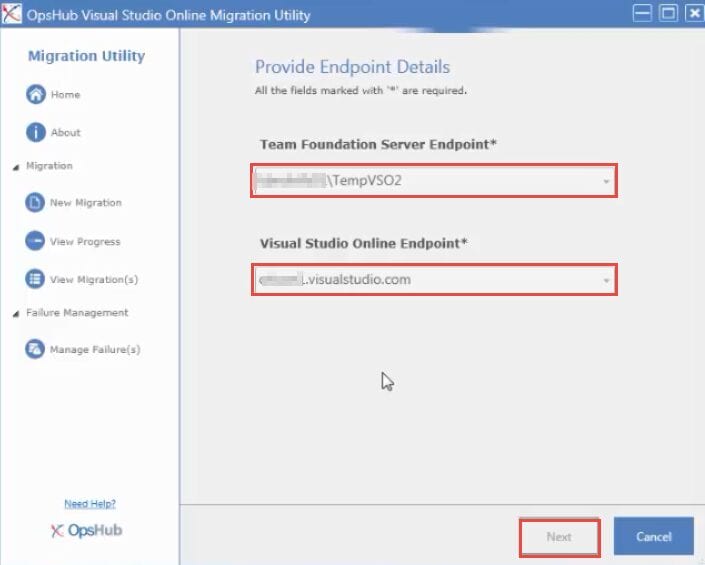
Select the source collection (local) and the destination account (VSO)
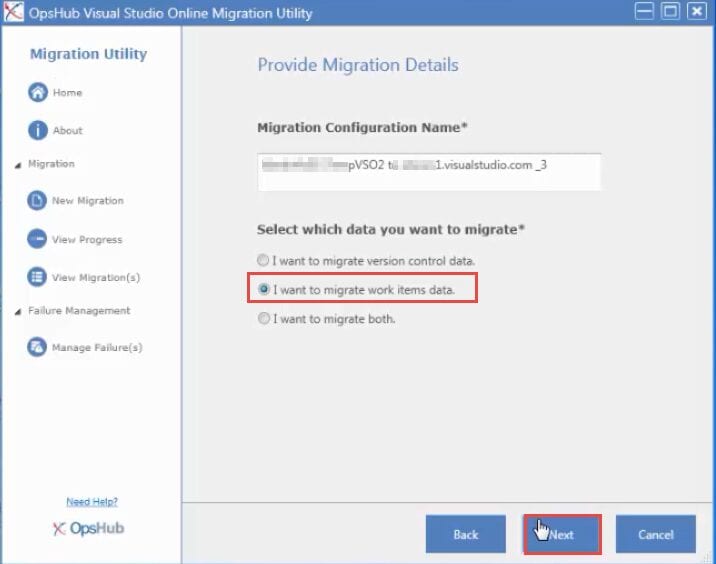
Choose I want to migrate work-item and click on Next
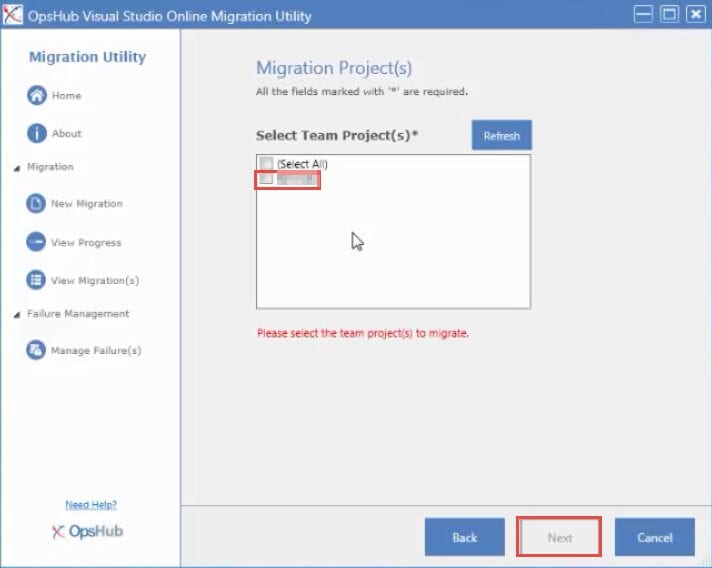
Select the destination project on VSO (Visual Studio Online) and click Next
Map the local users to the online users and click Next
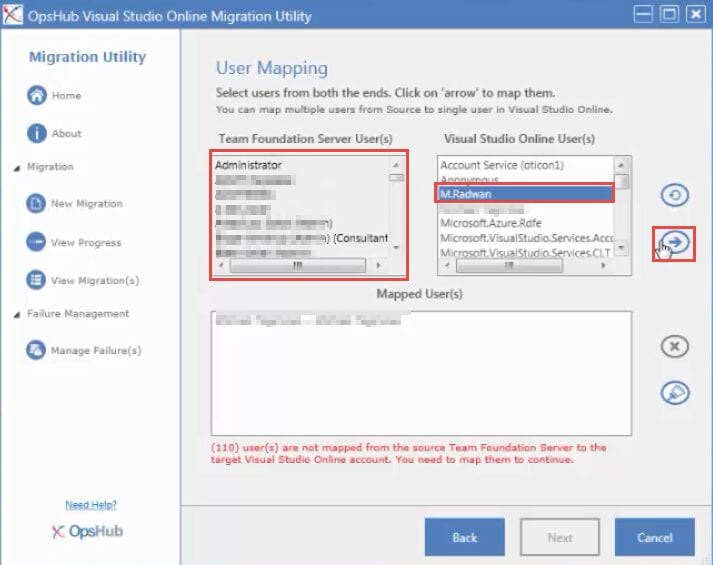

Make sure that the verification running successfully
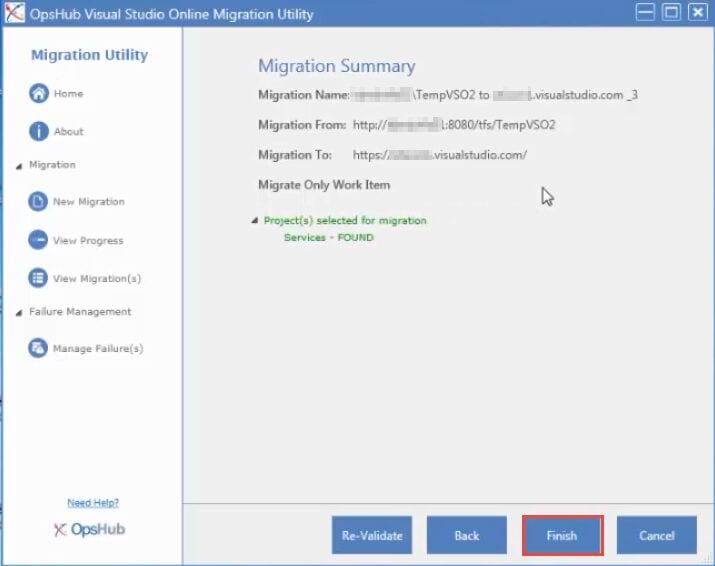
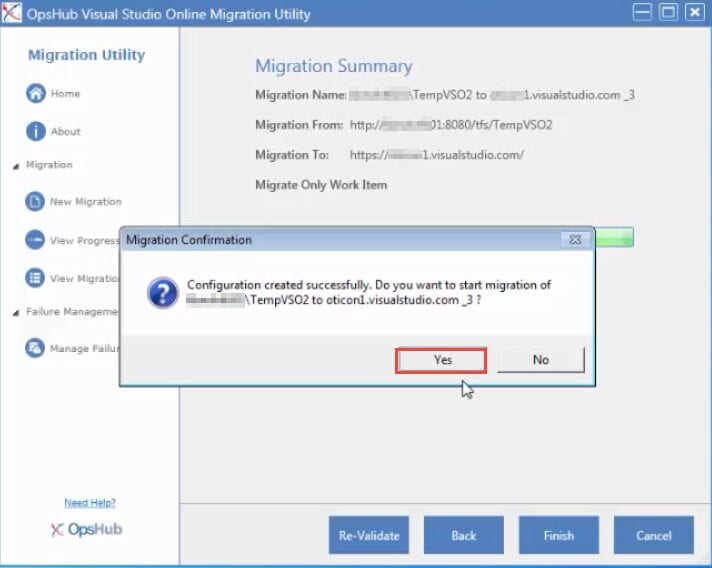
Start the migration
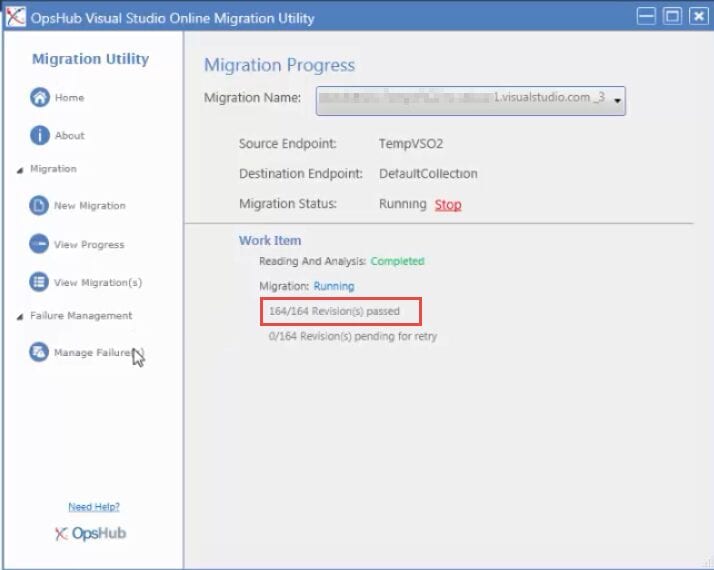
Review that the migration ran successfully
[3.Solution Notes:]
- OpsHub free version doesn't support migration from TFS on- premises to TFS on-premises
- OpsHub free version required that you migrate to the same project name
- Migrating (copying work-items) using MS Excel will lose the history and the attachments
[3.Migrating work-items using TFS Integration Platform]
[1.Solution Summary]
Using TFS Integration Platform we can make custom mapping to map work-items to different types and also mapping work-item's fields to different fields, so we will not changing the process template of the project also I will not map all fields so I can show how to resolve conflicts for undefined fields
- Run TFS Integration Platform
- Use a custom mapping file (Doesn't map all required fields)
- Show how to resolve conflict for none found fields
- Continue migration
[2.Solution Details]
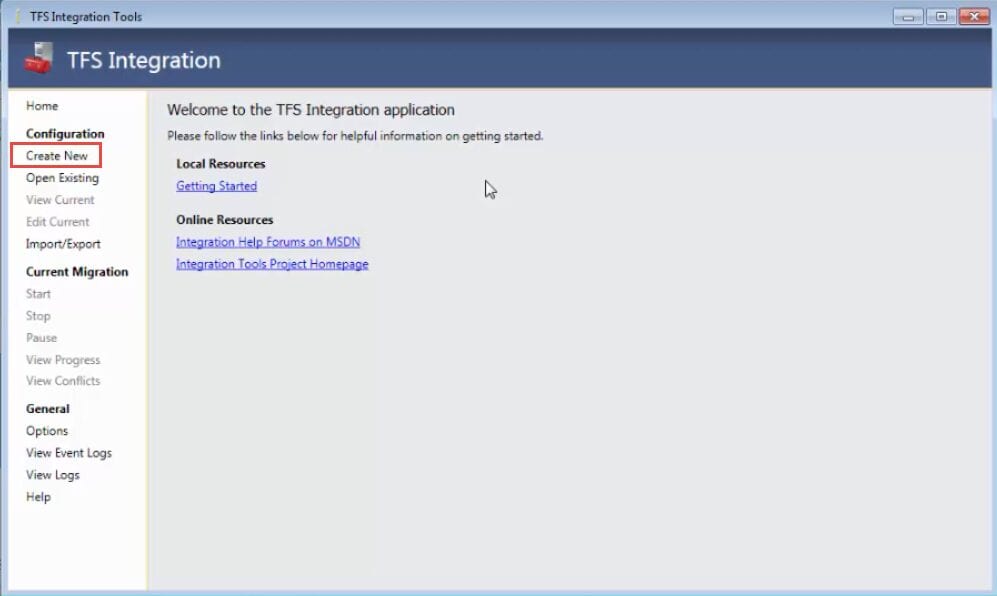
- Run TFS Integration Platform
After launching the tool, click on Create New
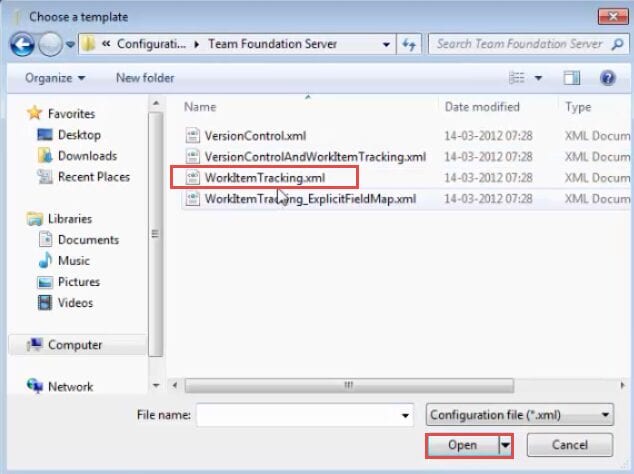
Select workItemTracking.xml
In the left side select the source (on-prem), in the right side select VSO (Visual Studio Online), make sure that workflow type is One-way-migration, click on Edit XML
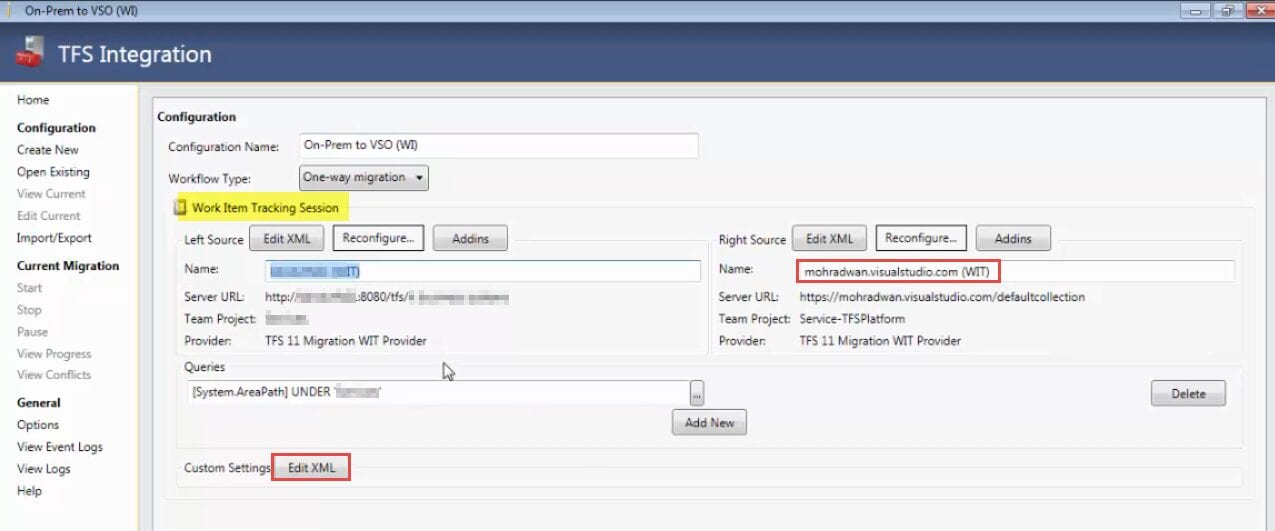
Put the mapping file

Review how the mapping file translated by TFS Integration Tool, click on each work-item mapping to see the details of the mapping fields, click save to DB
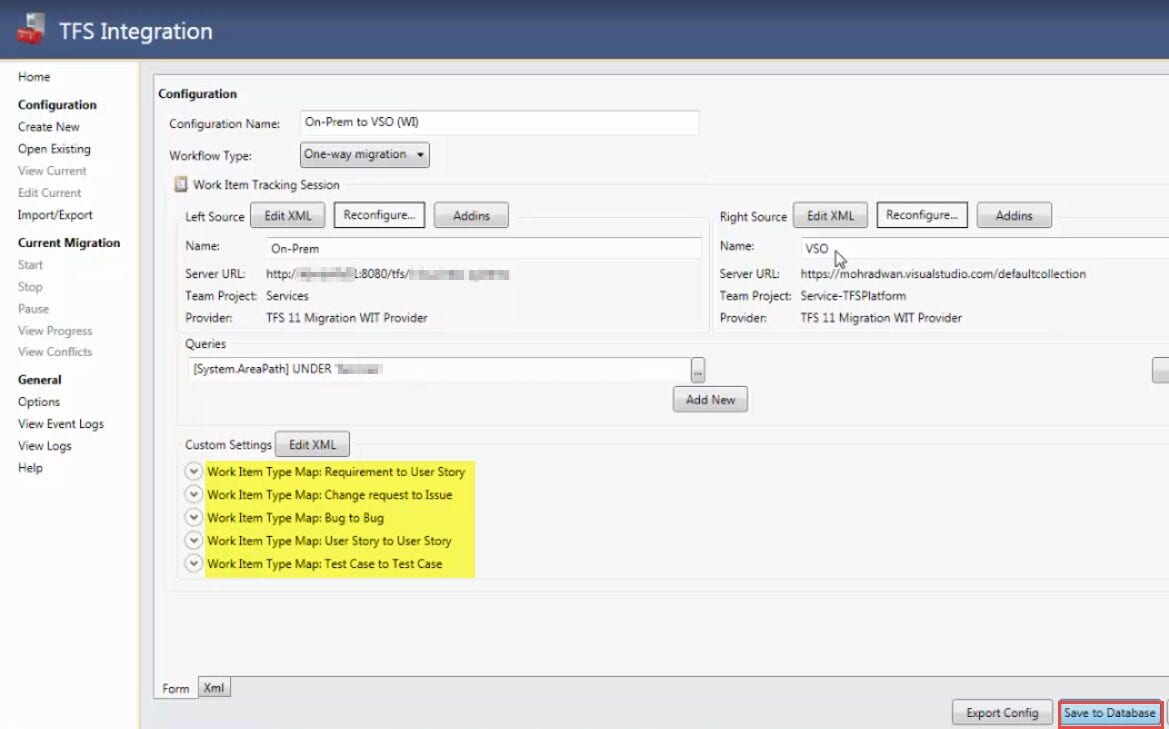
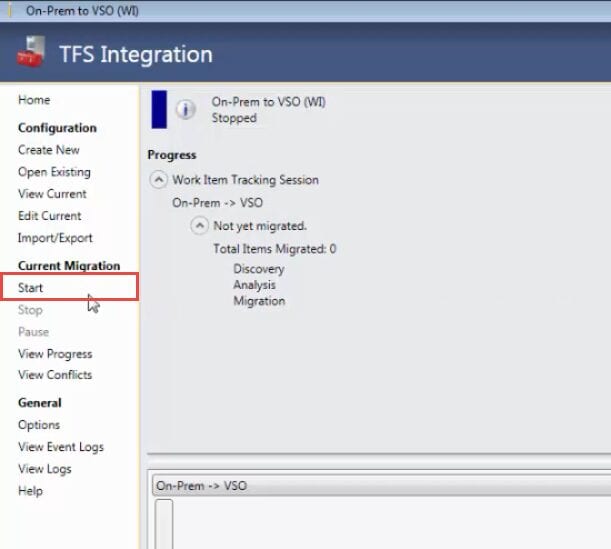
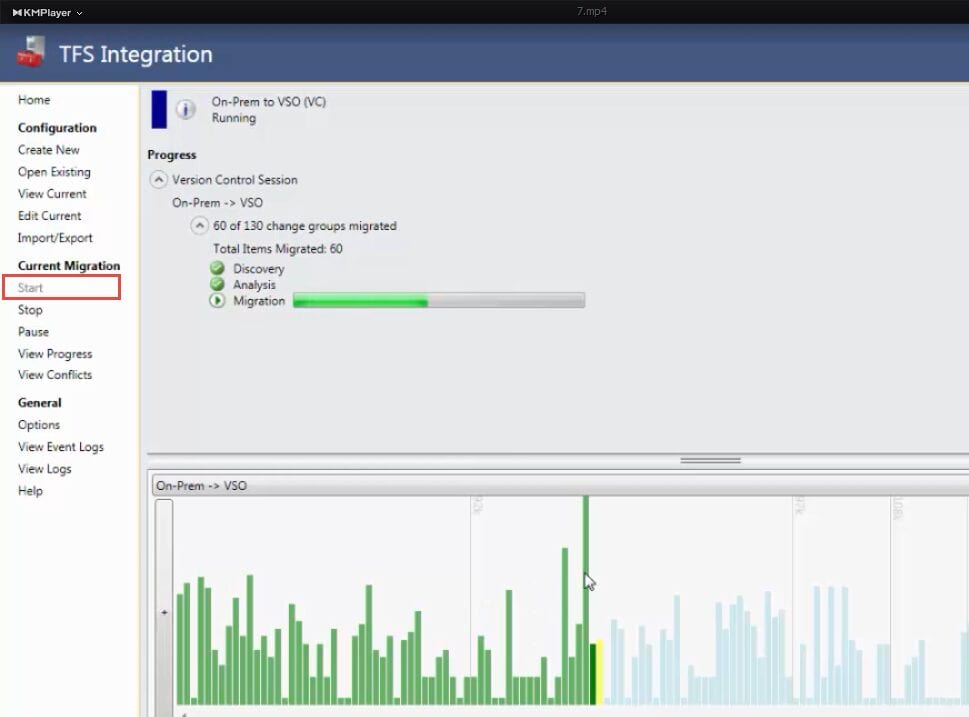
Click on Start
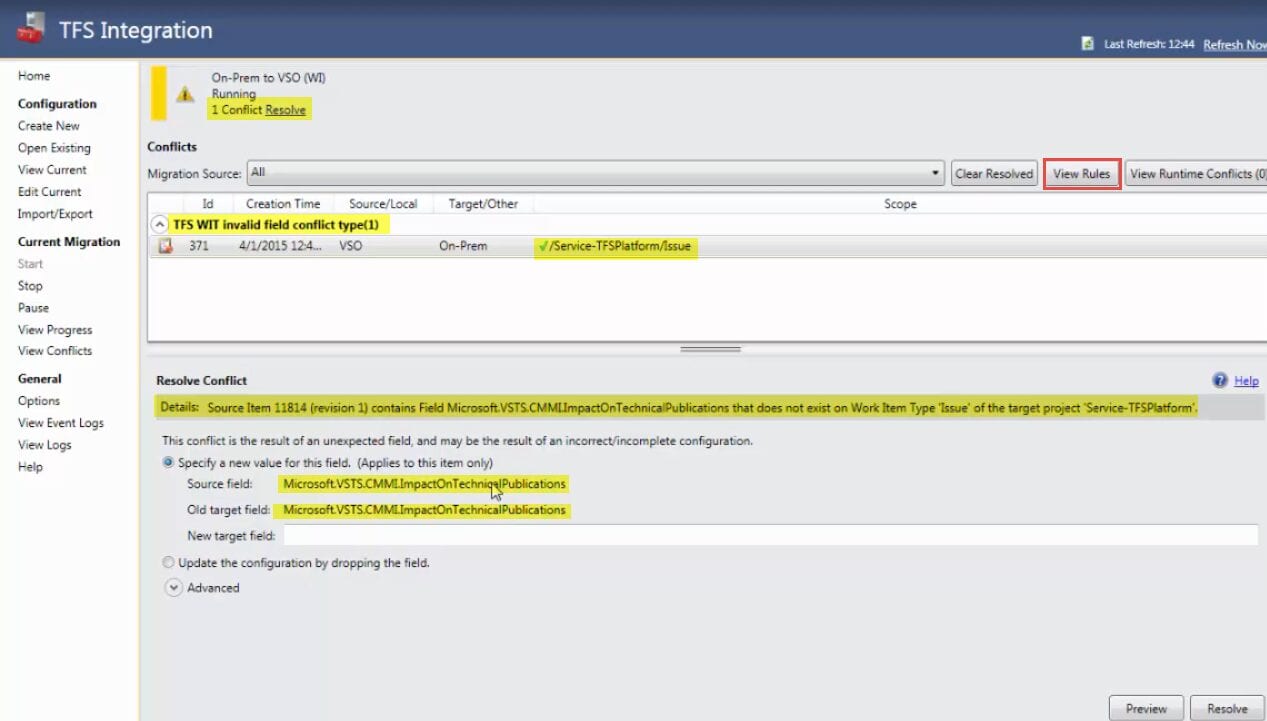
The first conflict raised because a field in a work-item from the source not exist in the destination work-item, we can choose the first option which include typing the field that we want to map source field and click resolve.
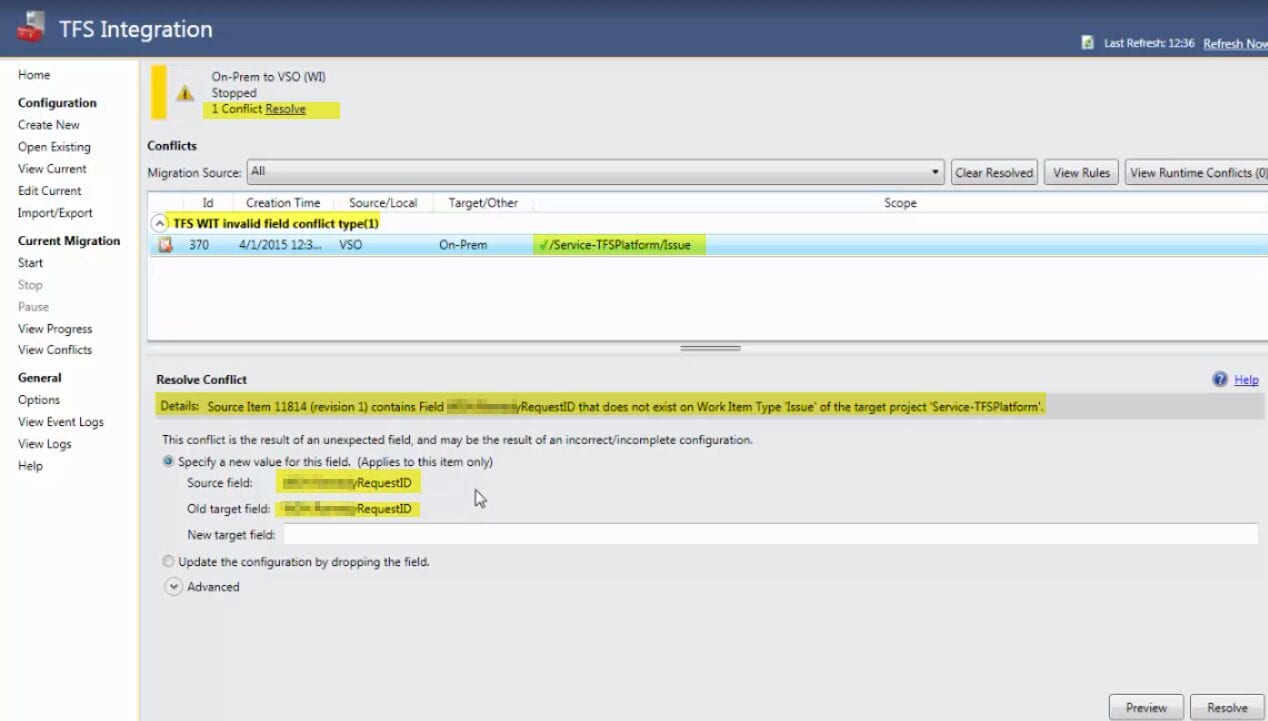
I chose second option to ignore that filed
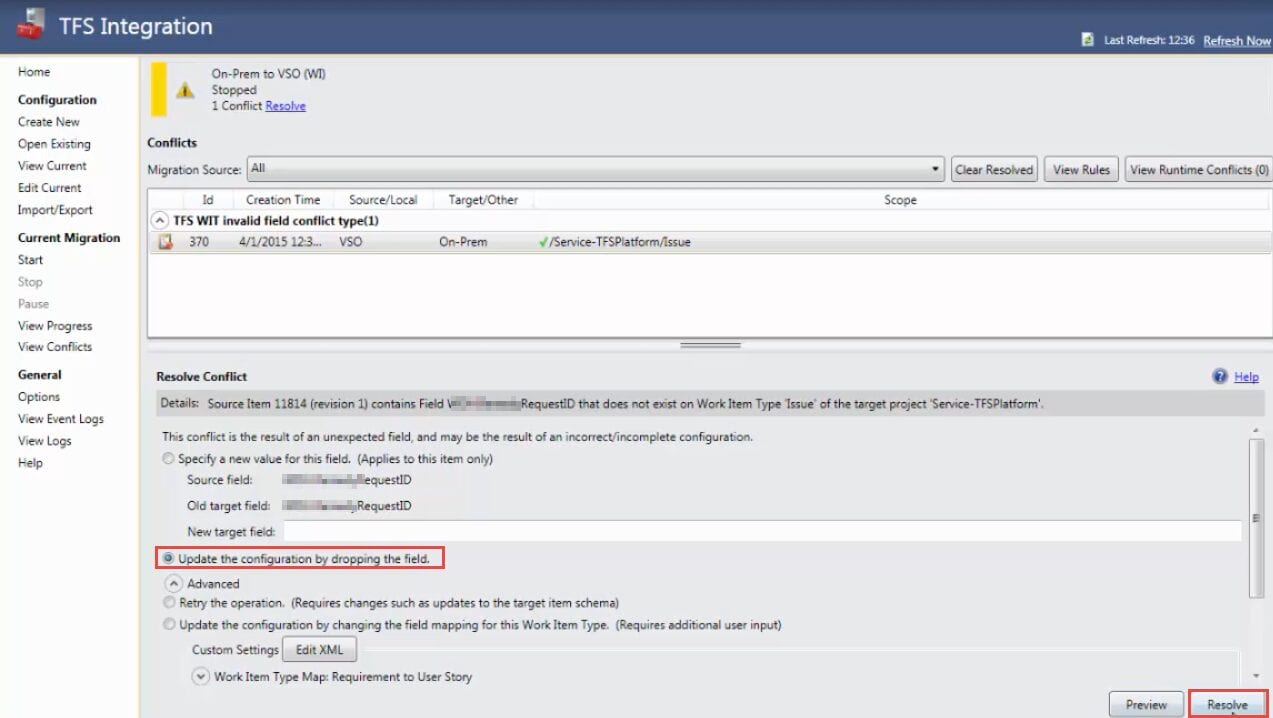
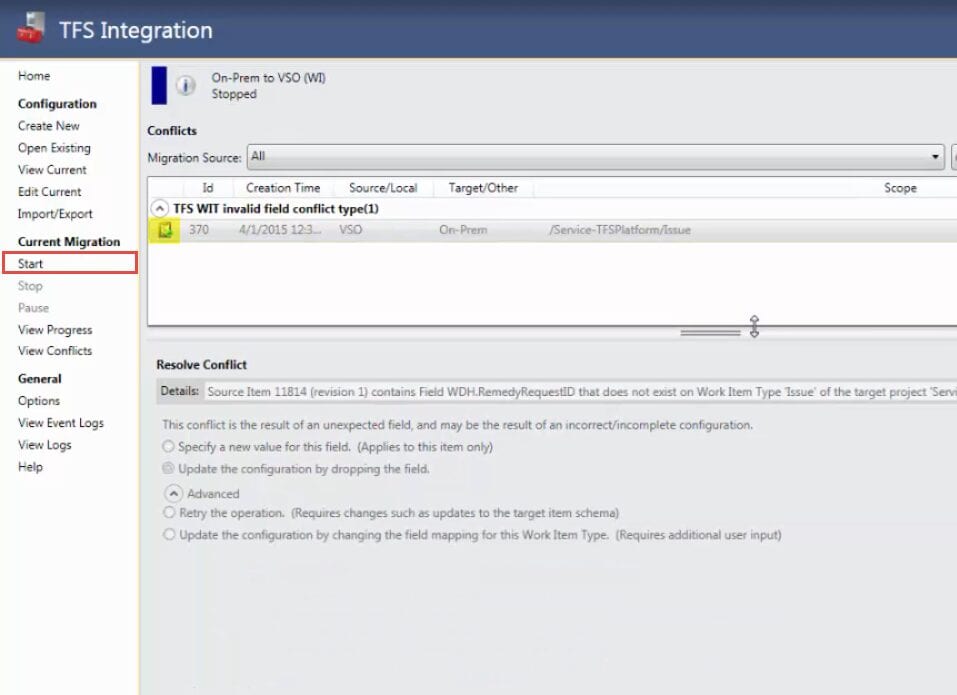
Make sure that the conflict resolved (green icon) and click start
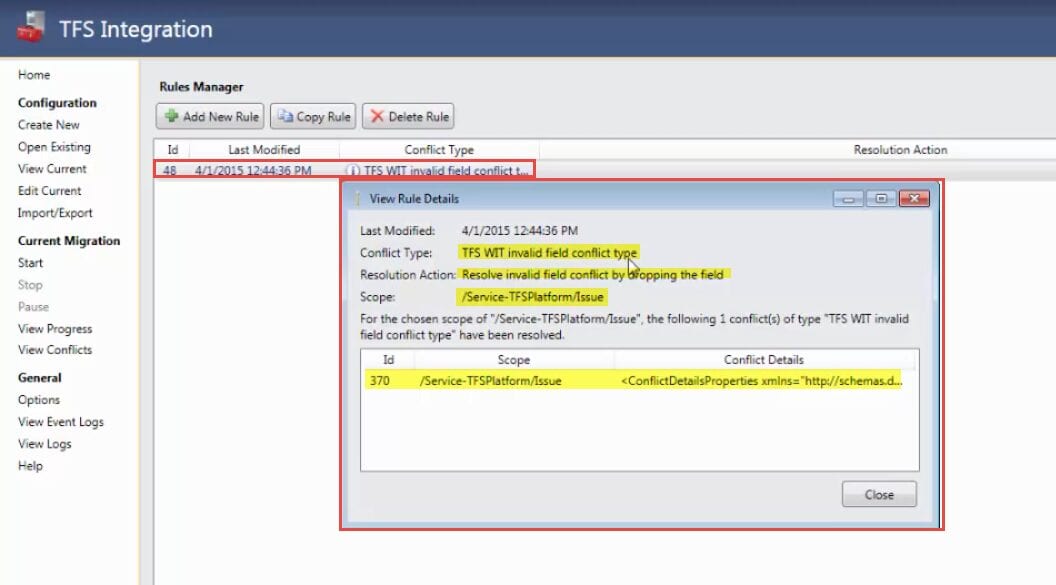
The second conflict raised because the second field that not exist, I will solve this conflict with another way, click on View Rules
Double click on the rule to view the rule details, review the information, take care of the scope that identify where to apply the rule
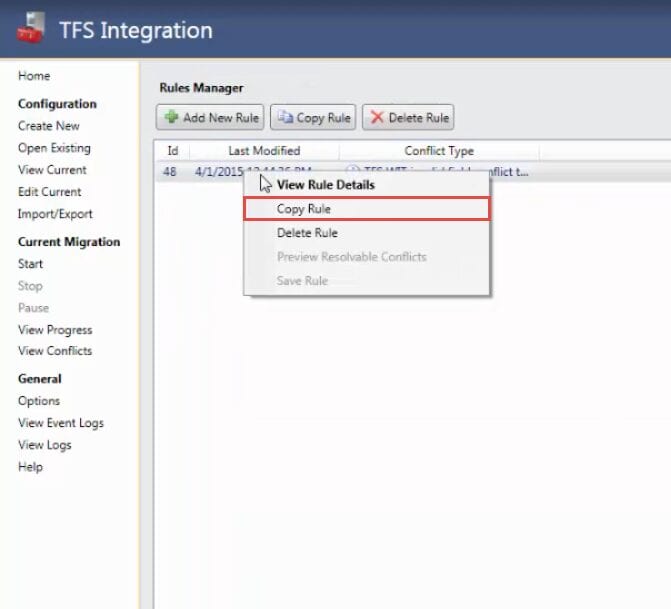
To solve the conflict, right click on the rule and select copy rule.
In the InvalidFieldRefreneceName I will put the name of the missing field, I also put it as the description but this is not important, I will leave the scope with no change as I only need that scope.
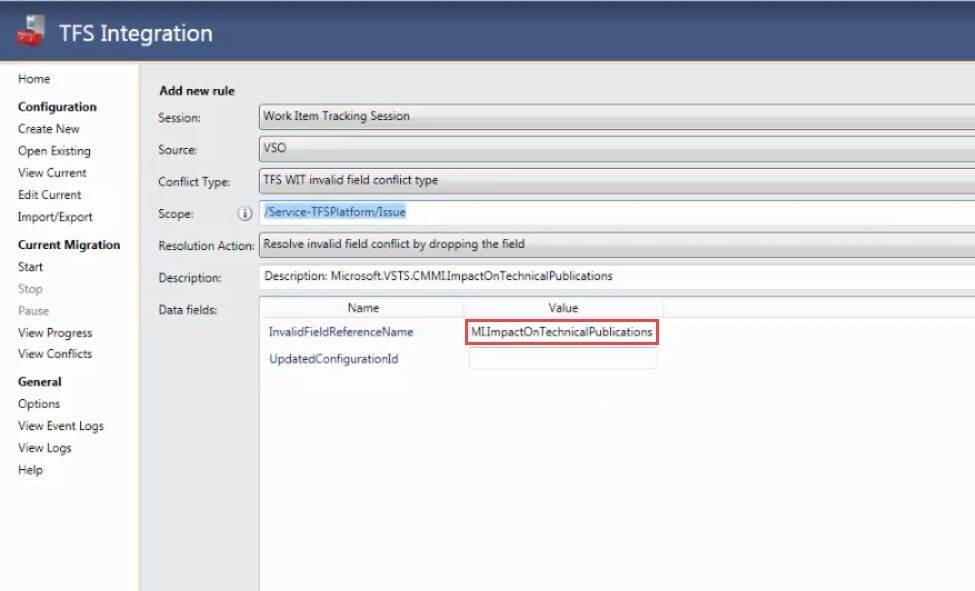
Click preview, this will display all work-items under that scope, select the work-item and click resolve
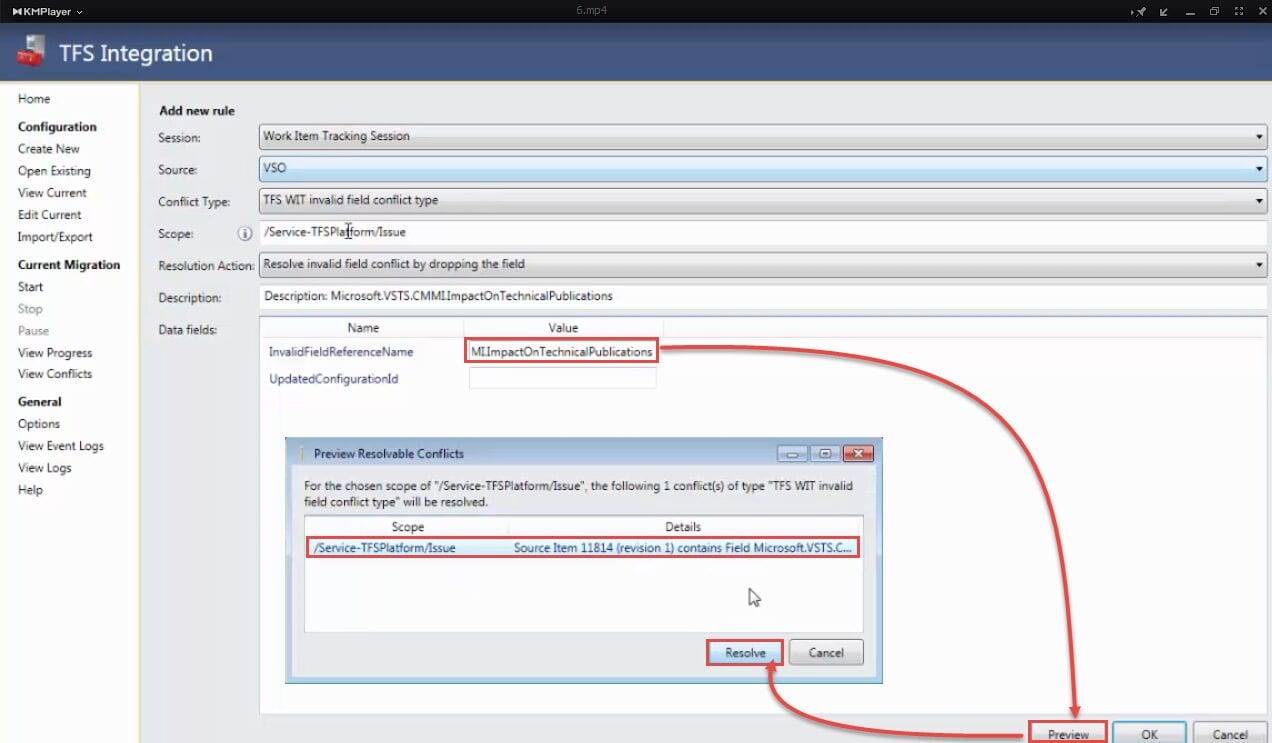
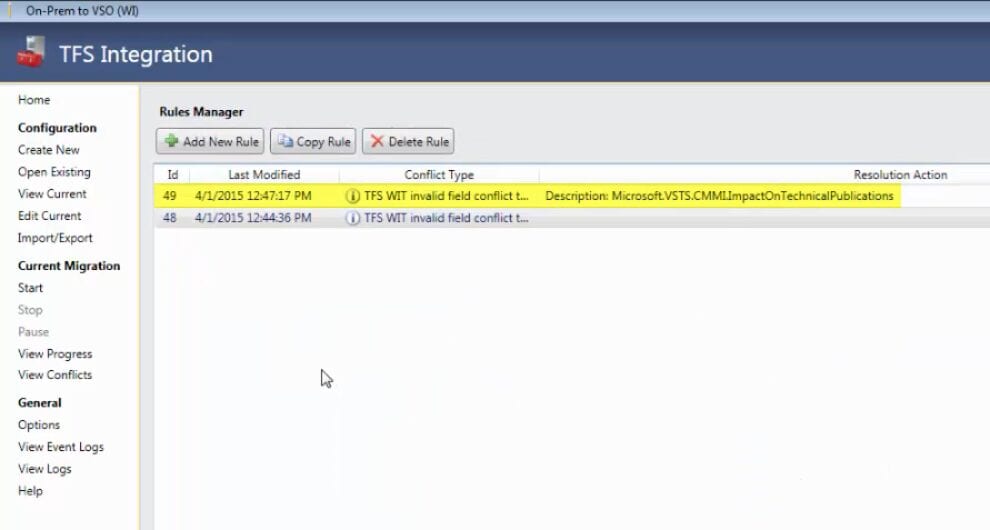
Review that second rule created successfully after resolve the conflict, click start to continue the migration process
[3.Solution Notes:]
- When you resolve a conflict, this built a rule, you may want to create a rule to solve conflict in case you want to change the default scope for the automatically created rule.
- You don't need to restart the migration as the tool can continue for the conflicted items
- Be careful of how to exclude fields in the mapping file
- TFS Integration platform not support new features anymore
[3.Migrating Source control using OpsHub]
[1.Solution Summary]
Just run the free version of OpsHub to migrate the source code
[2.Solution Details]
Make sure that the account that you logged-in and will be used for the migration added in Project Collection Service Accounts group.
Make sure that you have a project with the same name, it's not important to match the process template unless you plan to migrate work-items using the free version of OpsHub too
Run OpsHub and select New Migration
Select the source collection (local) and the destination account (VSO)
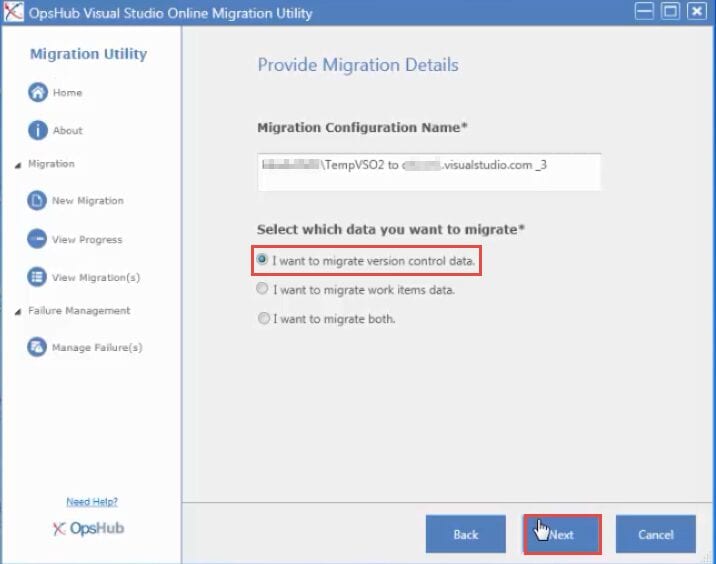
Choose I want to migrate version control data and click on Next
Select the destination project on VSO (Visual Studio Online) and click Next
Map the local users to the online users and click Next
Make sure that the verification running successfully Start the migration Review that the migration ran successfully

[3.Solution Notes:]
- You must add all users with their license before migration take place so we can map them to the local users as the tool only shows the licensed users
- The tool heavily consumed CPU hence it needs a good machine with good CPU and RAM, it took about 3 hours to migrate source code that took only 10 minutes to be migrated using TFS Integration Platform
[4.Migrating Source control using TFS Integration Platform]
[1.Solution Summary]
Just run the TFS Integration platform and migrate the code
[2.Solution Details]
Make sure that the account that you logged-in and will be used for the migration added in Project Collection Service Accounts group.
- Run TFS Integration Platform
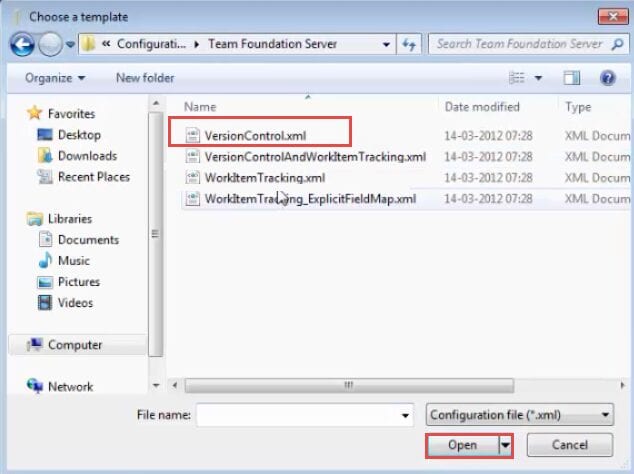
After launching the tool, click on Create New
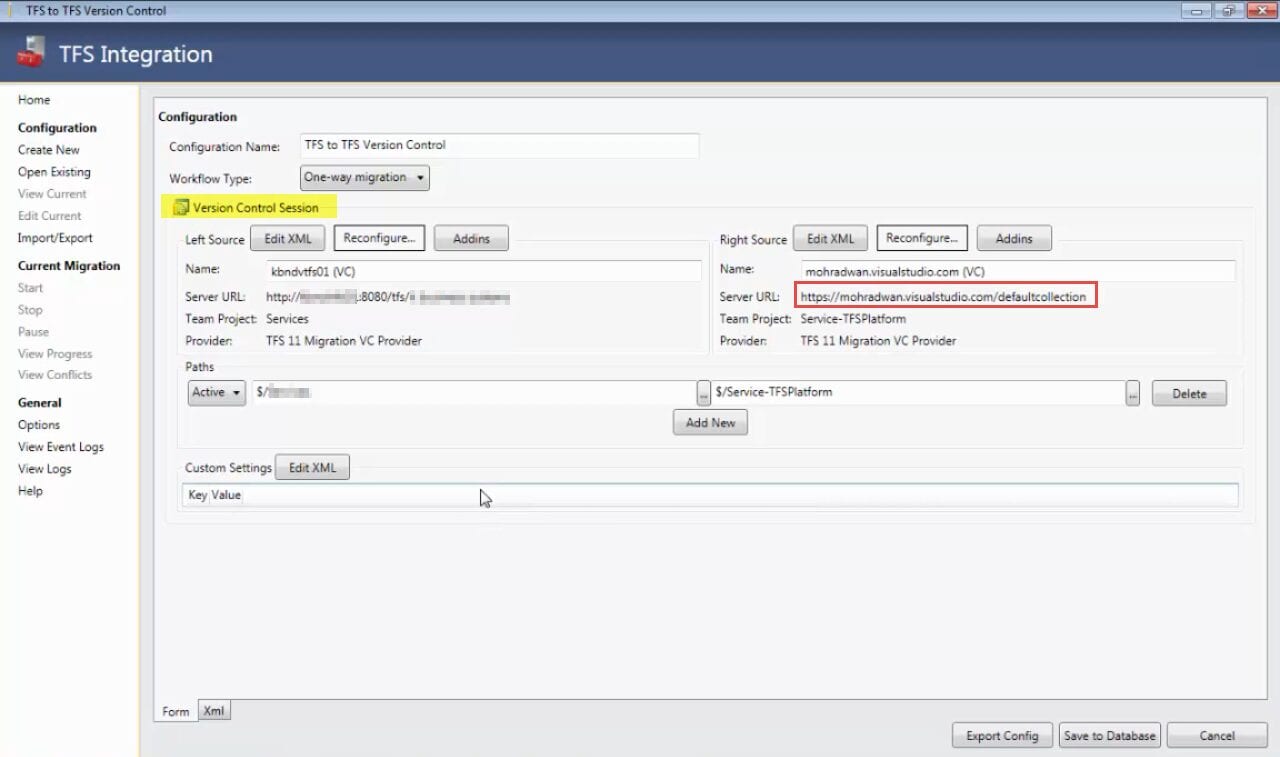
Select VersionControl.xml
In the left side select the source (on-prem), in the right side select VSO (Visual Studio Online), make sure that workflow type is One-way-migration
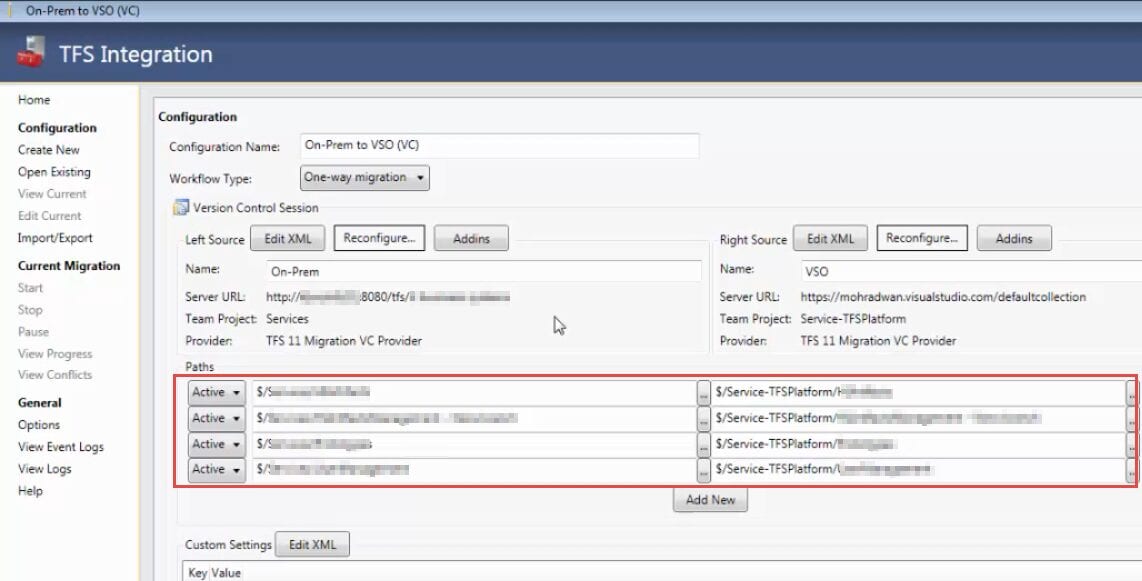
 Because when we create a new project on VSO it create the folder "BuildProcessTemplate", this makes a conflict during the migration as it exists on both sides(Source and Destination) the manual resolve couldn't solve this conflict.

We could destroy those folders on any++side to solve the conflict but I thought it's better to just map all other folders except that one
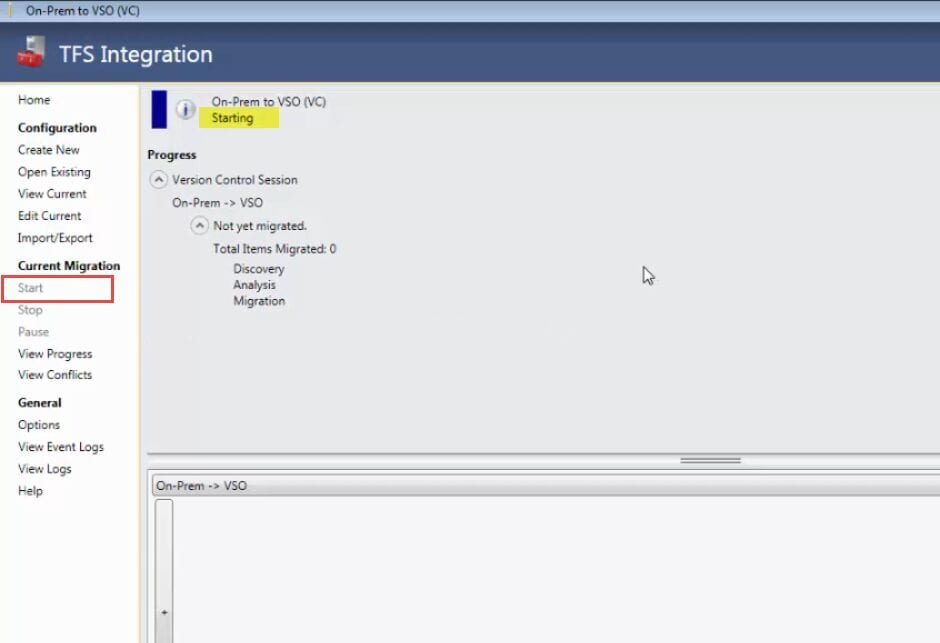
Start the migration
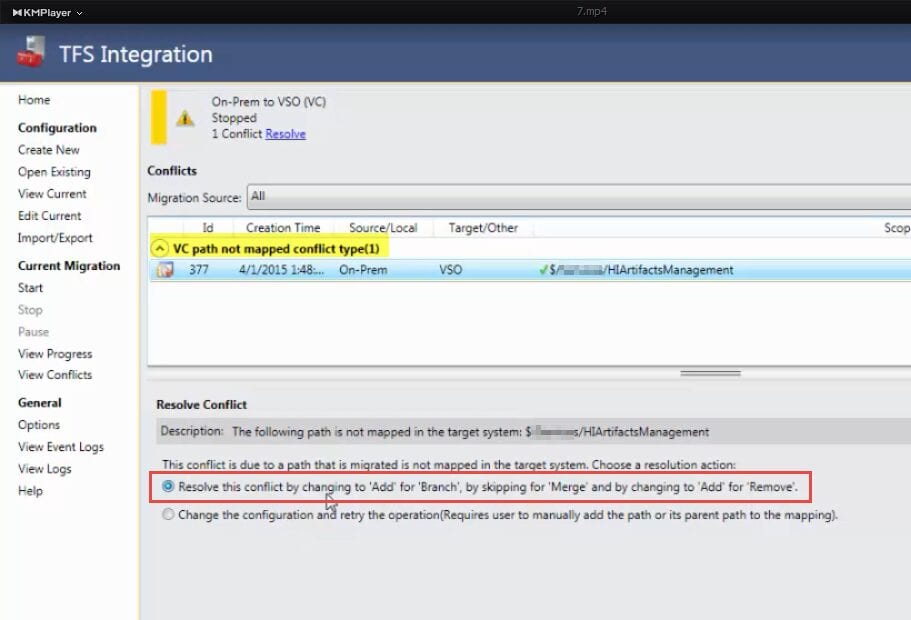
If your source code use branches you may encounter the following conflict "VC path not mapped conflict type" and because we want the history as much as possible, we will chose "Add' for 'Branch', by skipping for 'Merge' and by changing to 'Add' for Remove" and click resolve. Remember that we could change the resolving scope by create a rule instead of resolving by applying the automatic rule
Continue the migration by clicking on Start
[6.Overall Notes:]
WARNING: Always do the migration on a test environment first before you ever touch production and before touch the production always backup first. It's recommended that developers test the migration on a testing environment before making the live migration VSO (Visual Studio Online) doesn't support multiple collection yet but we can create multiple accounts that has different default collection
[7.Links:]
Migrating On Premises TFS to VS Online (Brian Harry) Migrating Your Data from TFS to Visual Studio Online with New Free Utility from OpsHub (Ed Blankenship)
Migrate team projects from on-premises TFS to Visual Studio Online MSDN)
TOC: TFS Integration Tools Blog Posts and Reference Sites TFS Integration Platform - Summary of Links How to Assign licenses to users on VSO How to integrate VSO with Azure AD