
Introduction
In this post, I am going to write more about how your team can get started with agile work planning using Azure Boards. We will take a tour through Kanban boards, backlogs, and more to show you how to get started and how Microsoft is helping agile teams manage their work.
For more information about how to work with Git using animation, with all commands represented in graphical animation (e.g., git branch, git merge, git rebase, git cherry-pick), see Mastering Git with animation
Plan your work with Azure Boards
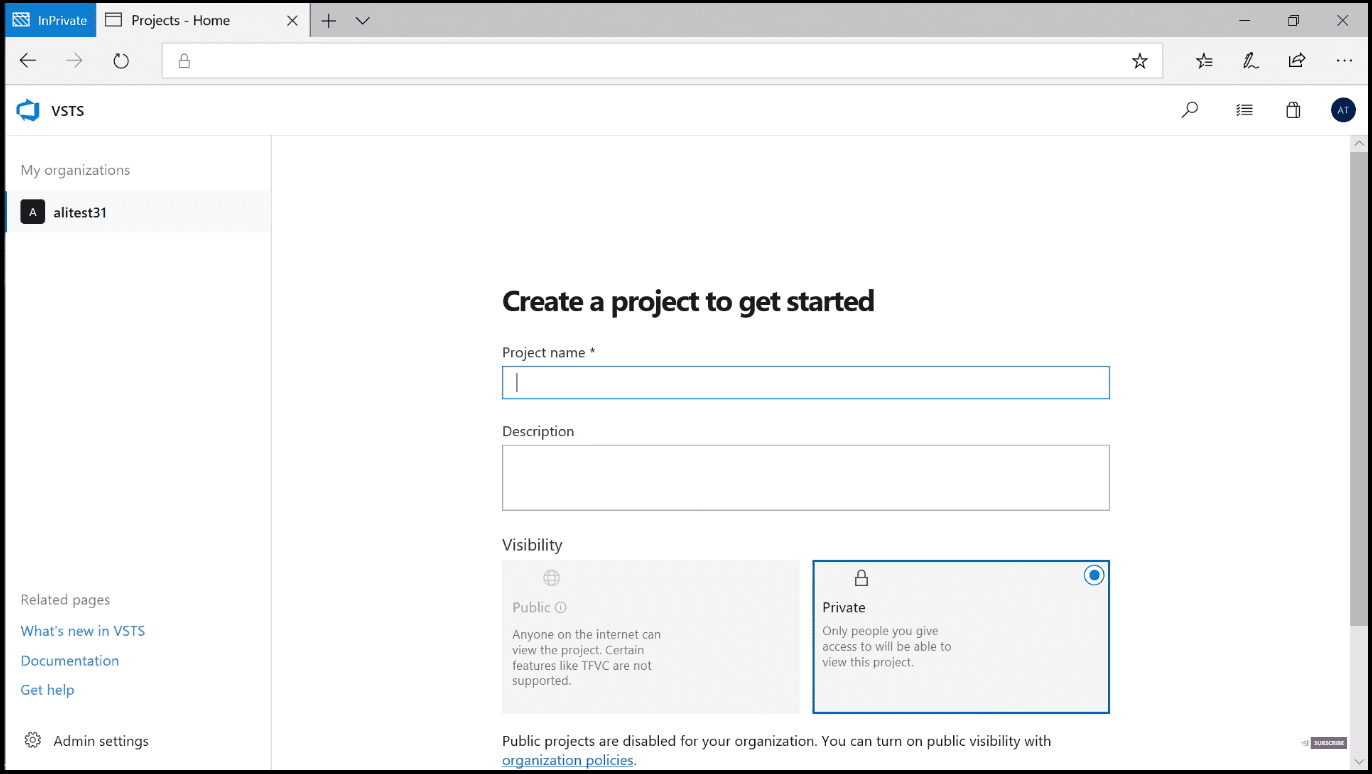
In this part, I am going to show you how easy it is to set up your boards for your team. First, you need to go to dev.azure.com, where you can sign up for Azure DevOps for free. Log in with your credentials. Then choose your project name as displayed in Image 1. Additionally, here you can choose the privacy of your project to be public or private. If you choose to be Public, anyone on the Internet can view the Project, but if you choose Private, only people you give access to will be able to view the Project.
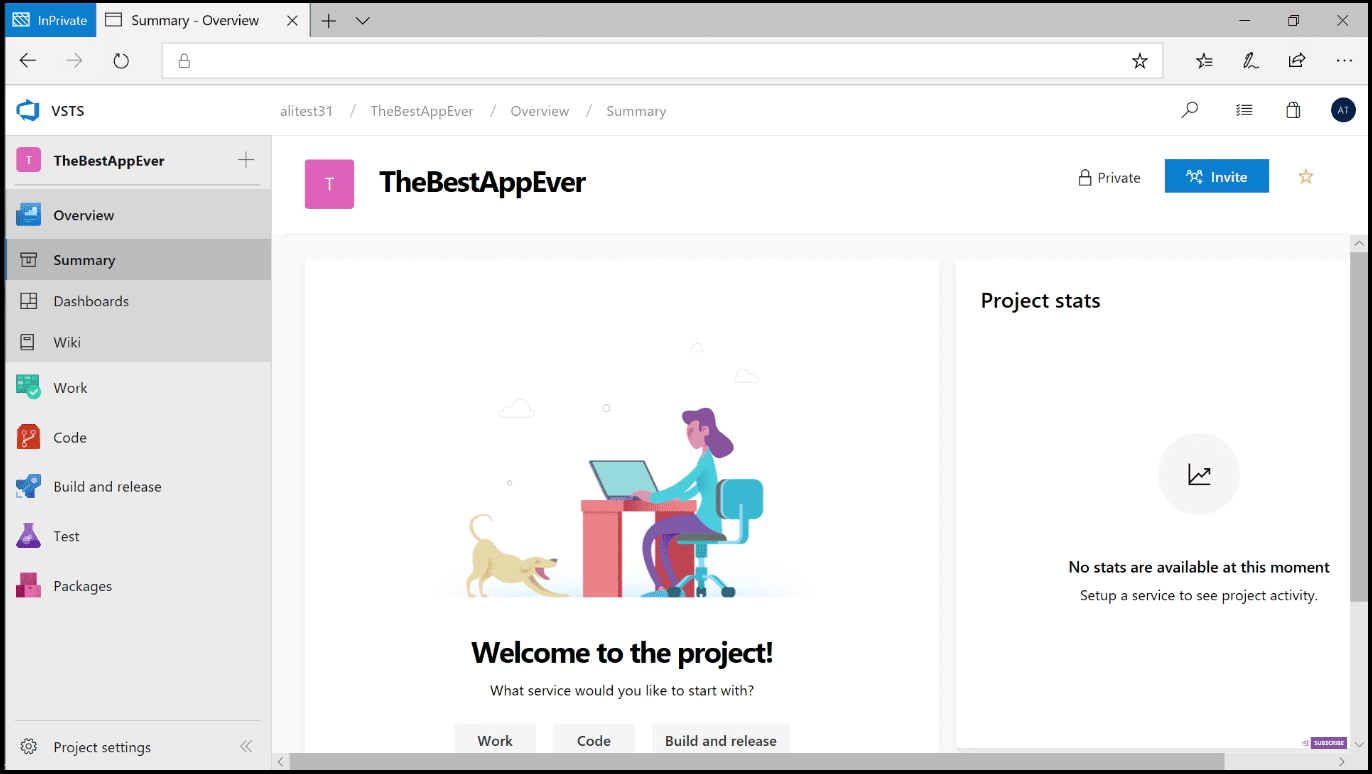
After creating your project, the Summary page will be displayed (image 2).
Next, go to the Boards section of Azure DevOps located in the Work menu, and you can start adding work. To add a new item, simply click the plus button and type a title onto the card (image 3).
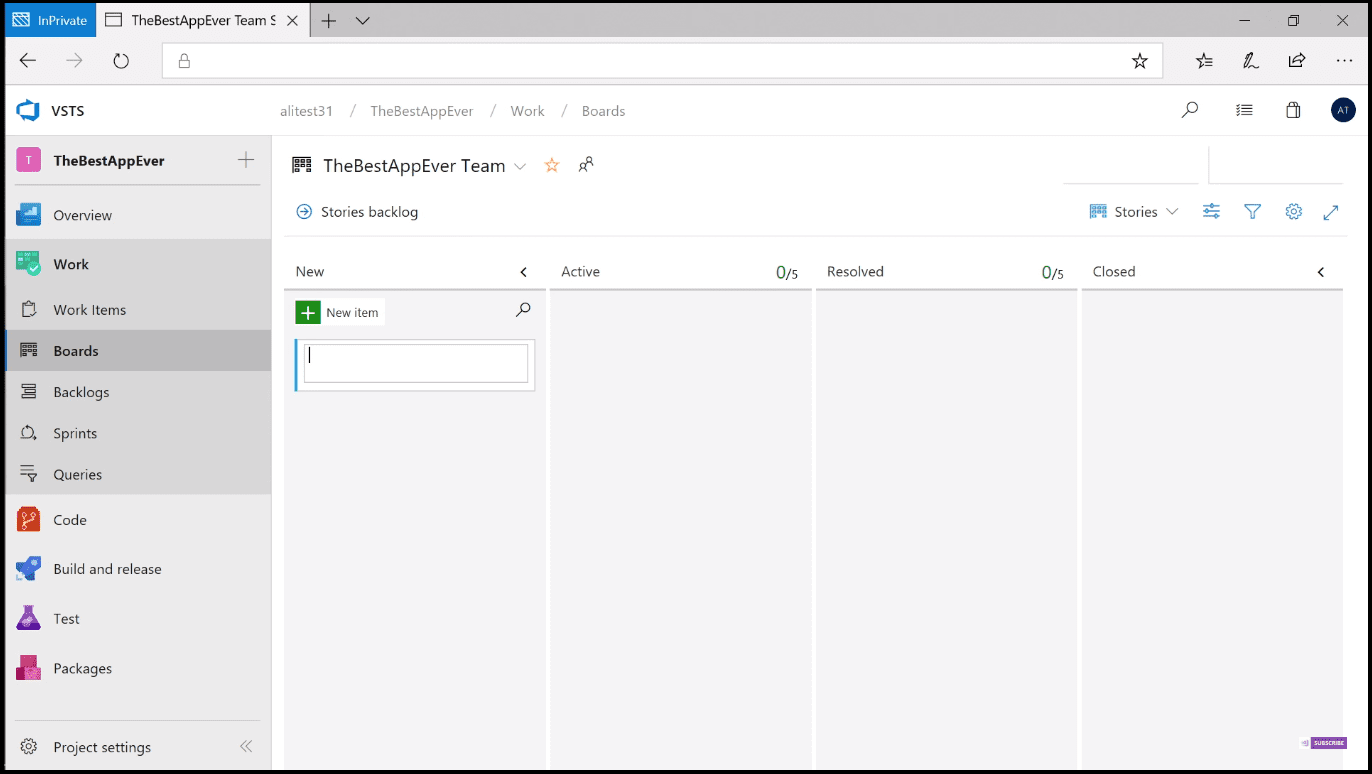
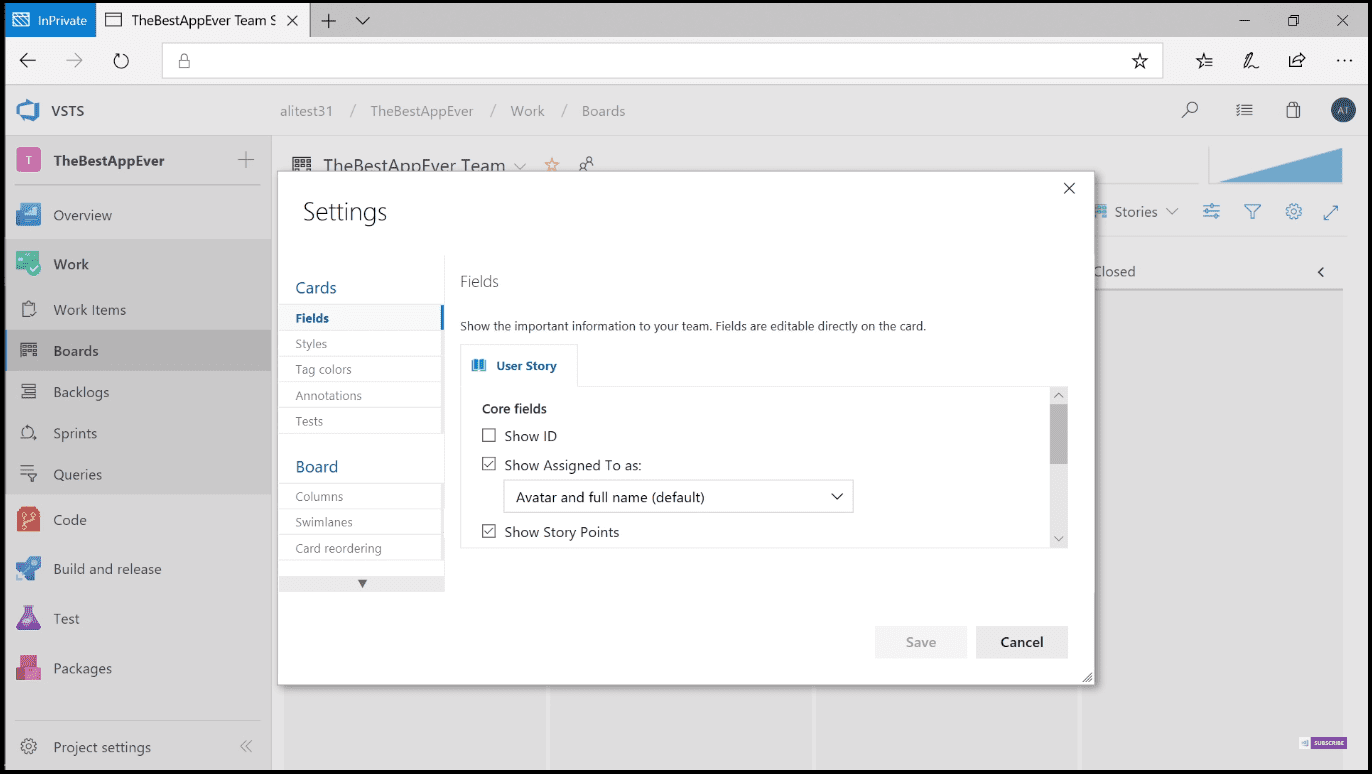
You will notice that it is added to your column called New. After creating some more work items, you can move them between columns like Active, Resolved, Closed, etc., to visualize the various states that make sense for your project. You can also customize your columns by clicking on the Configure team settings button and what shows on the cards so they make sense for your team (image 4).
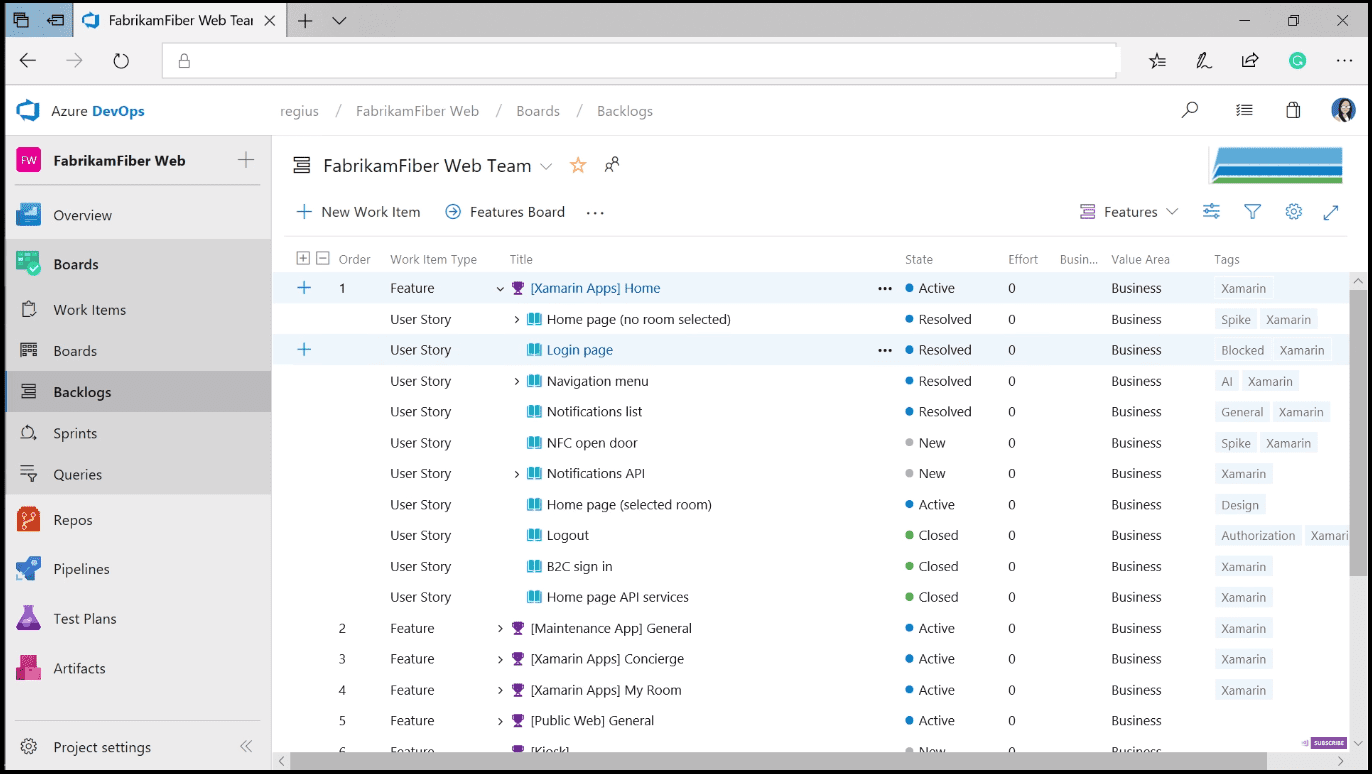
On the next image, you can see an already prepared project with lots of work items in various states (image 5).
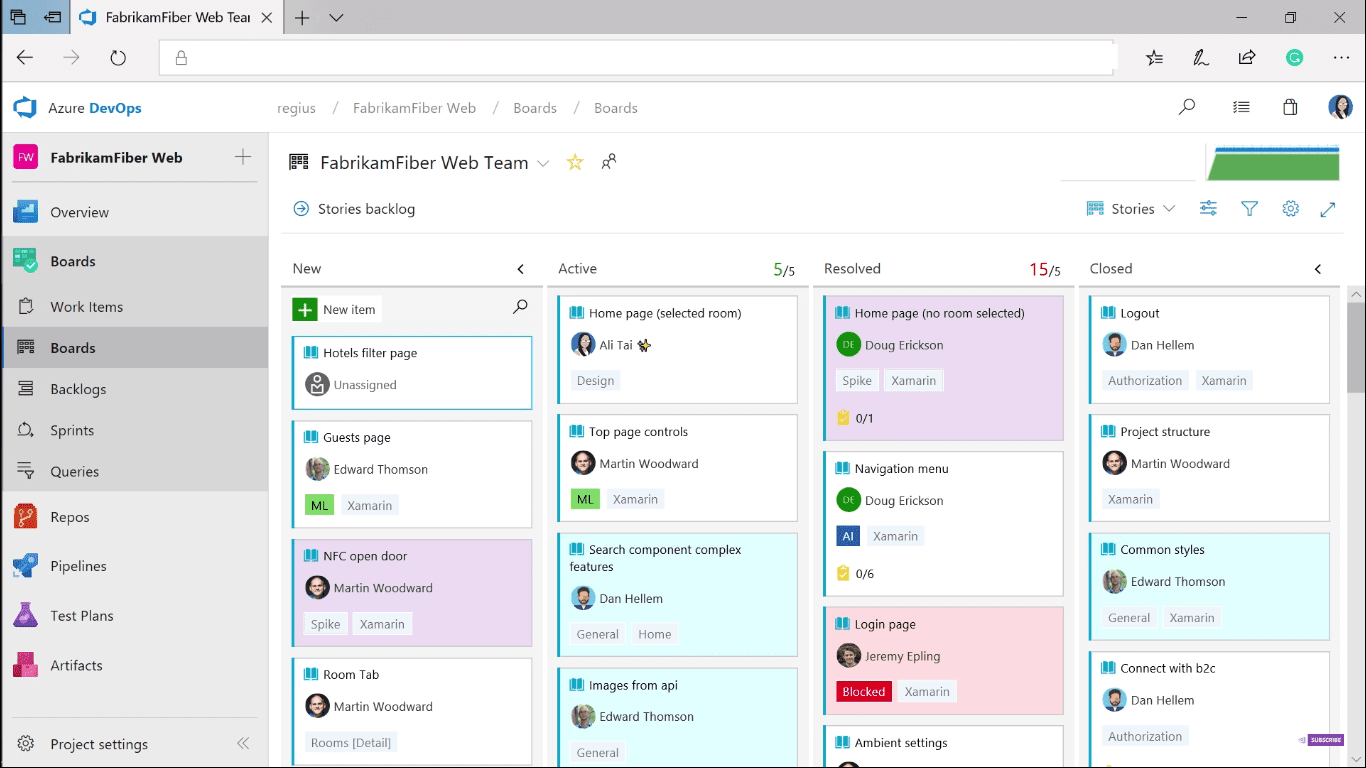
For each work item, you can see the name of the work item, who it is assigned to, and its tags. Some of these fields can be updated directly from the board (image 6).
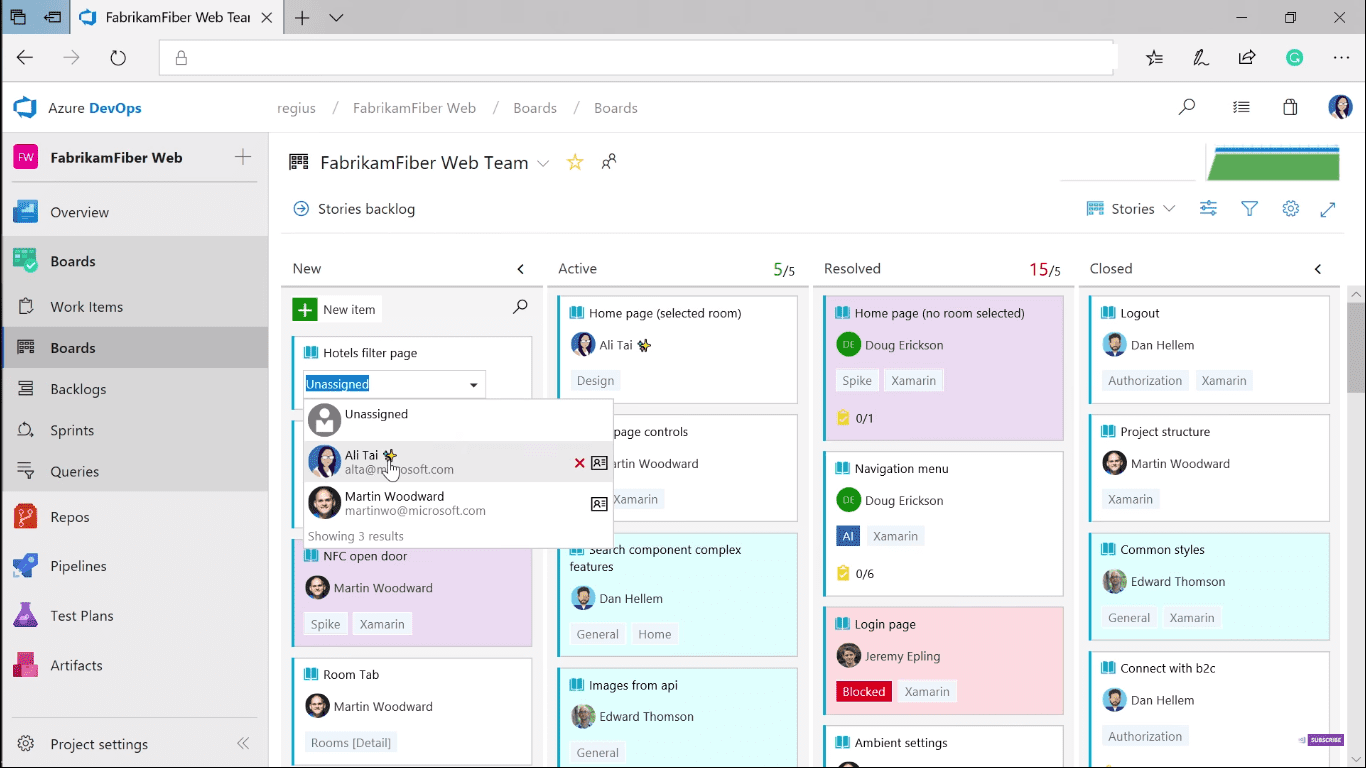
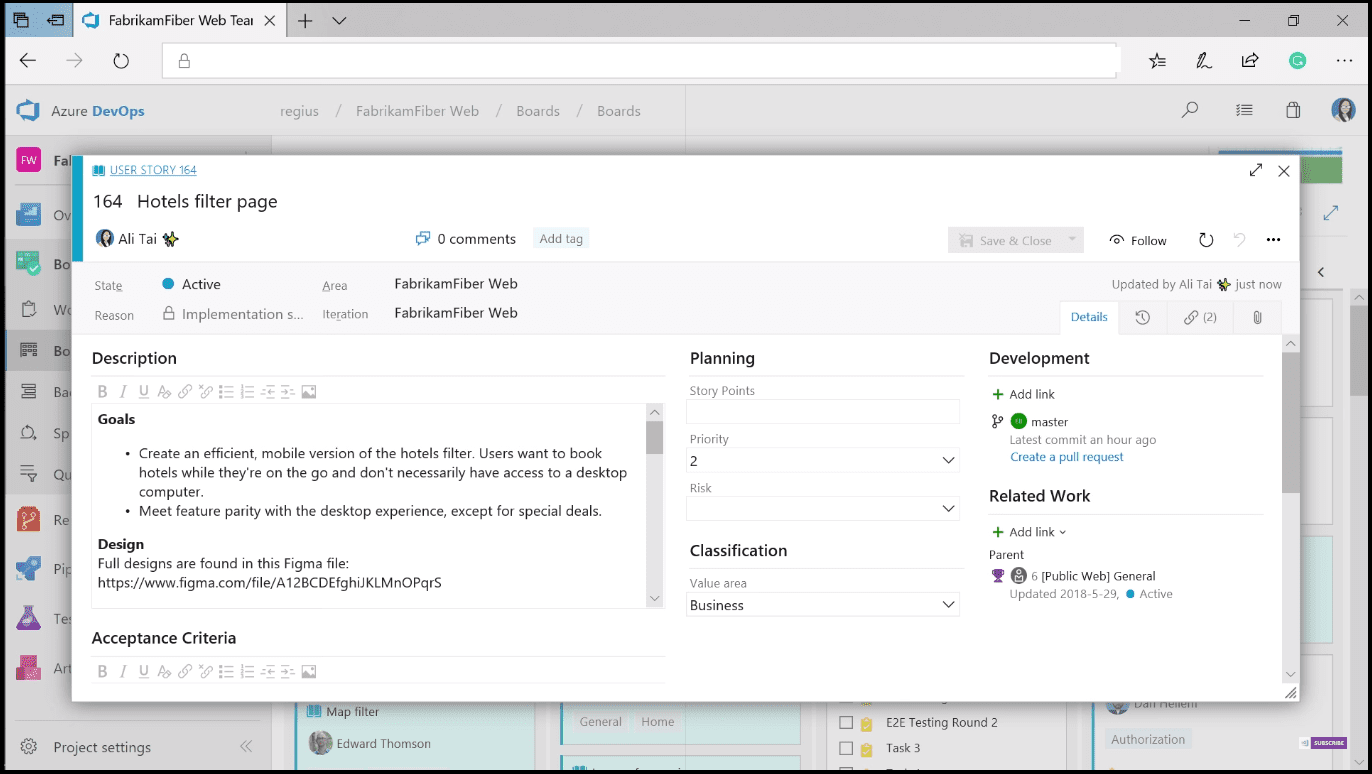
Additionally, you can set up some display styles, which you can use when you need a higher level of visibility. For example, we have a style set up to highlight cards in red when they have the blocked tag to help get that work unblocked as soon as possible. You can move any of your work items between the columns to visualize the progress of your work. You can also add a series of tasks and have them show up on a card for lightweight tracking to support work elements of a story. Each of these cards can also be opened up for more details, so that you can add as much information as you need. You can use the work item to hold formatted details, images, and links to other work items in the project. You can also customize the fields on your work items to meet your team tracking needs.
For more information about how to work with Kubernetes clusters and deploy them to Azure Kubernetes Service (AKS) and work with Azure Container Registry, see Kubernetes cluster for beginners
Build your board and backlog
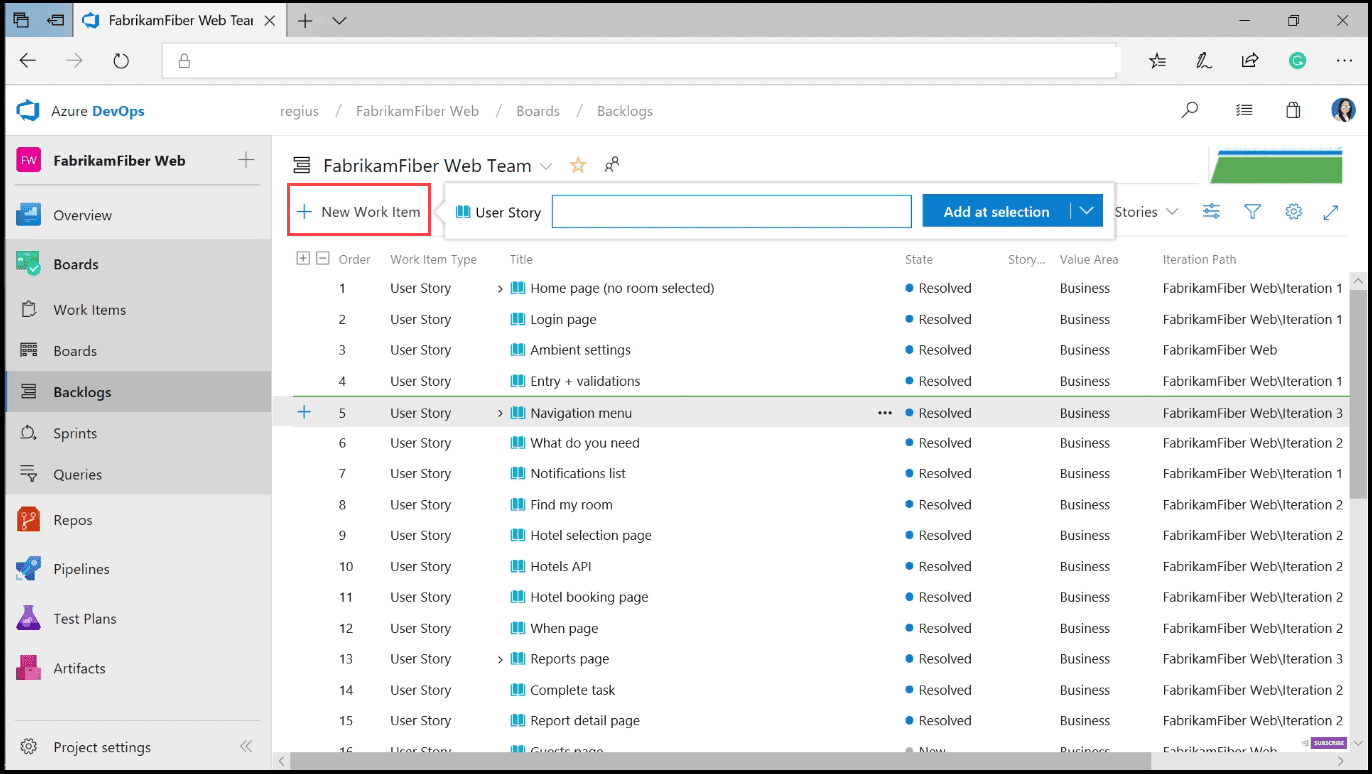
Each of the boards also has a backlog associated with it, where you can prioritize all the work that you have. Reordering on your backlog is as easy as drag and drop. You can also add a new work item by clicking on the plus button New Work Item (image 8).
There is also a view above this user stories backlog features, which lets you get a higher-level view of the work being done and ensure that you have cross-team objectives. You can switch to this view by clicking on the drop-down and choosing Features instead of Stories. Each of the features listed in this view can be extended, so you can see what related user stories are happening under it (image 9).
Run a sprint
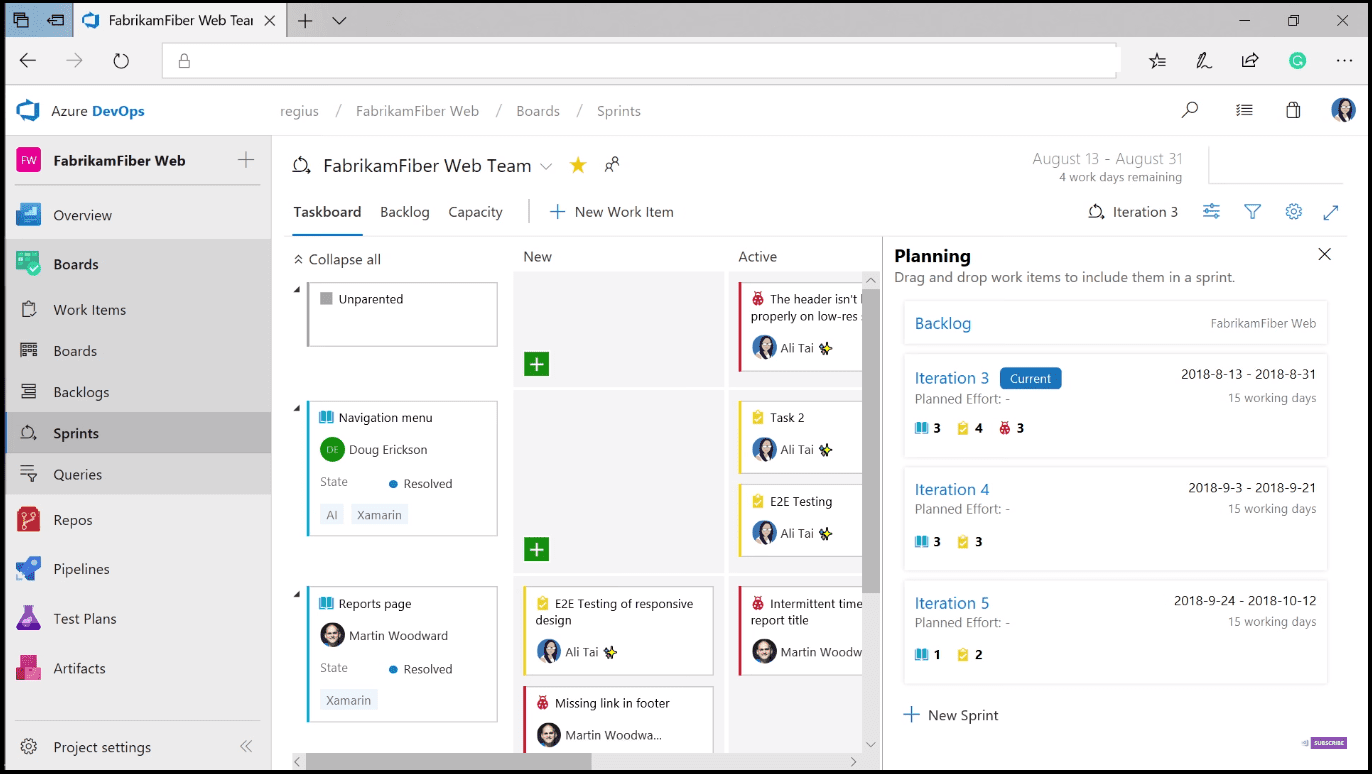
For each of the user stories that you define, you can see the iteration or Sprint view, where you can create tasks for each story and visualize the progress being made on them in the current sprint. If something just is not going to make it in this sprint, you can drag it over to a different sprint plan in the planning pane displayed on the right (image 10).
Like other boards, each sprint also has a backlog view where you can easily see stories split into their tasks that have been scheduled into the sprint. You can also prioritize those tasks and stories and schedule tasks into other sprints as necessary.
Track important work
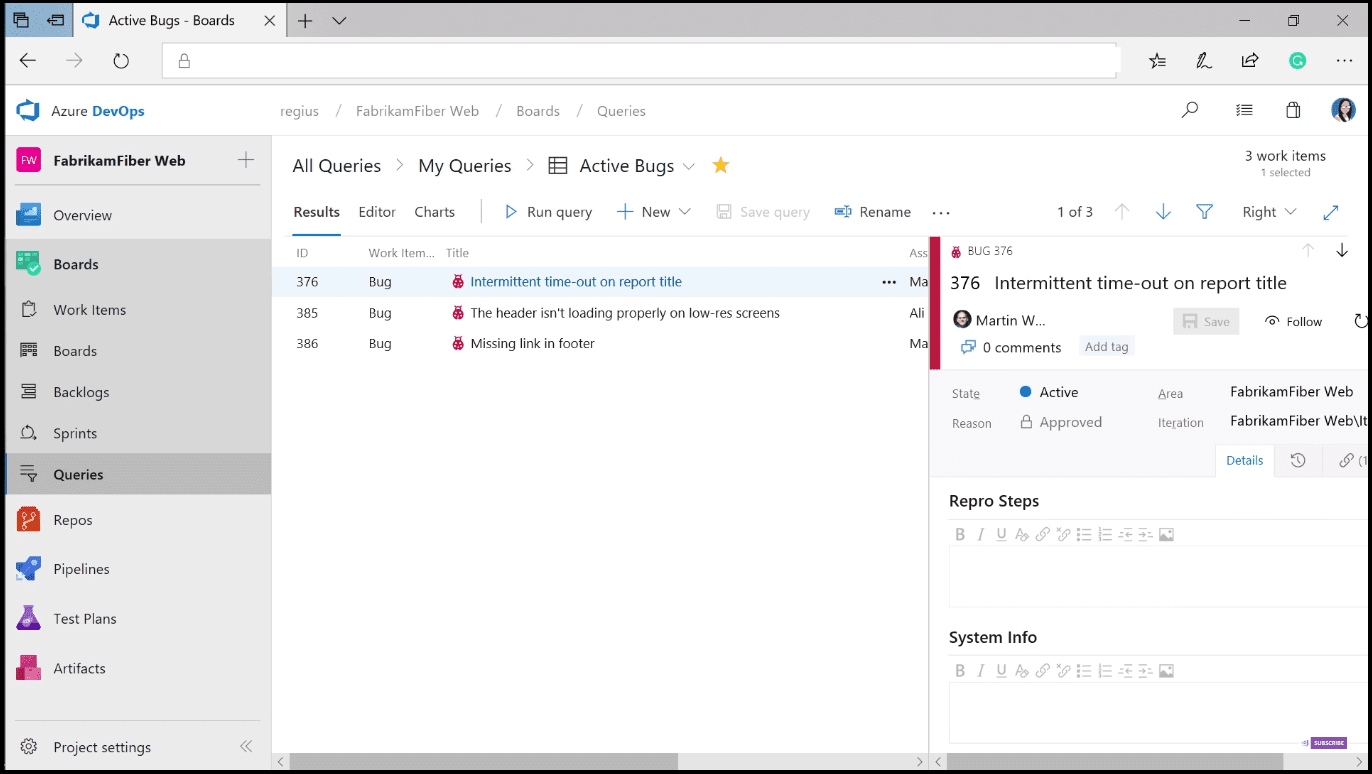
You can also track the work going on using Queries (image 11).
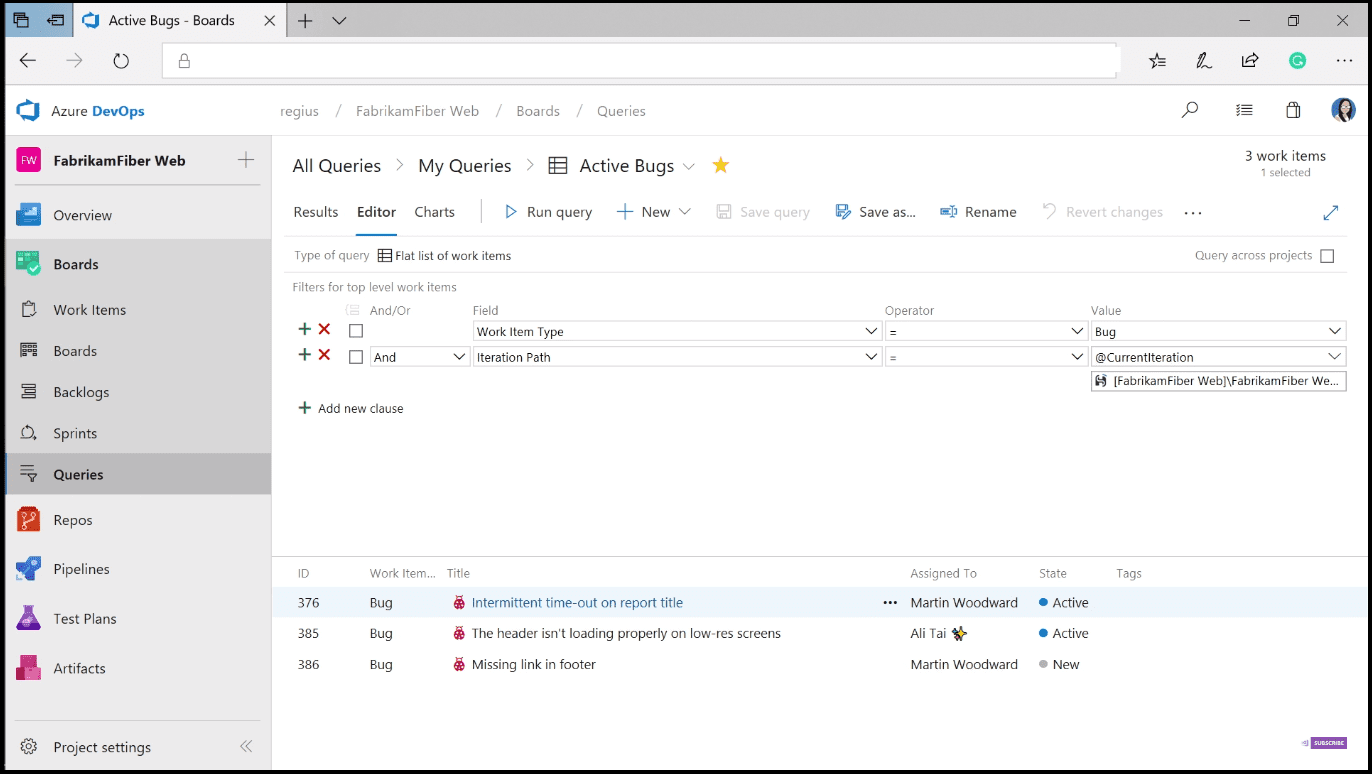
Now I am going to show you how to create a query that will grab all of the active bugs under the current iteration. First, click on the Editor button, choose Field - Work Item Type with Value - Bug. Add one more Field - Iteration Path with Value - @CurrentIteration (Image 12).
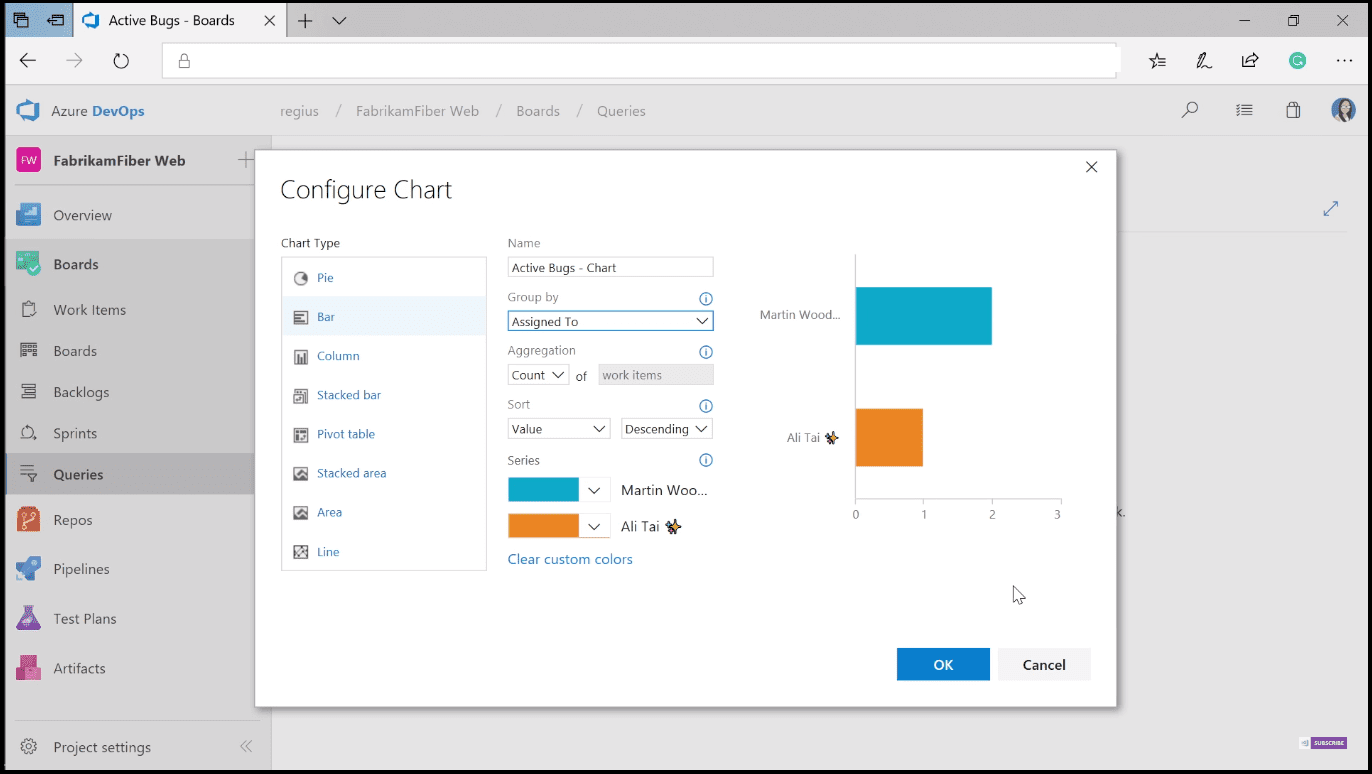
You can create as many of these queries as you want and easily share the results with your team. One of the ways that you can share the results is by creating a chart, which visualizes the work. In image 13, you can see setting up a chart that shows the count of who the previous bugs are assigned to. Now you are able to see how many bugs each engineer has to fix before the end of the sprint.
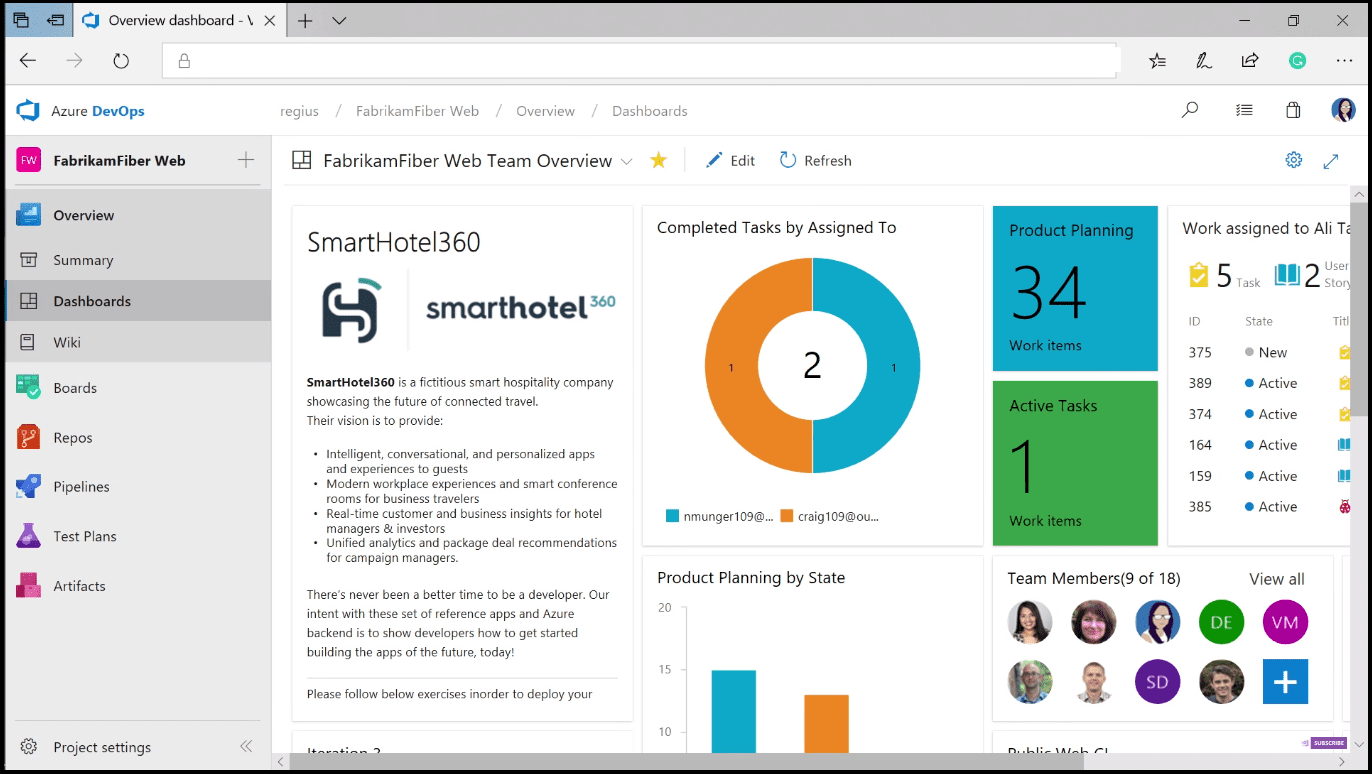
You can also take the created charts and pin them to your team’s dashboard. Just click on the Dashboards menu, and you will see a tailored view for your team, where you can share information and monitor progress to help inform workflow improvements (image 14).
Conclusion
That was just a quick look at how you can plan, manage, and track work in Azure Boards. You saw how to combine drag-and-drop sprint planning and flexible work item tracking with comprehensive traceability to have the perfect home for all your ideas, big and small.