Introduction
Release Management is DevOps solution for Visual Studio Team Services and Team Foundation Server. Can help you automate software deployment and testing in many different environments. With Release Management, you can either have full automation of software or partial automated processes, with approvals and on on-demand deployments. This is really important element of DevOps which helps teams to continuously deliver software faster and with lower risk.
You can find more information about DevOps in the following post: DevOps: The Three Stage Conversation - People, Process, Products which describes the basic principles of DevOps. This post will be especially helpful to those for whom DevOps is still a new concept. If you prefer a deeper view on this topic, have a look at the following guide: quick guide about Basic Principles of DevOps, which presents an overview of DevOps process and practices, describing “the big picture”, while still maintaining the high level of detail.
If you would like to know more about the best practices for DevOps, Continuous Integration and Continuous Delivery, you can have a look at the following post: Configure CI (Continuous Integration) and CD (Continuous Delivery Pipeline).
Part 1: Features in Release Management
In this part I’m going to describe some important features in Release Management. It’s very important to know that it can help you to automate your deployments and to set up continuous deployment. You can deploy regularly through different production environments using managed workflows and even to multiple platforms. It can use manual or automated steps for approval of workflows and have a great impact on collaboration and transparency between teams. You can also have full trails history as it tracks the status of recent deployments in each of the environments. The control and security are another two important features, as you can selectively restrict which users can manage or just view release entities. Another great feature is to create your own workflows. You can custom PowerShell scripts for deployment and for deployment of Artifacts from TFS and VSTS build.
There are many VSTS extensions designed to make the work process easier. One of them is the Delivery Plans extension providing a better cross-team visibility. Read more about it in my post Delivery Plans Extension for VSTS and learn how to manage more than one team in a much easier way.
You can see this video, if you would like to find more information about a walkthrough introducing the Release Management and Build Automation using TFS 2017/2015. Step by step about all process, starting from creating the project, check in the code in the source control, create a build definition and trigger the build, and also create a release pipeline. Learn how to configure properly the build steps, including Copy Files and Publish Build Artifacts. See how to create new release definition, add environments and link to build definition. Afterwards see how to add tasks to the release definition, like Windows Machine File Copy and configure it properly.
Part 2: Visual Studio Team Services (VSTS) vs. Team Foundation Server (TFS)
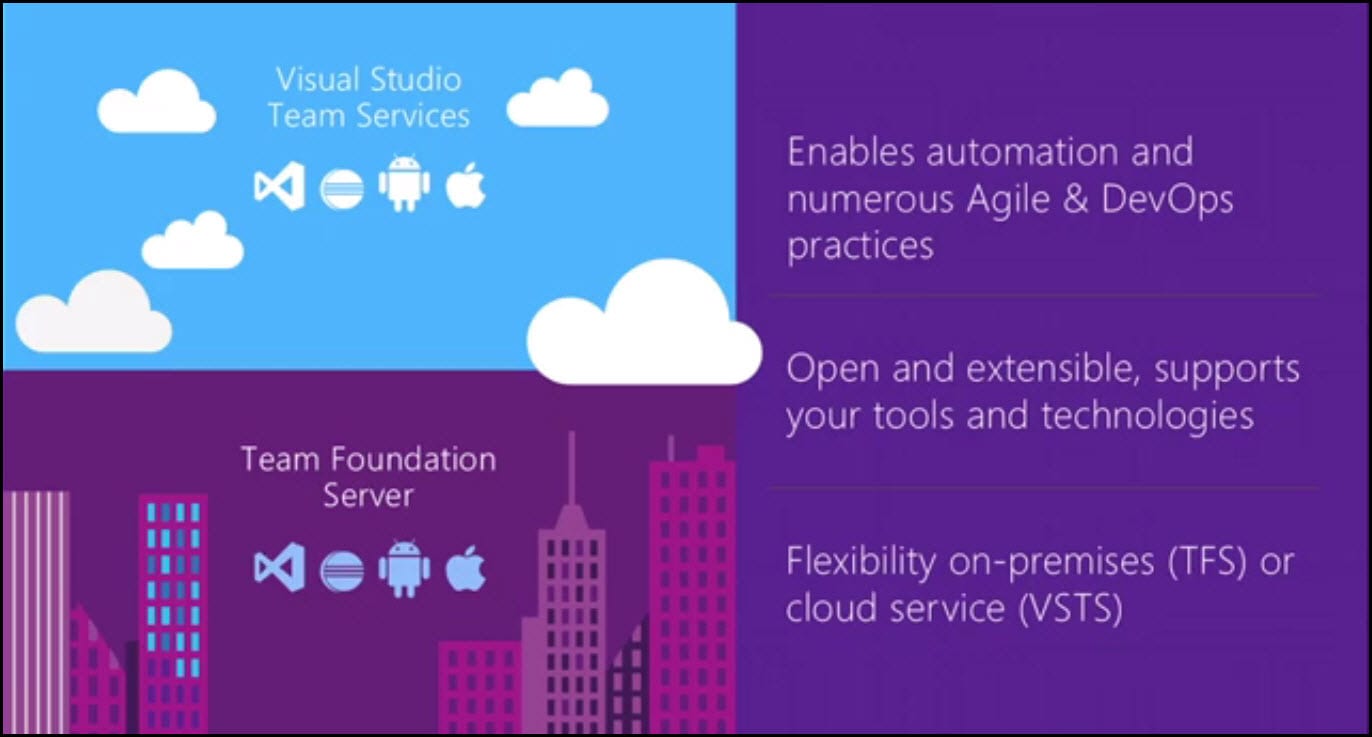
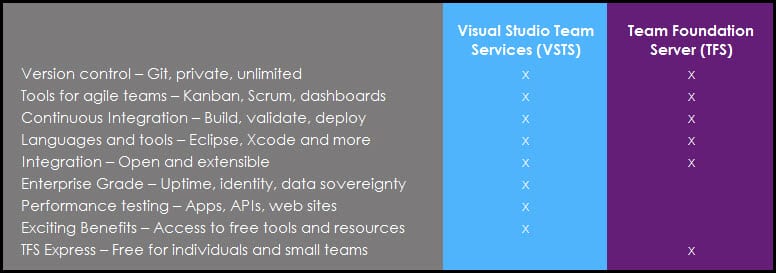
Team Foundation Server is available in two different forms: on-premises and online. The latter version is known now as Visual Studio Team Services (before it was Visual Studio Online or VSO). The cloud service is supported with Microsoft’s cloud platform, Microsoft Azure. It uses the same code as TFS on-premises and implements the most recent features. For Visual Studio Team Services you don’t need any setup. You just need to sign in with a Microsoft account to set up an environment and then you can start with creating projects and adding team members. All new features developed are added to the cloud version first and they migrate approximately every three months to the on-premises version as updates.
If you would like to find more information about how to get started with Release Management and its advantages. See how to create a build definition using CI/CD Tools for VSTS Extensions. (I will be using Package Extension and Publish Artifact tasks). And also using DevOps-VSTS-POC trigger in order to enable CI. All of that in order to be able to publish, share, install and query versions. You will see how to create release definition, choose an artifact and configure source for the artifact and default version. See how to create different environments or clone the existing one. In my case I am going to create QA, Preproduction and Production environment. Each with one phrase and one task. See also how to configure Publish Extension task for each environment See an end-to-end continuous delivery pipeline using VSTS extension with Build and Release Management.
If you are interested in developing a Visual Studio Team Service extension, and you would like to know and to follow the best practices for DevOps, Continuous Integration and Continuous Delivery, have a look at the following post, Develop VSTS Extension and Configure CI (Continuous Integration) and CD (Continuous Delivery Pipeline).
Conclusion
VSTS is updated online every three weeks with some new functionalities whereas TFS is updated only every three months. If you are using TFS on-premises, it’s highly recommendable to consider moving into VSTS. The most common reasons other organizations give for making this move are: Simplified server management. Immediate access to the latest and greatest features. Improved connectivity with remote sites. A transition from capital expenditures (servers and the like) to operational expenditures (subscriptions).
If you would like to start using Visual Studio for developing, read the details about its installation, launching and creating a new project in my post Get Started Developing with Visual Studio. If you prefer to use Mac, see how it looks in Visual Studio for Mac post.
You can see this video, if you would like to find more information about how to upload a virtual machine to Azure and how to create a virtual machine from the uploaded image or uploaded VHD file. Learn how to convert your virtual machine from VHDX to VHD format in order to be able to upload it on Azure. In order to be able to use PowerShell commands related with the upload of the virtual machine to Azure (e.g. Add-AzureVhd). You must have Azure PowerShell version greater than 1.1. Learn more about the templates which may be used. In order to create a virtual machine from a specialized VHD disk and which variables to use during the creation of the virtual machine (osDiskSizeInMB, resourceDiskSizeInMB). See how to customize the template parameters (LOCATION, OSDISKVHDURL, OSTYPE, VMSIZE, VMNAME). Also I am going to show how to create a virtual machine from a User Image and which parameters needs to be customized (USERIMAGESTORAGEACCOUNTNAME, USERIMAGESTORAGECONTAINERNAME, USERIMAGEVHDNAME, DNSNAMEFORPUBLICIP, ADMINUSERNAME, ADMINPASSWORD, OSTYPE, VMSIZE).


