Introduction
In some of my previous posts, I’ve described what DevTest Labsis, how to set Virtual Machines with Artifacts in DevTest Labsand how you can use and configure VM policies in DevTest Labs. This post will describe how to add and set your private VSTS Git Artifacts Repository in DevTest Labs. For now, this is possible only for Visual Studio Team Services, Gitand GitHub repository. Artifactscan be items such as actions that you want to run on the VM, tools that you want to install on a VM, or some applications that you want to test.
Step 1: Setting VSTS Git repository
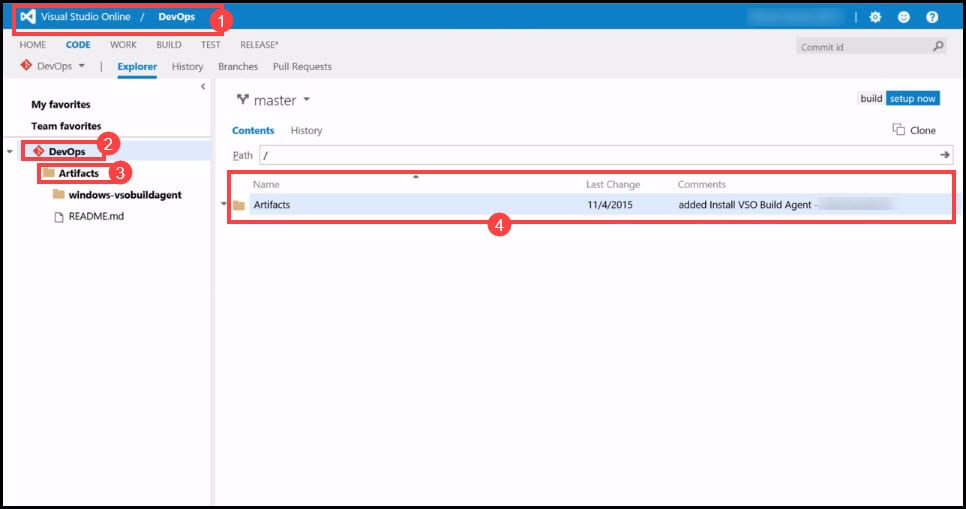
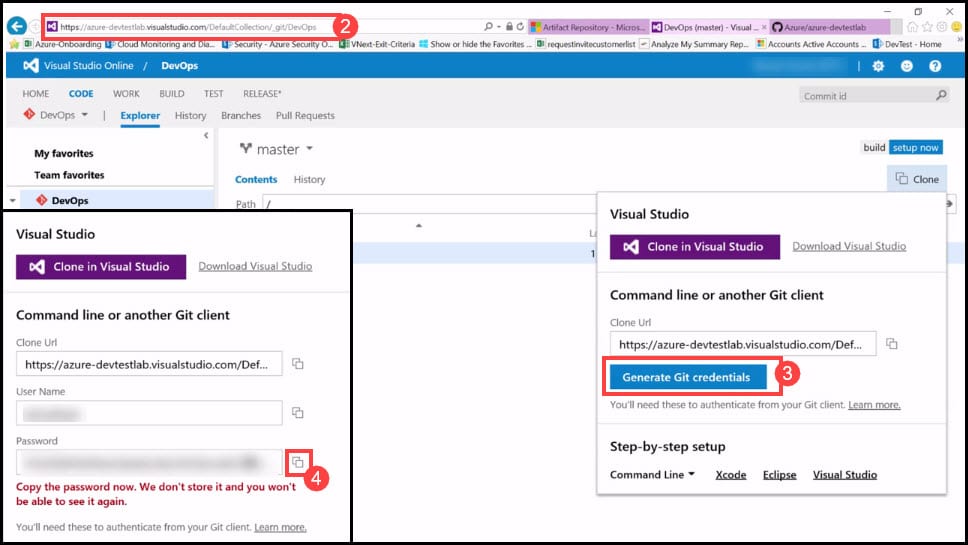
In order to set the VSTS Git repository, you will first need to create a folder for Artifacts under your private Git Repository. This folder will contain all the Artifacts that you are going to create in later steps. These Artifacts can also be shared with other users in the Lab.
- Open Visual Studio Team Services.
- Navigate to the DevOps folder.
- Click on your Artifacts folder.
- On the right side, you will see the details of your Artifact folder.
Step 2: Setting the Name of Artifact Repository in the Lab
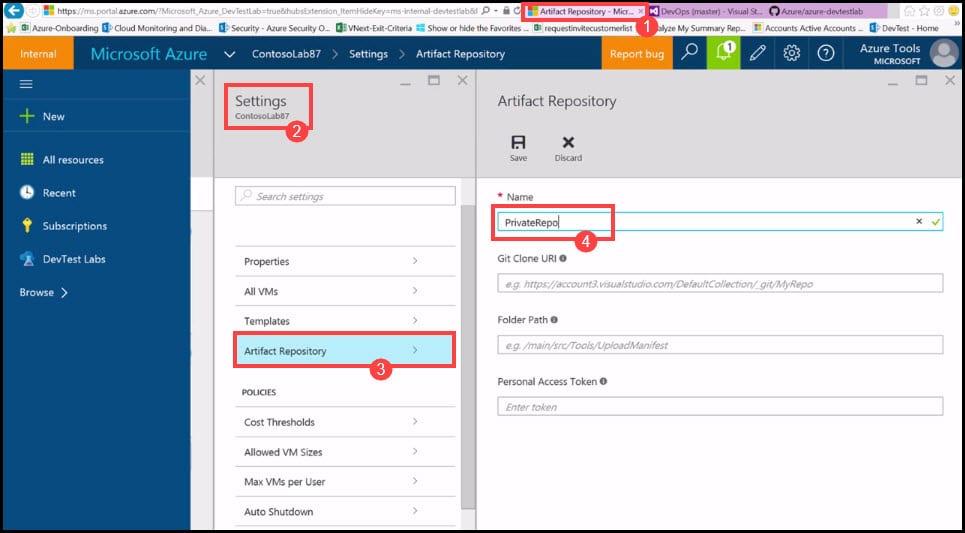
First, you need to set some basic settings such as the name of your private VSTS Git Repository. You can choose the name of your choice, just pay attention to use the same name where needed.
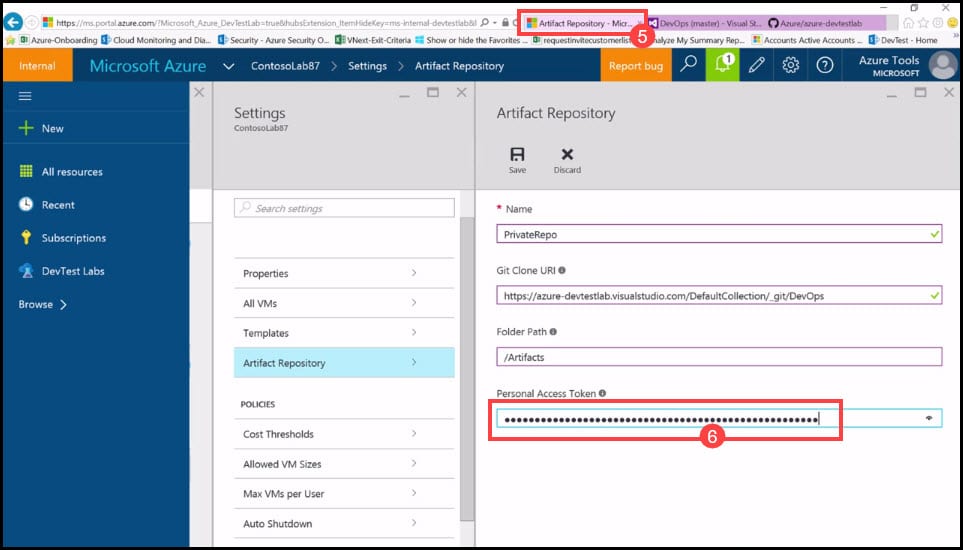
- Navigate to the Lab, which is in this example already open in another tab.
- Click on the Settings tab.
- From the menu choose Artifact Repository to start setting the details of it.
- In the right window, type the Name of your private VSTS Git Repository.
Step 3: Setting the Git Clone URI of Artifact Repository in the Lab
In this step, you will have to set the Git Clone URI for your Artifact Repository in your Lab to get the copy of your Git Repository.
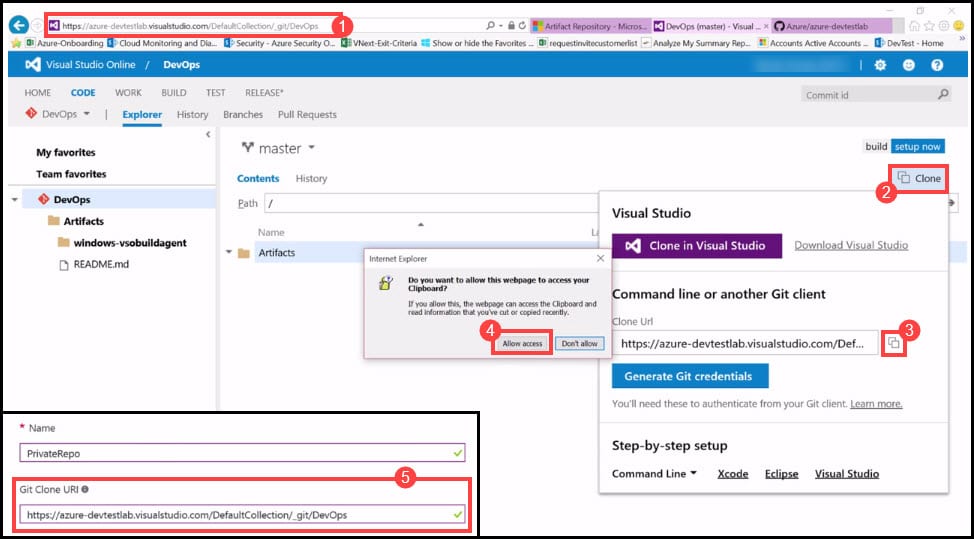
- Navigate back to the VSTS Git Repository.
- On the right side, click on the Clone button to see the Clone URI details.
- Click on the Copy symbol to copy the link to the clipboard.
- A new pop-up window will appear with a notification for allowing access. Click on the Allow Access button.
- Navigate back to the Lab and paste the link for the Git Clone URI.
Step 4: Setting the Folder Path and Personal Access Token in the Lab
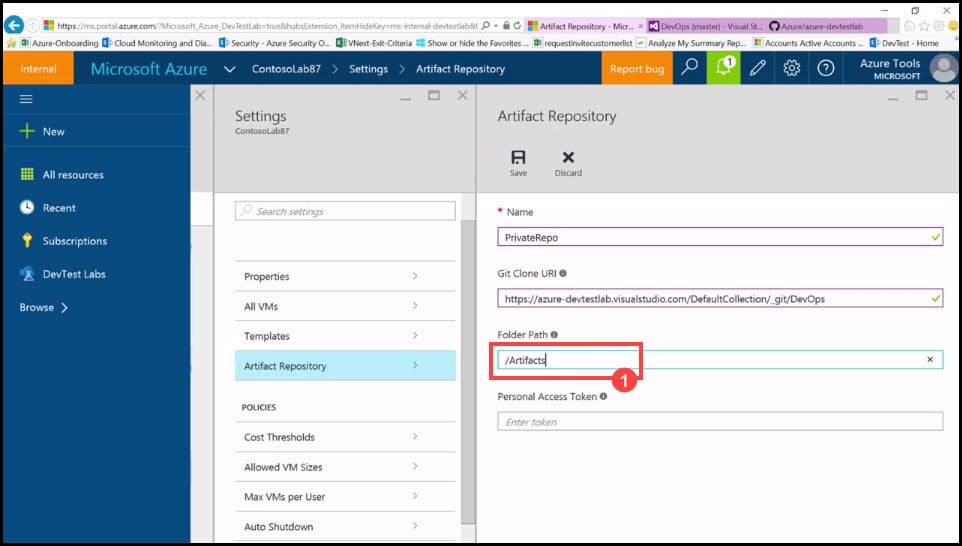
The Folder Path is the name of the folder that is described in the first step of this tutorial. It is listed under your private Git Repository, and you will have to type the exact name of it.
- In the Folder Path field, enter the name of your Artifact folder, exactly as it is shown in Step 1-3. Before the name, type the symbol
/. In this case, I’m going to type/<Artifacts>.
- In order to set the Personal Access Token, navigate back to the VSTS Git Repository.
- Click on Generate Git Credentials.
- The window will generate a new password. Click on the Copy button on the right side.
- Navigate back to the Lab.
- Paste the generated password in the Personal Access Token field.
Conclusion
In the previous post, you saw that Azure DevTest Labs artifact repository includes some Artifacts by default. This post described how to set your private VSTS Git artifacts repository in DevTest Labs in simple four steps. In the next post, I’m going to describe how you can set private Artifacts by using a GitHub Repository. Stay tuned!
You can see this video, if you would like to find more information about how to upload a virtual machine to Azure and how to create a virtual machine from the uploaded image or uploaded VHD file. Learn how to convert your virtual machine from VHDX to VHD format in order to be able to upload it on Azure. In order to be able to use PowerShell commands related to the upload of the virtual machine to Azure (e.g. Add-AzureVhd), you must have Azure PowerShell version greater than 1.1. Learn more about the templates which may be used in order to create a virtual machine from a specialized VHD disk and which variables to use during the creation of the virtual machine (osDiskSizeInMB, resourceDiskSizeInMB). See how to customize the template parameters (LOCATION, OSDISKVHDURL, OSTYPE, VMSIZE, VMNAME). Also, I am going to show how

