
- Navigate to-Azure Portal and log in.
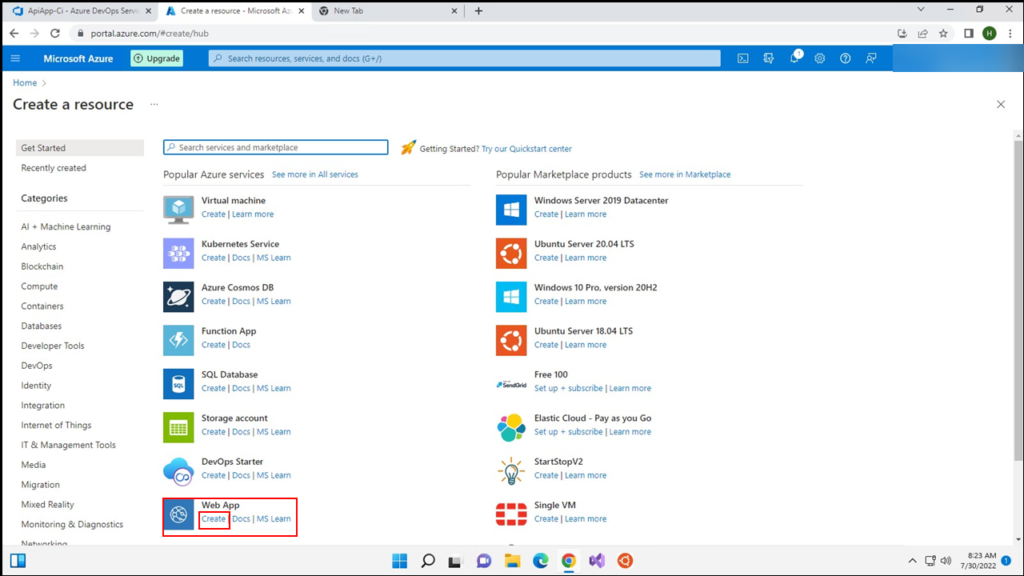
- Select Create a Resource.
- Select Create on the Web App.
4.1 Select Create new.- 4.2 Put any desired name to name the RG. 5.1 Put any desired unique app name. 5.2 Select Docker Container. 5.3 Select Linux. 5.4 Select Change size.
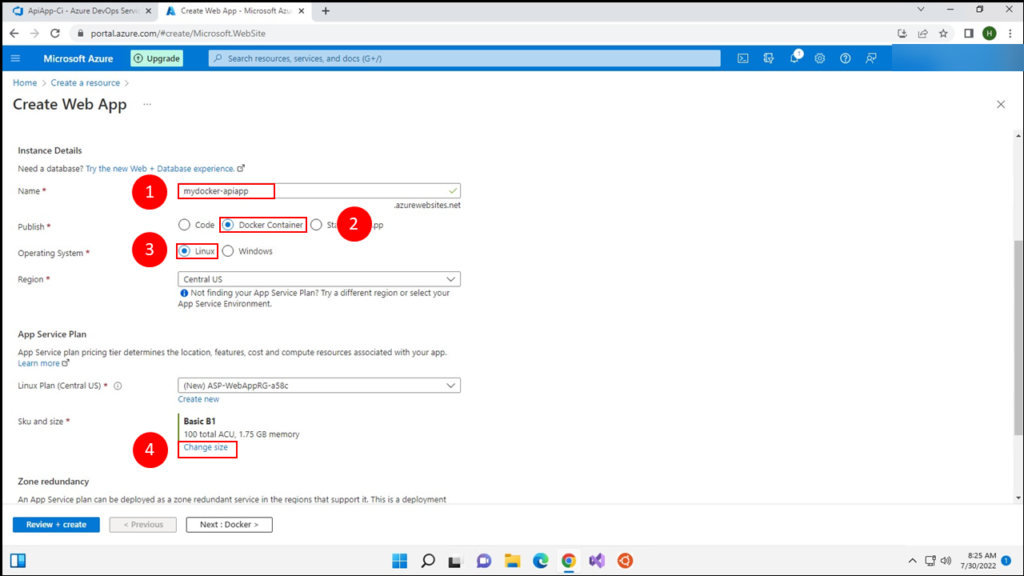
6.1 Select Production. 6.2 Select P1V2. 6.3 Select Apply. 6.4 Select Review + create.
- Create
- Go to the created resource.
- Navigate to your app URL to examine it:
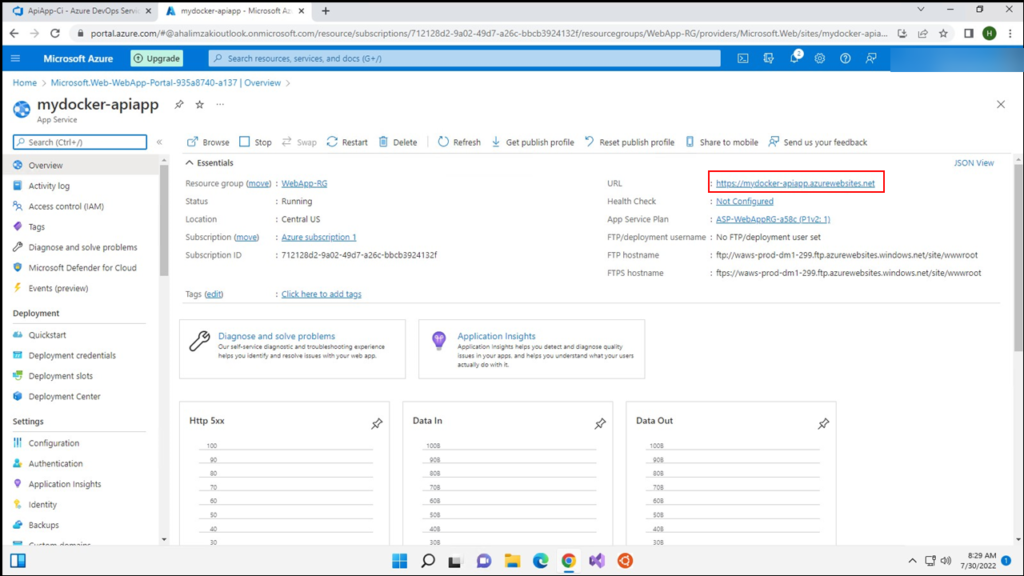
- You can see your App URL-is working but we still haven’t deployed the Docker image yet.
- Navigate to-Azure DevOps-and select “Releases” from pipelines.
- Select New pipeline. 13.1 Change the CD name to any desired Name. 13.2 Select Empty job. 14.1 Select Add An artifact.
- Select docker hub.
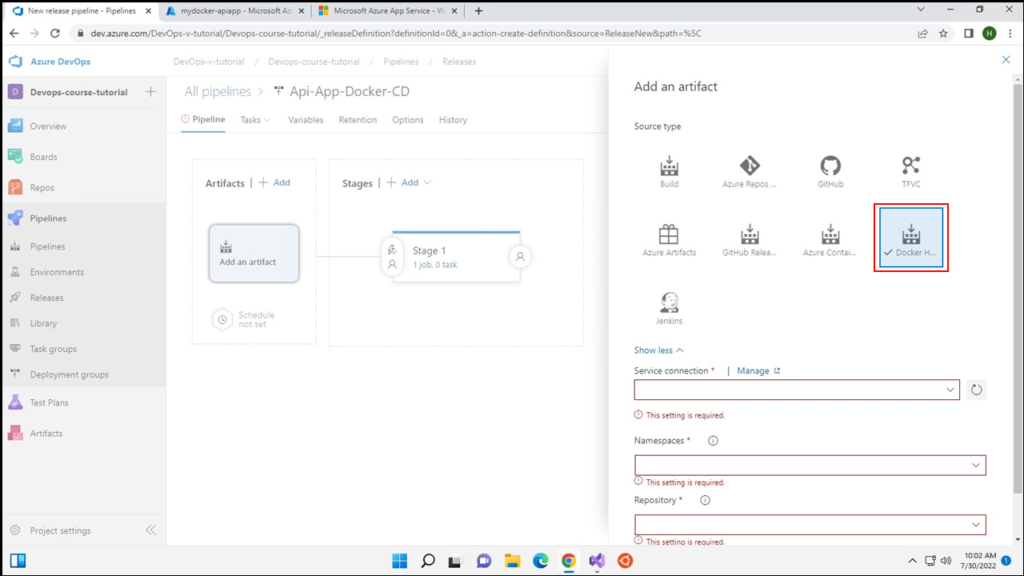
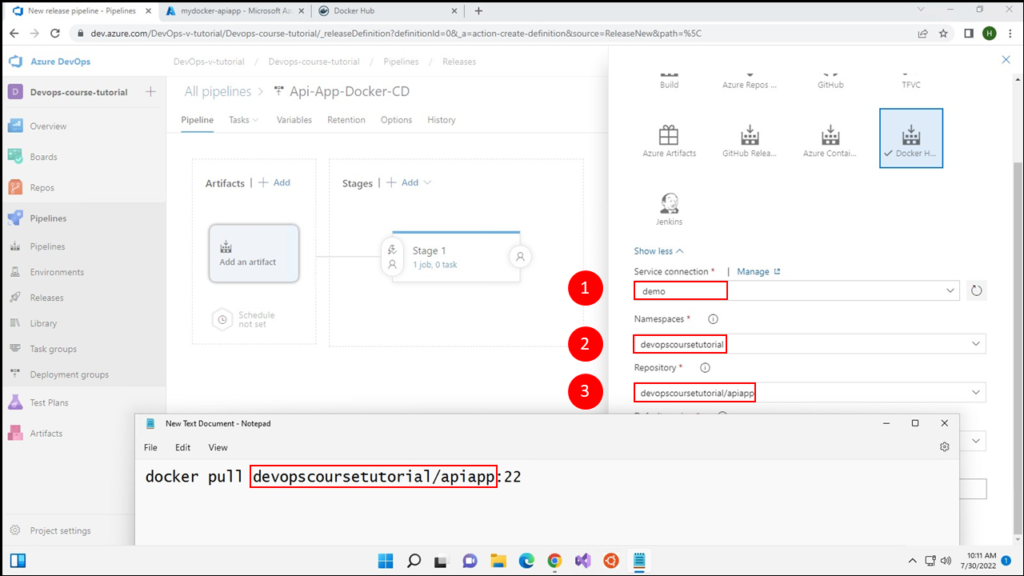
- Navigate to-DockerHub. 16.1 Select your App repo. 16.2. Add the required info (Service connection, Namespace, Repository)
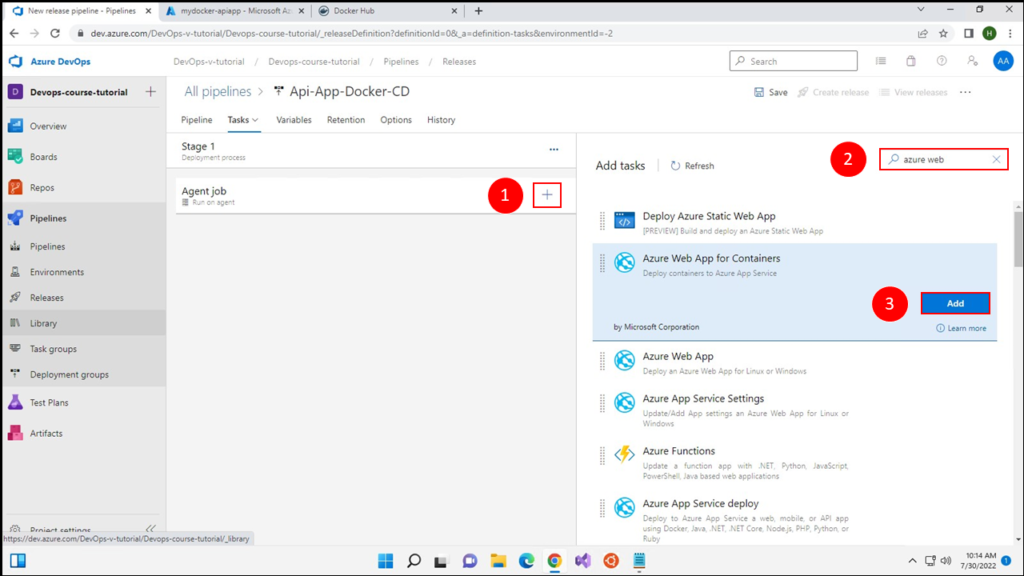
17.1 Press on + to add a new task 17.2 Search for Azure web. 17.3 Add Azure Web App for Containers.
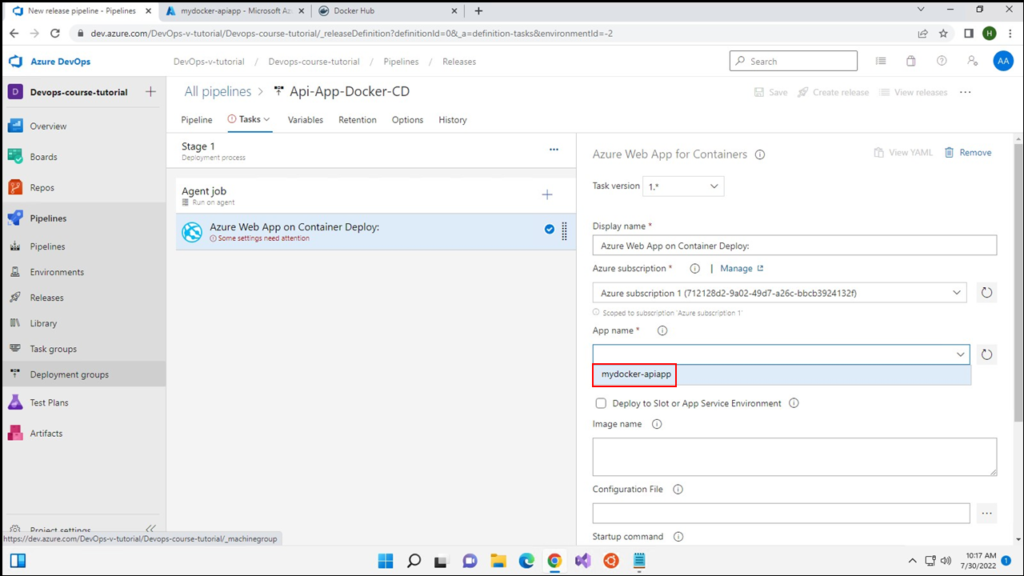
- Select your Azure Subscription.
- Select your app from Azure.
- Set the Docker Image name.
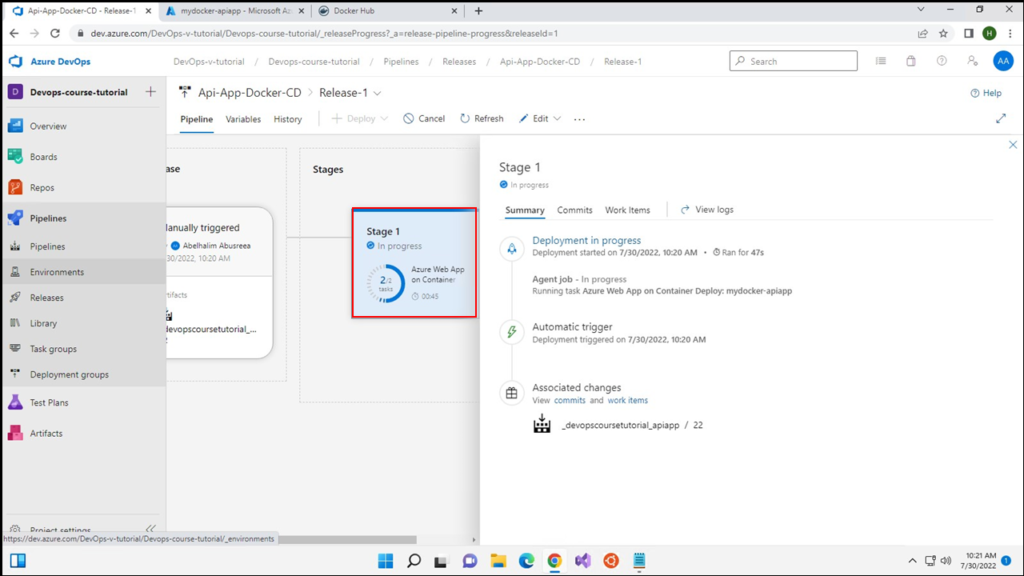
- Press on Create release
- Navigate to the app URL and check if it’s working as expected.