
Introduction
The idea of having two backlogs can still be pretty new to many people. So I will first try to explain in this post the philosophy behind the usage of different backlogs and present the integration of different management systems. The Operations backlog or Ops backlog is usually a backlog for management of business and end users. Where incidents, problems, tickets, and service requests are being recorded. By monitoring and event management events are dispatched back to the Development backlog or Dev Backlog. The main goal of the team is to deliver constant structural enhancements to improve satisfaction and prevent incidents affecting the high quality of performance and functionality for the end user.
In order to ensure a smooth connection between different backlogs, there are some good solutions on the market for incident management. Such as Service Now, Remedy, Trello, ZenDesk, User Voice{target=”_blank” rel=”noopener noreferrer} and much more.
To get more insights from real examples, in many of my projects the development, which is using Dev Backlog, was made in Visual Studio and integrated with Ops Backlogs using different incident management apps mentioned above. The idea is well captured in the image below: 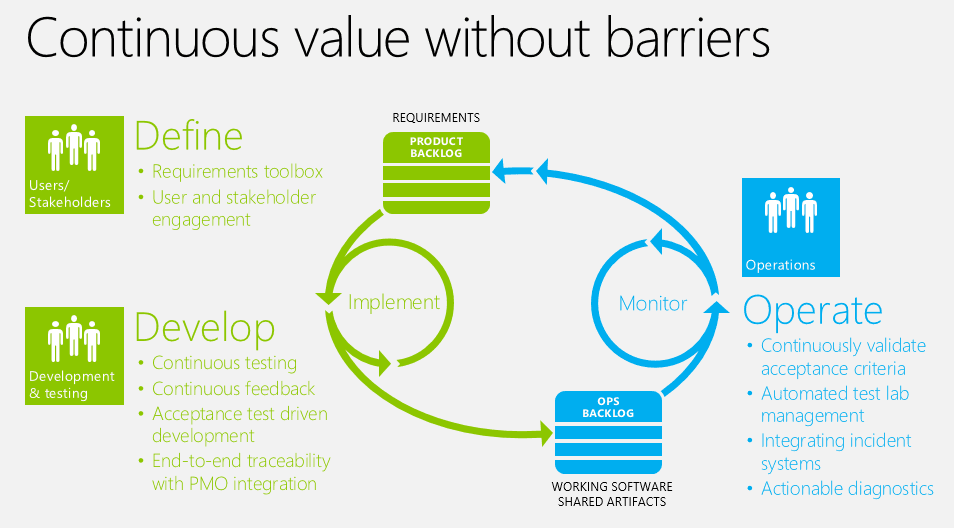
Further, in this post, I will show the example of how to make the integration between Trello and VSTS{target=”_blank” rel=”noopener noreferrer}, which will enable us to see all changes in the state of work items on the boards of each application. We’ll use Zapier to connect both applications and Zapier will enable us to automate tasks between both apps.
Connecting to Trello
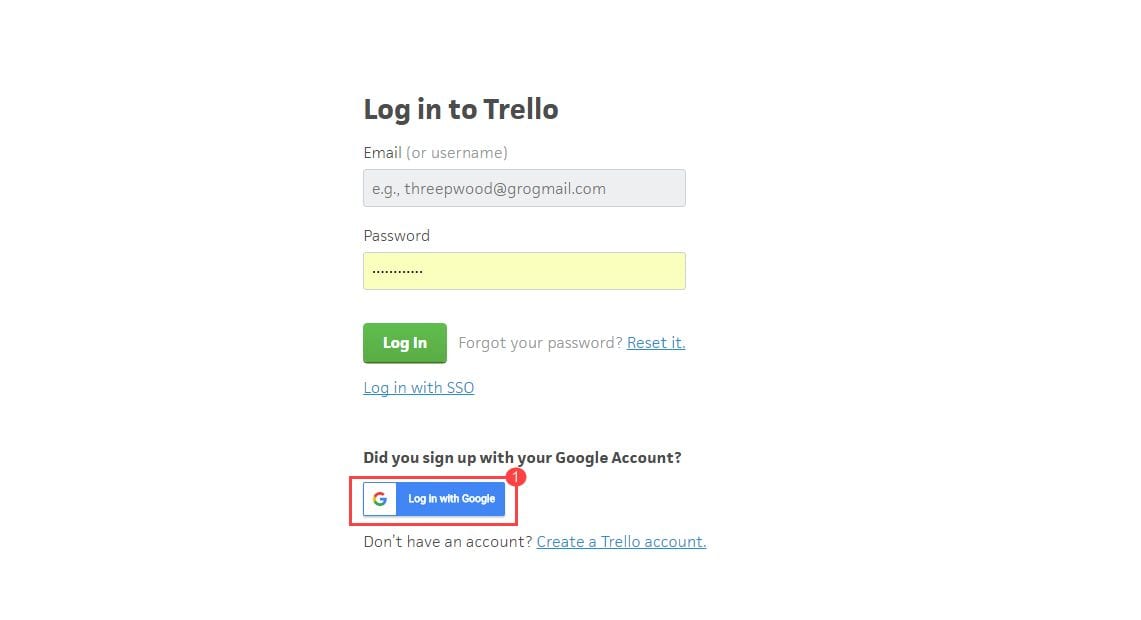
First, we’ll need to log into Trello with a valid account.
- For our case, we have connected with a valid Google account.
![1.1-Connecting to Trello]()
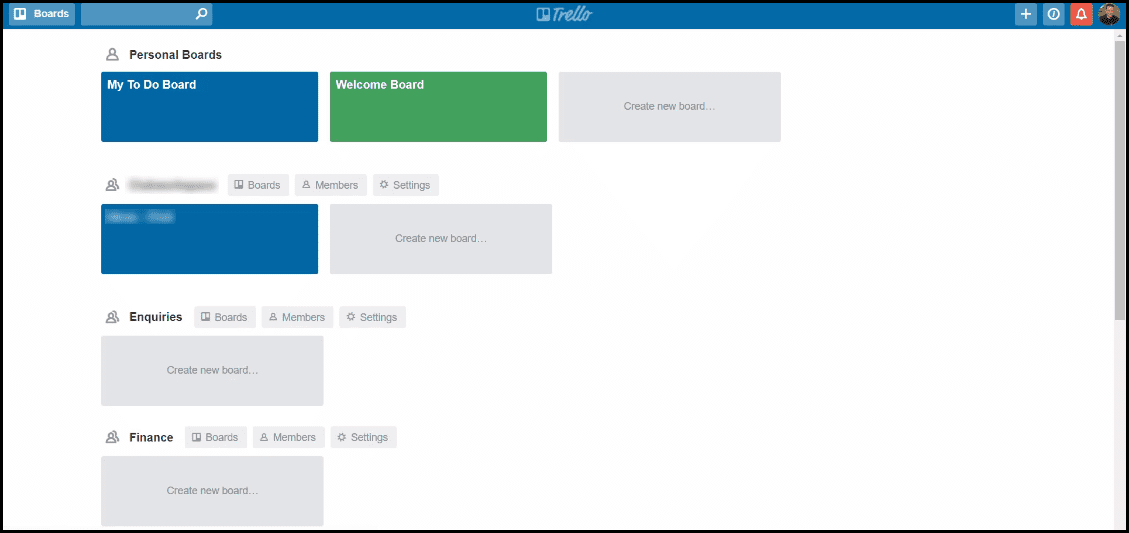
- After we log into Trello, we’ll be able to see all the teams that we can join.
![1.2-Connecting to Trello_Boards]()
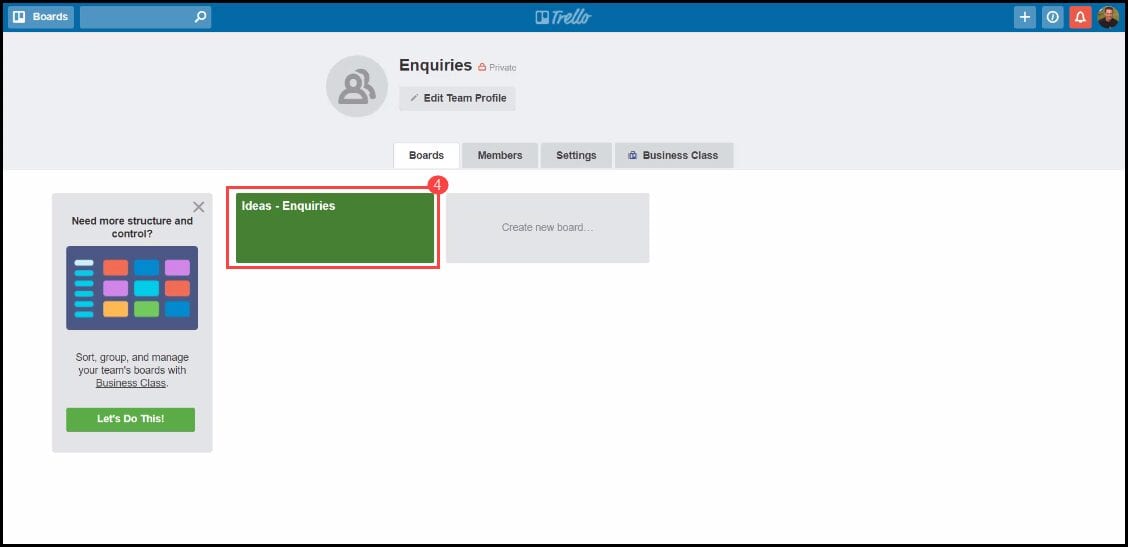
- By clicking on the team’s board icon we’ll be able to join the team for which we want to create automation on Zapier.
![1.3-Connecting to Trello_Boards_settings]()
- By opening the board of the team in Trello, we see all the boards of the team. Here we can add a new board, change the colors of the current boards, or any other settings of the board, such as team members for example.
![1.4-Connecting to Trello_Board_settings]()
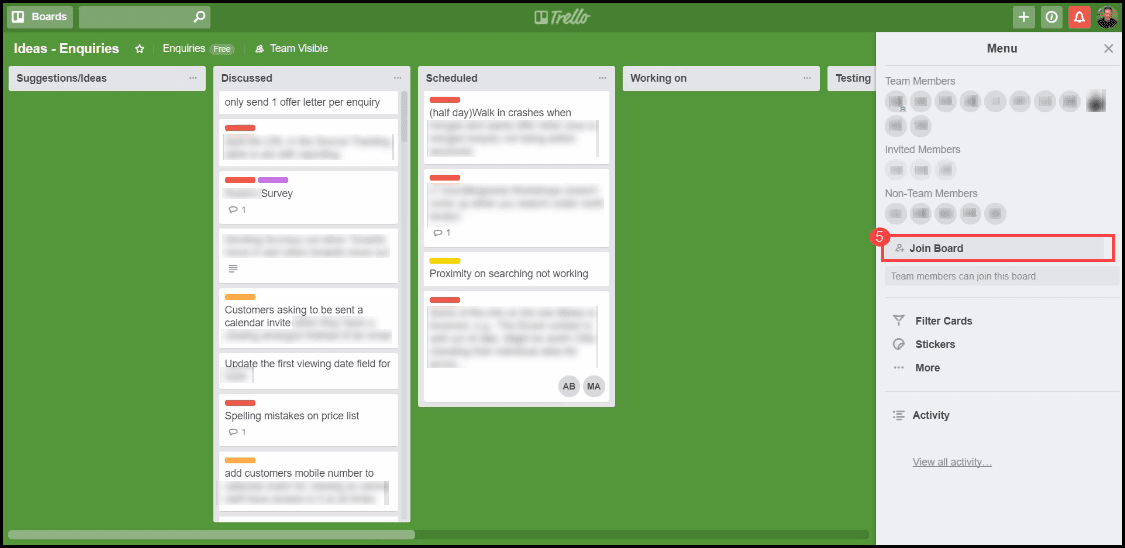
- By choosing the team’s board, a new window will appear with the board settings. On the right side of the side window, we will have the board’s settings, where we will be able to see the activity of the team with all team members. We’ll be able also to see the Join the team button, which we need to choose in order to create an integration in later steps.
![1.5-Connecting to Trello_Board_joining the team]()

If you want to know more about maintaining the backlog in a proper way, you can visit the following post: Key Tips For Maintaining Good Product Backlog in Agile and Scrum. The post describes a way to efficiently organize the backlog items allowing you to understand the requirements better, and providing you with a higher level of detail of what is actually expected from the work or delivery perspective.
Creating automation in Zapier
In your Zapier account, you will need to create a Zap, which represents the integration between the apps. On the left side, you will add the triggers and on the right side, you will add the actions. In the first Zap in the example below - Trello to VSTS, we can see that the trigger is set to be Trello and the action will be done in VSTS. 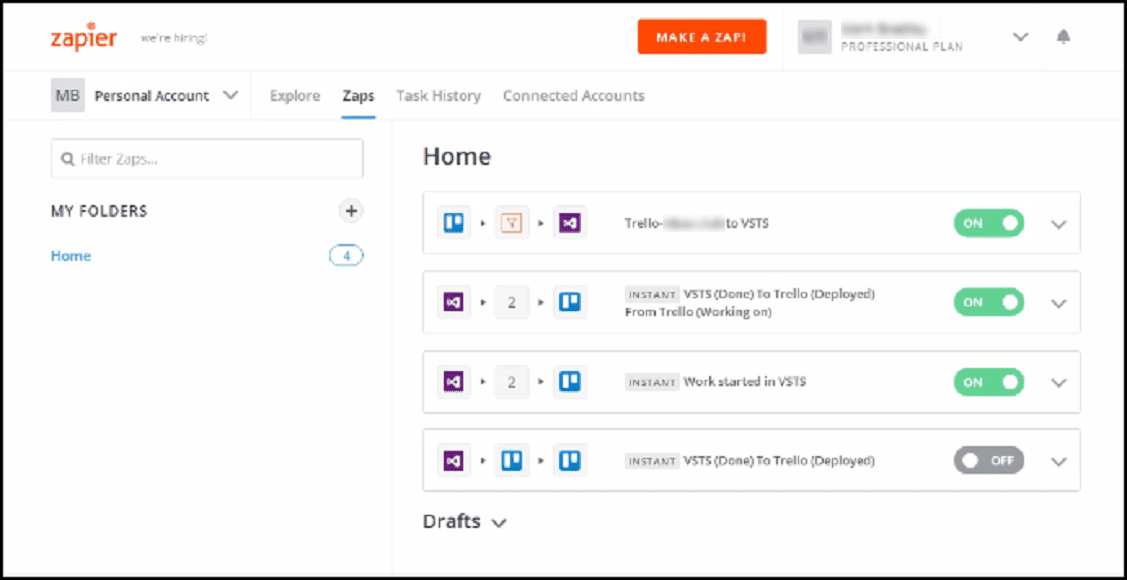
In the example below, you will be able to see the integration or the Zap for Trello cards to VSTS.
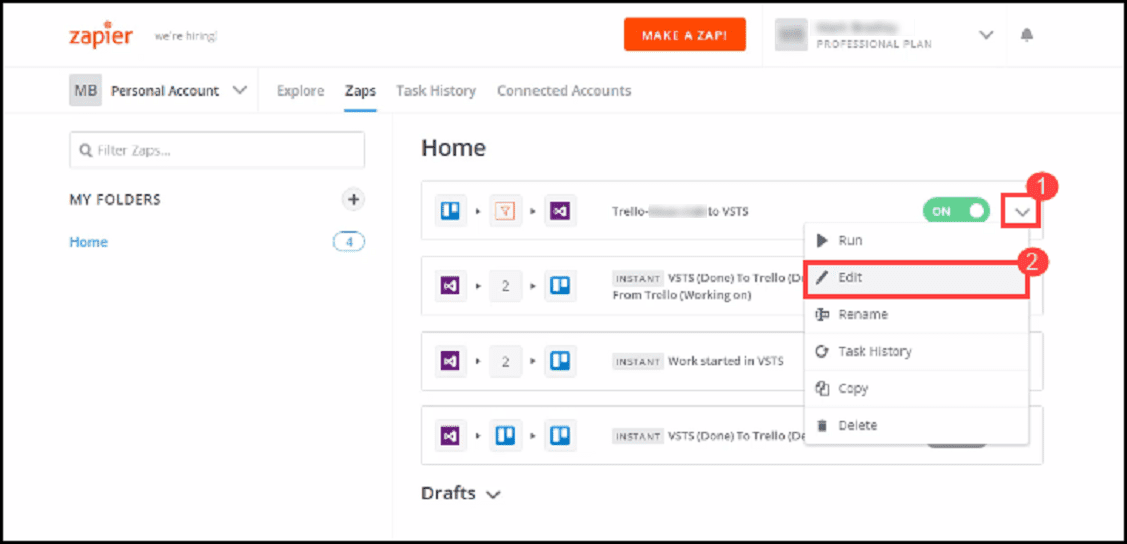
- By clicking on the arrow on the right side of the Zap.
- You will be able to choose from the drop-down menu the Edit option to see or edit the settings of this integration.
![2.1-Creating automation in Zapier_Zap]()
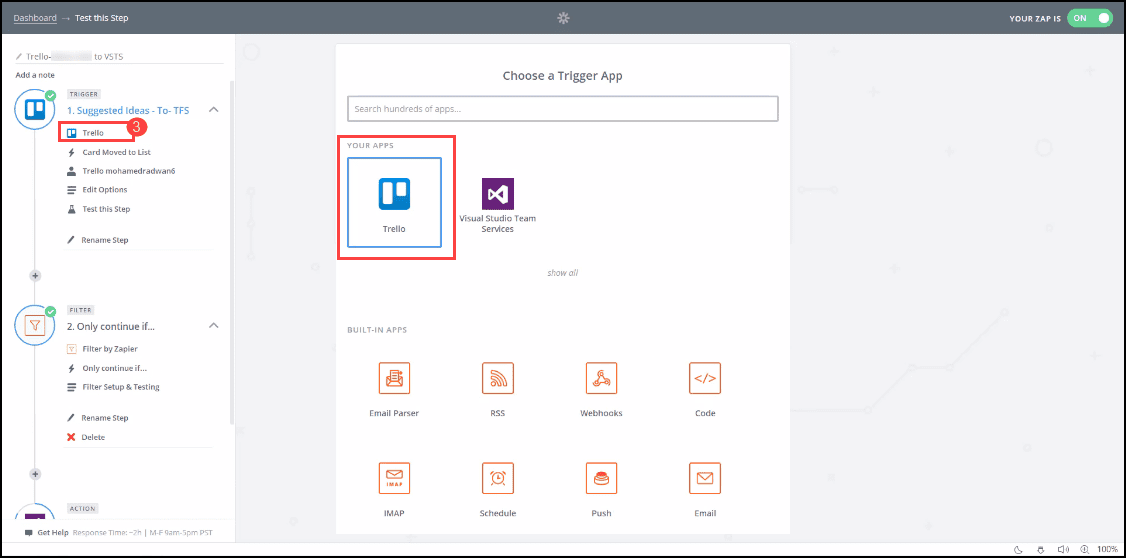
In this integration, we’ve set 3 steps, but please note that step 2 is not really used and it’s unnecessary as it doesn’t provide any function. You will be able to see it to get an idea that we can use different filters as the steps.
- In the Connection to Trello, where we have set different options for connection and in the first part we first chose the app for our connection, which is Trello.
![2.3-Creating automation in Zapier]()
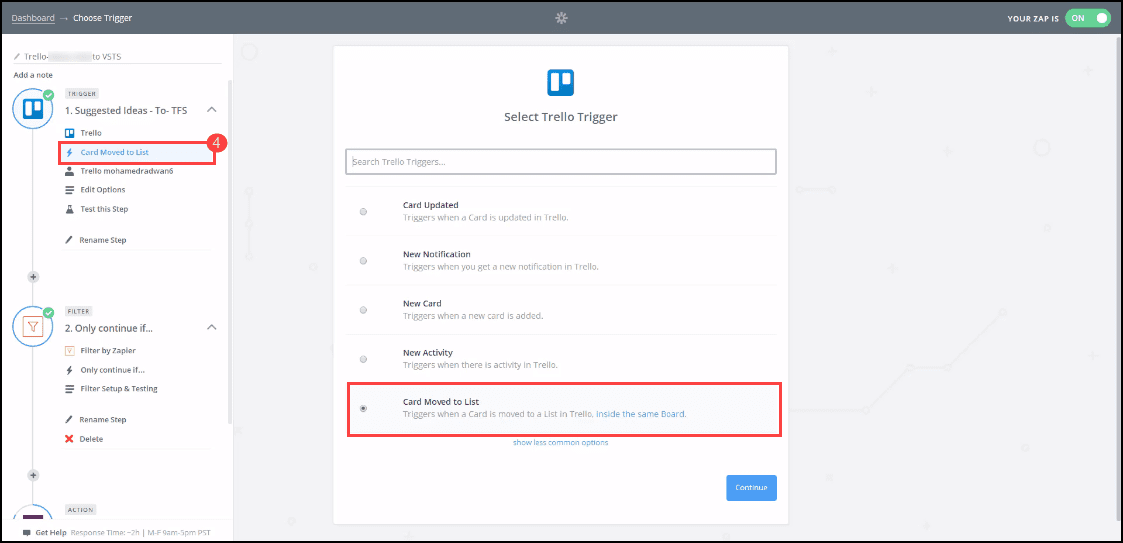
- Then we define the Trello trigger, which is in our case when the Trello card is moved to the list.
![2.4-Creating automation in Zapier]()
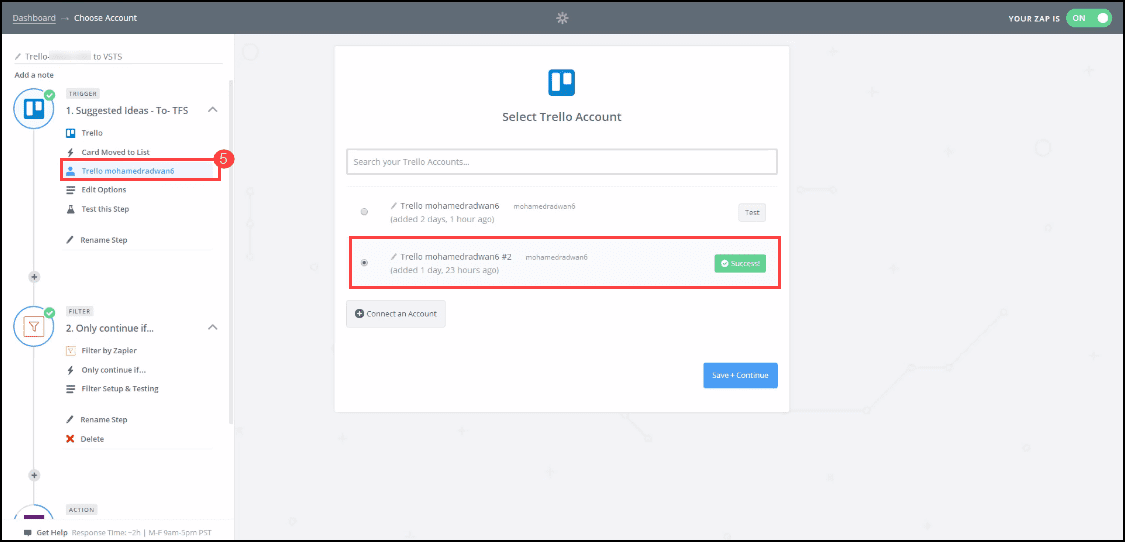
- After that, we have defined the account with which we are connected to Trello, where it is a good idea to test if the connection to the account is working fine.
![2.5-Creating automation in Zapier]()
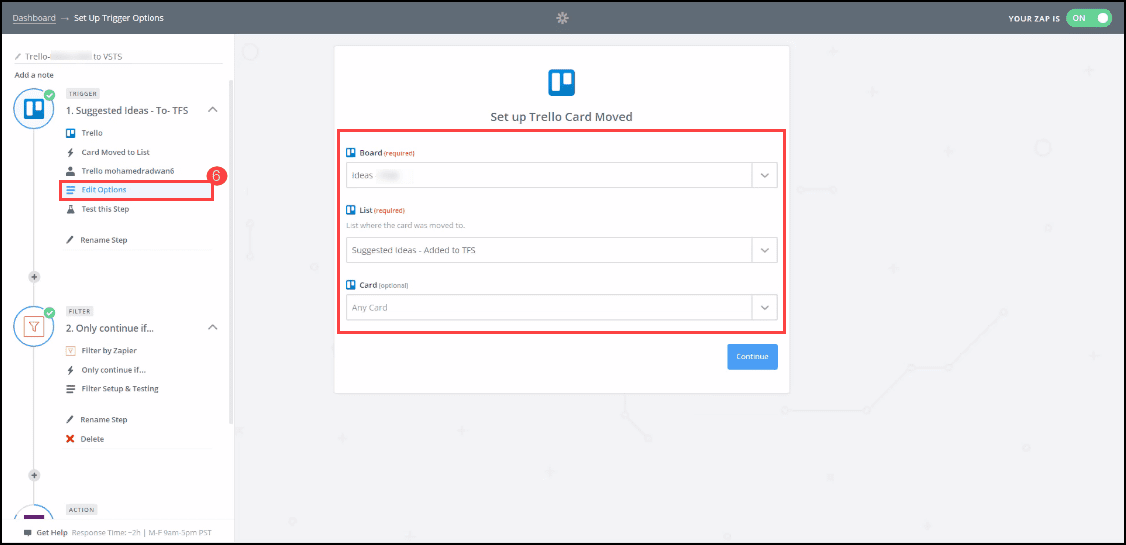
- Next, we’ll move to Edit Options, where we choose the Trello board for which we want to have the integration, the list of the stage for which we want to set the trigger, and the type of the card that we want to use.
![2.6-Creating automation in Zapier]()
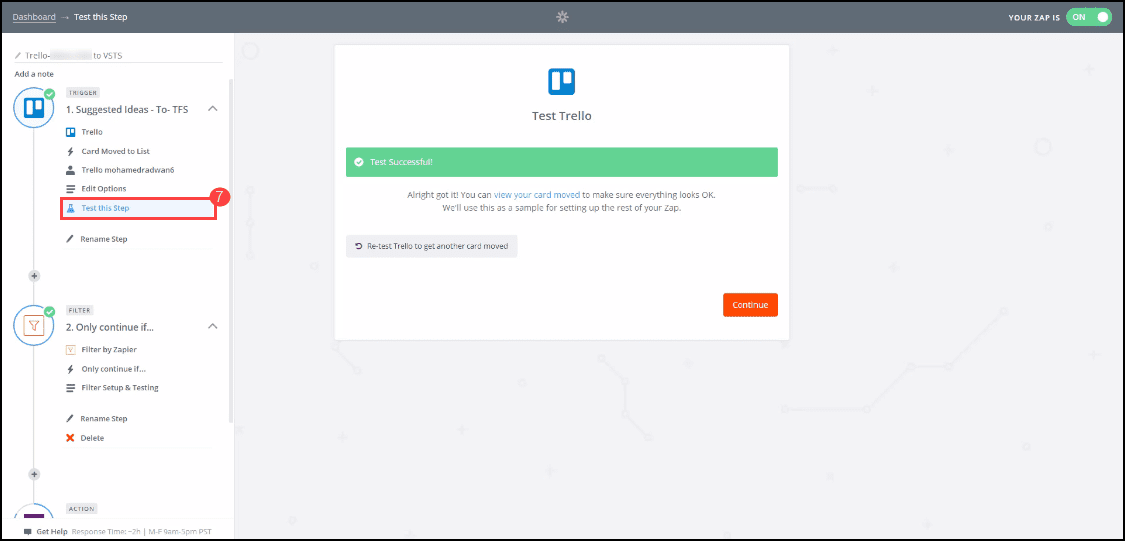
- Once we finish the settings of the step, we need to test it to move to the next settings of our integration.
![2.7-Creating automation in Zapier]()
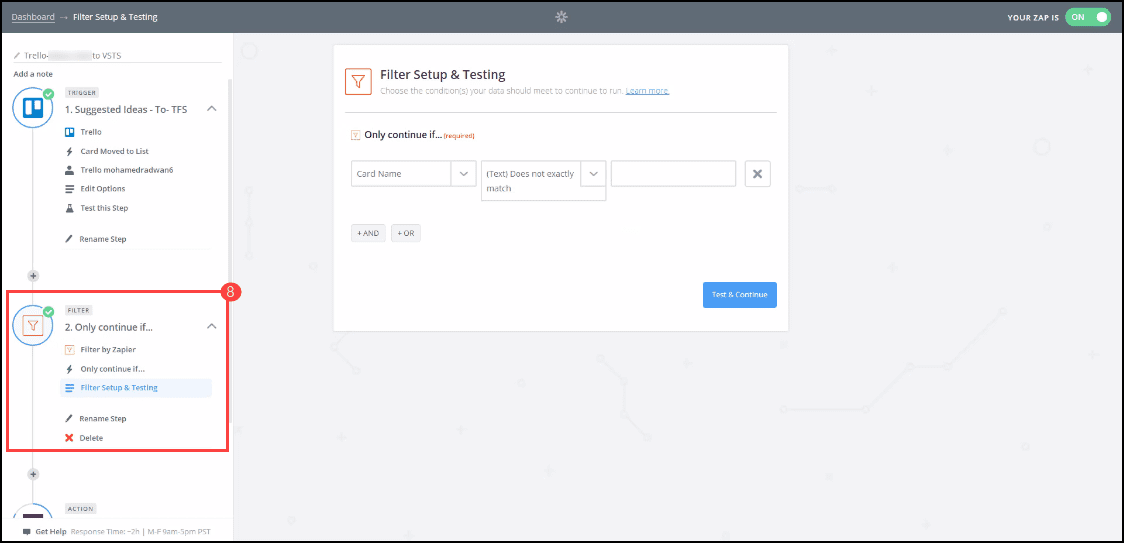
- We can set filters to ensure that triggers only work when specific conditions are met. For example, we can set the trigger to work only when the card name doesn’t already exist to avoid any duplication of the work items. But as explained before, this filter is not really needed for this Zap as it will not do anything.
![2.8-Creating automation in Zapier]()
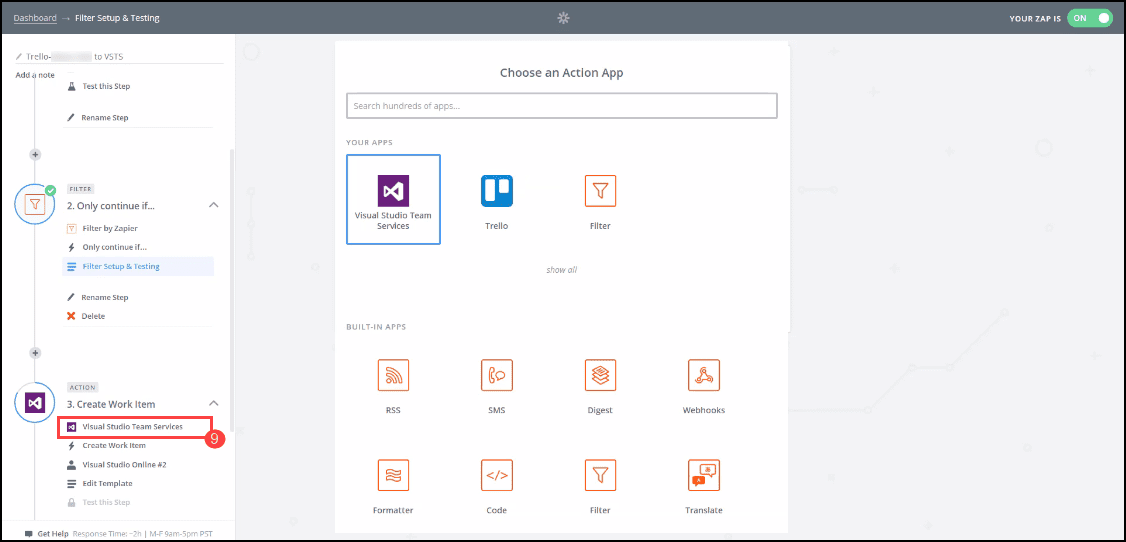
- In the Connection to VSTS backlog, we will choose the action, which will appear in the VSTS backlog. First, we will connect our VSTS account.
![2.9-Creating automation in Zapier]()
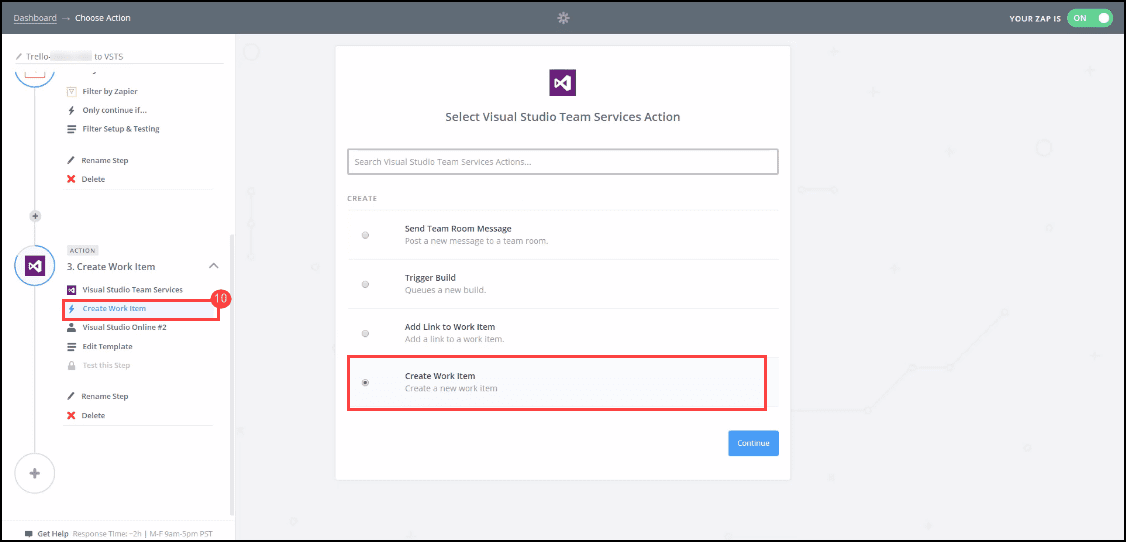
- Then we will choose the option, in which the new work item will be created based on the trigger from the first step.
![2.10-Creating automation in Zapier]()
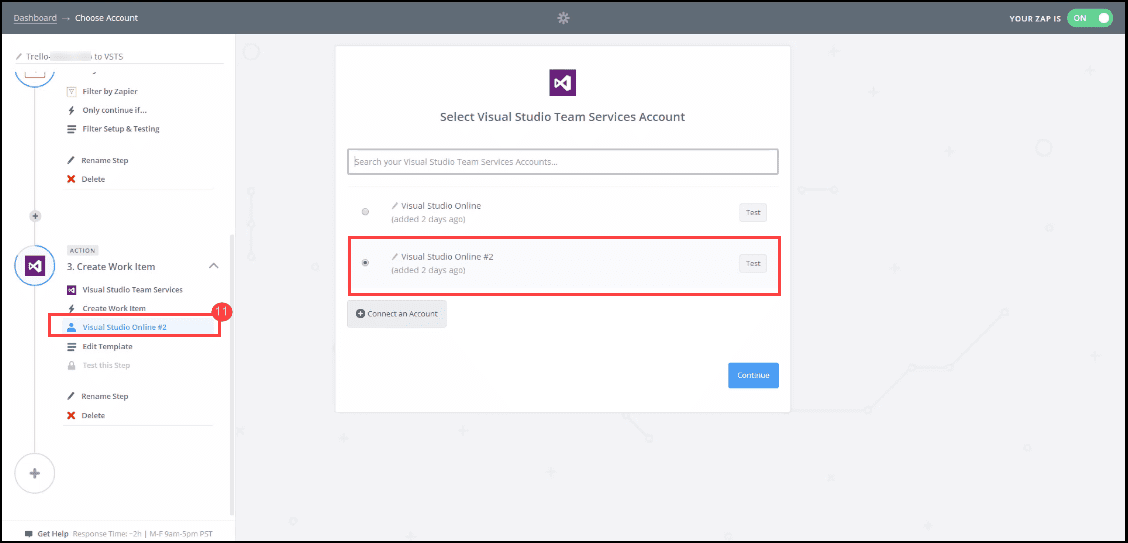
- We chose the account with which we are connecting to our VSTS backlog and again, before continuing to the next step of setting the integration, we need to test if the account connection is working fine.
![2.11-Creating automation in Zapier]()
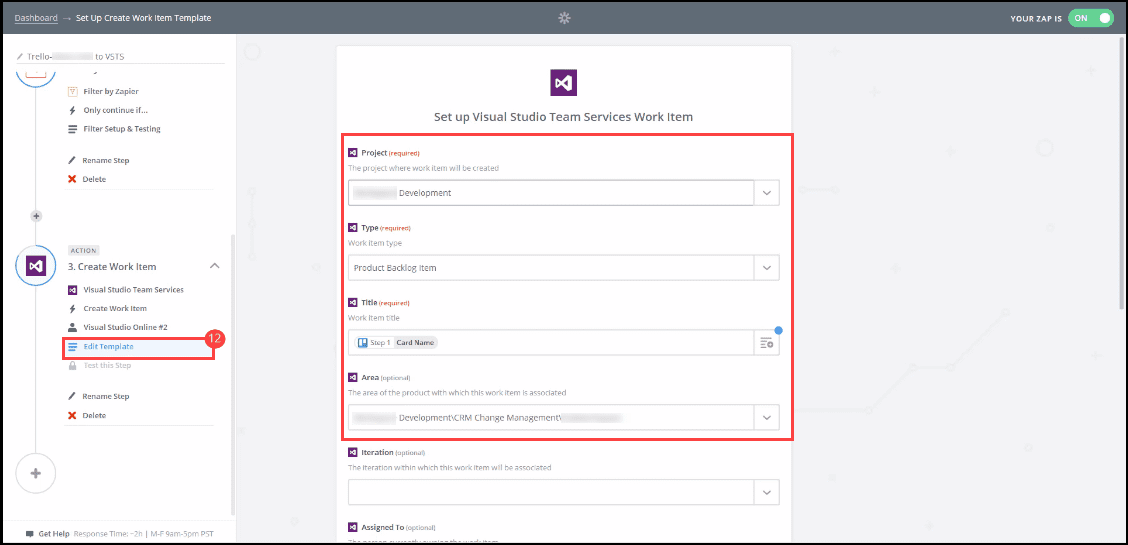
- We edited the template, where we chose the VSTS project, the type of the work item which will be created, and the title of the new work item, which in our case is equal to the Trello card name. In the next options, we chose the area and the description of the newly created work item, which will be the same as the Trello card description.
![2.12-Creating automation in Zapier]()
When we’ve set all the requirements for our integration, we need to test the settings by going through the process. You will see that we have created in our Zapier account three more integrations or Zaps for automation of different state changes. The same idea or philosophy was used also in these Zaps. First, we connected both accounts and chose the appropriate steps, such as the filters which will tell us when to continue to the next step and for which state changes we want to see the automation.
[Tip]{.ion-tip} The post User stories in Agile world focuses on an important unit of Agile software development process. Which is User Story. The post also describes some basic rules and recommendations you have to follow before adding the descriptions of PBI.
Example of moving the Trello card between the different states
For this example, we created a test card in Trello, which is not visible yet in the VSTS backlog. Considering the rules and filters that we previously set in Zapier, when we move the card from the state Suggestions/Ideas to the Suggested Ideas - Added to TFS, we’ll see that the card will appear as a work item in our VSTS backlog. 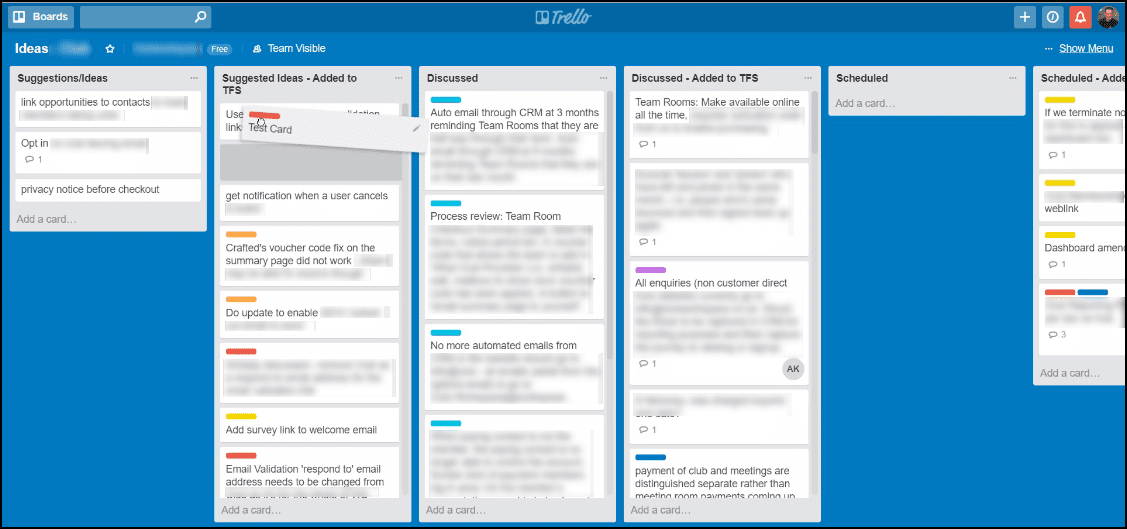
As we set in our Zap that the trigger will run every five minutes, the work item will appear in our VSTS backlog after these five minutes. Of course, if we want to see it immediately, we can navigate to Zapier, choose our Zap, and manually set the trigger to run immediately. We’ll see the new work item at the bottom of our backlog. 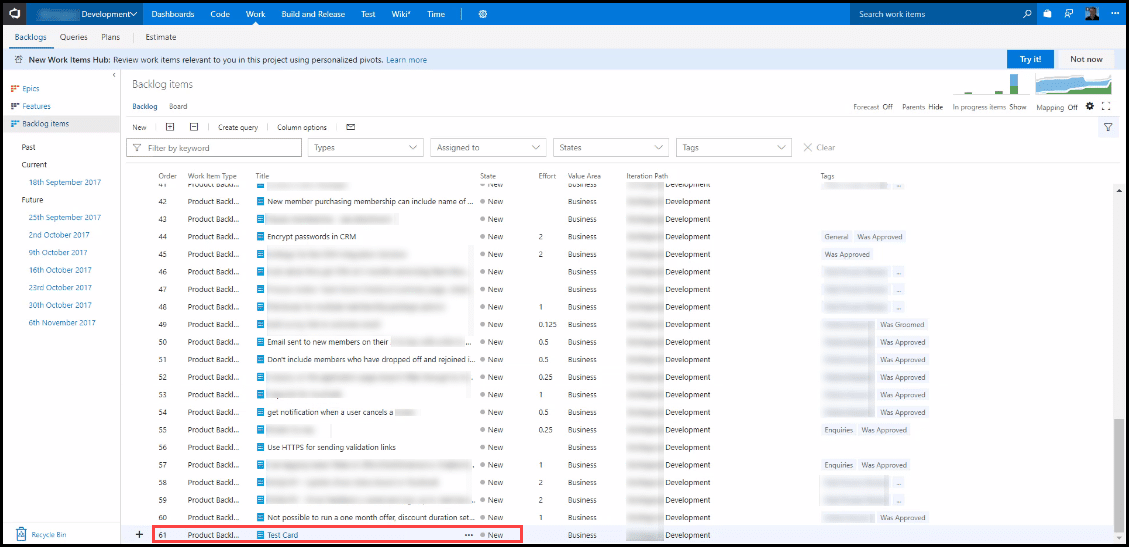
When we add our new work item to the current sprint and move it to the Committed state, we’ll be instantly able to see this change appear on the Trello board. In the image below, you will see that we moved our Test Work item to the Committed state. 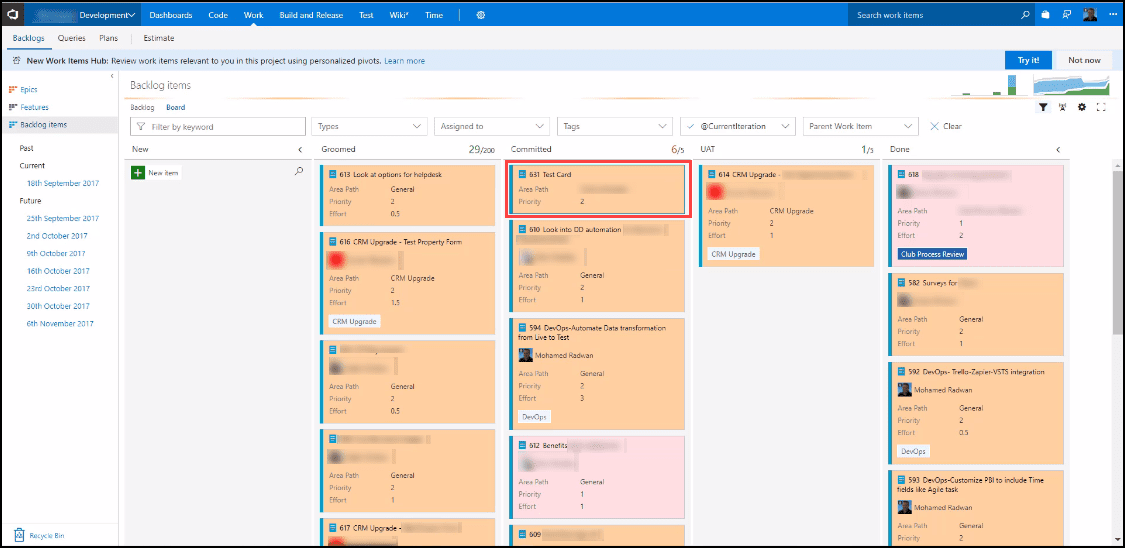
We will be instantly able to see this change on our Trello board. 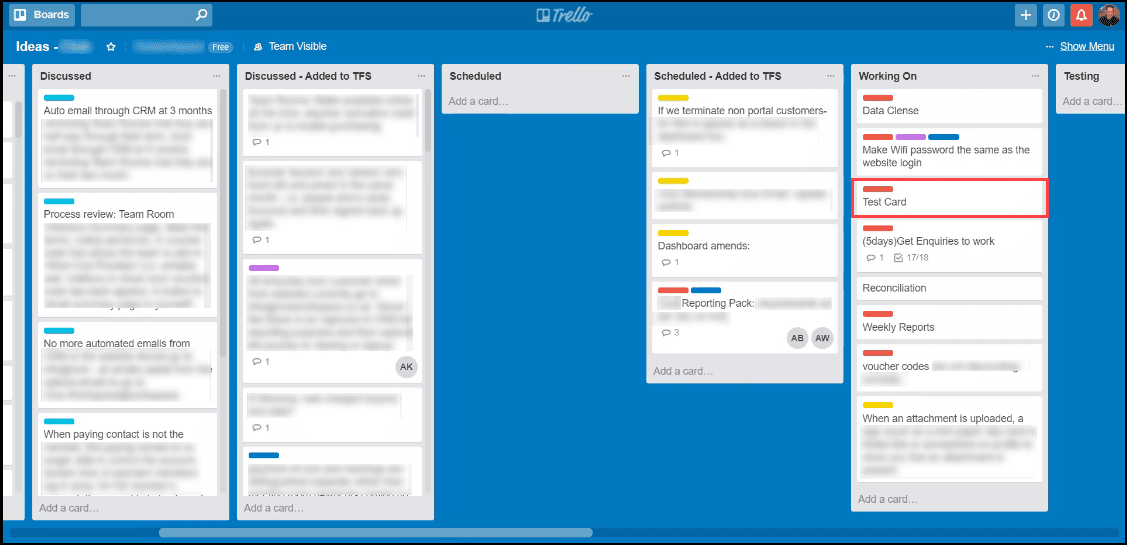
Remember, this will happen due to our previous settings in Zapier. We mapped the Committed state from the VSTS backlog with the Working on state on Trello. For example, if we try to move the work item in the VSTS backlog to the Groomed state, nothing will happen on the Trello board because the Groomed state of the VSTS backlog is not mapped to any state of the Trello board. The same automation will happen when we move the work item of our VSTS backlog to the state Done because the VSTS backlog state Done is mapped to the Deployed state of our Trello board. Again, this automation is done based on the settings that we chose previously in our Zaps. The same automation between the work items and the Trello card can be done for any other state. Such as Awaiting Deployment or Testing, we just need to set it in our Zaps.
Read detailed explanation about all types of Scrum and Agile meetings (Sprint Planning, Stand-up, Grooming, Sprint Review, Retrospective Meeting) in my past post Types of meetings in Scrum and Agile