
Introduction
In this post, I am going to share the latest improvements and features in Visual Studio 2019 to support modern application development and continuous innovation. We will walk through how Visual Studio 2019 enables you to get started writing code faster and easier with existing code repos or new projects, focus on what is important with new UI improvements, seamlessly collaborate across teams with pull requests, and more.
Start Window
The main goal of the start window is to make it easier to get to a state where code is loaded in the IDE by concentrating on the commands that a developer will require most often. In Visual Studio 2019, there is an enhanced start window (Image 1) in which you can:
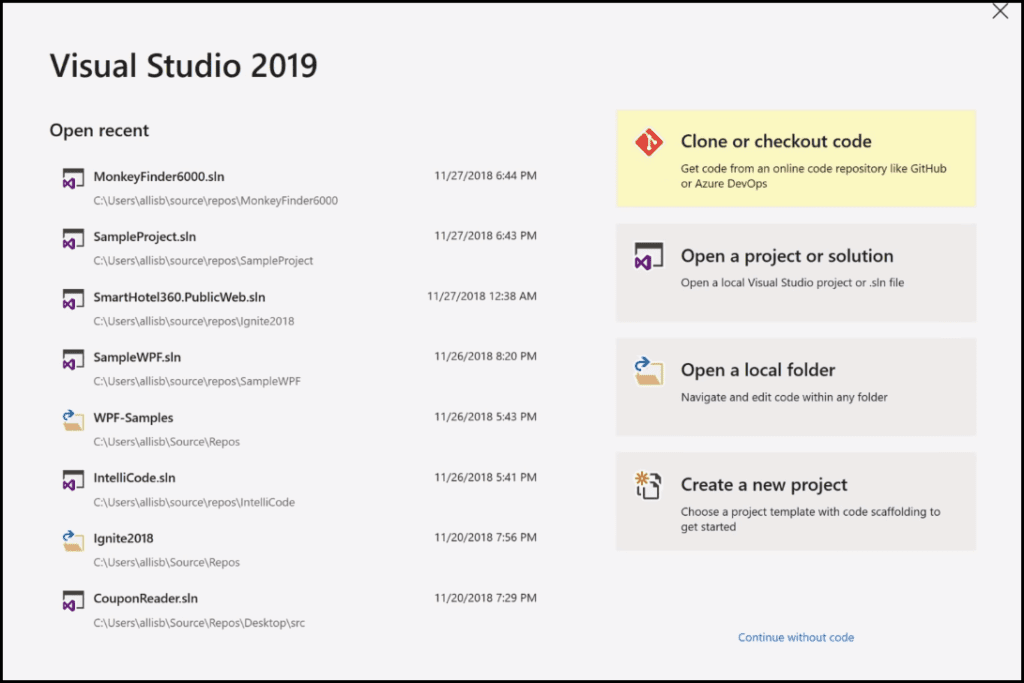 {.wp-image-8746 .size-large width=”760” height=”507”} Image 1 - Clone or checkout code option in the Start window of VS 2019
- Quickly clone or checkout code from Azure DevOps, GitHubor elsewhere (Image 2)
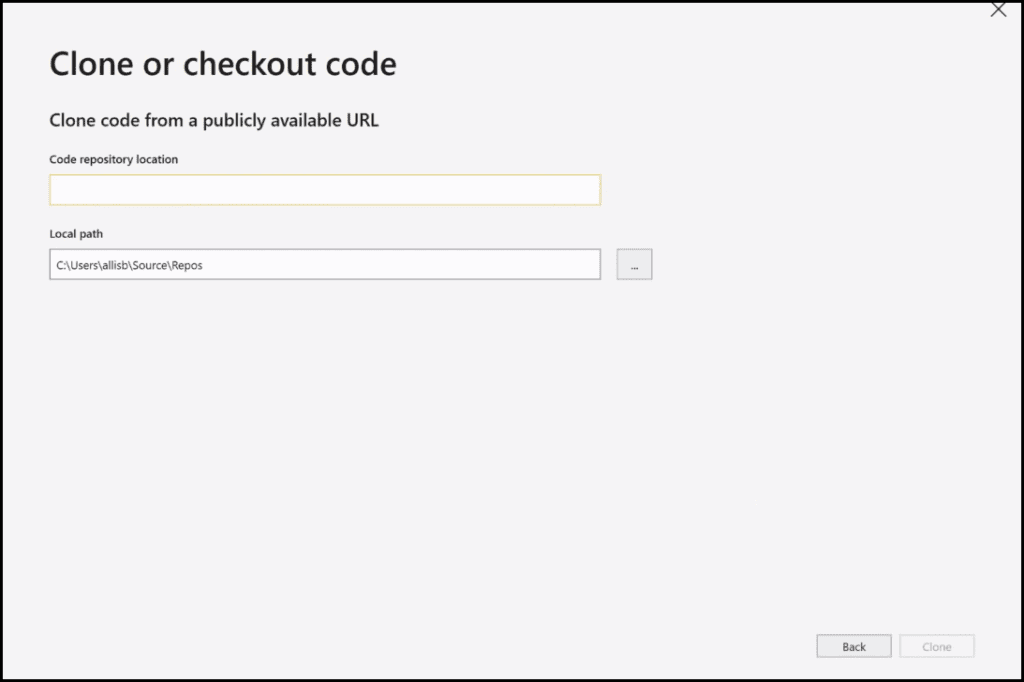 Image 2 - Clone or checkout code
[Tip]{.ion-tip} You can find more information about DevOps in the following post: DevOps: The Three Stage Conversation - People, Process, Products, which describes the basic principles of DevOps. This post will be especially helpful to those for whom DevOps is still a new concept. If you prefer a deeper view on this topic, have a look at the following guide: quick guide about Basic Principles of DevOps, which presents an overview of the DevOps process and practices, describing “the big picture” while still maintaining a high level of detail.
- Get started on one of your existing projects with Open a project or solution
- Use the Open a local folder button which will open the file explorer
- Pick up with a recent project or folder by choosing one of the listed recent projects or folders under Open recent
- Create a new project and check out the new project dialog experience (Image 3), which allows you to search and filter your project templates so you can quickly get to what you are looking for
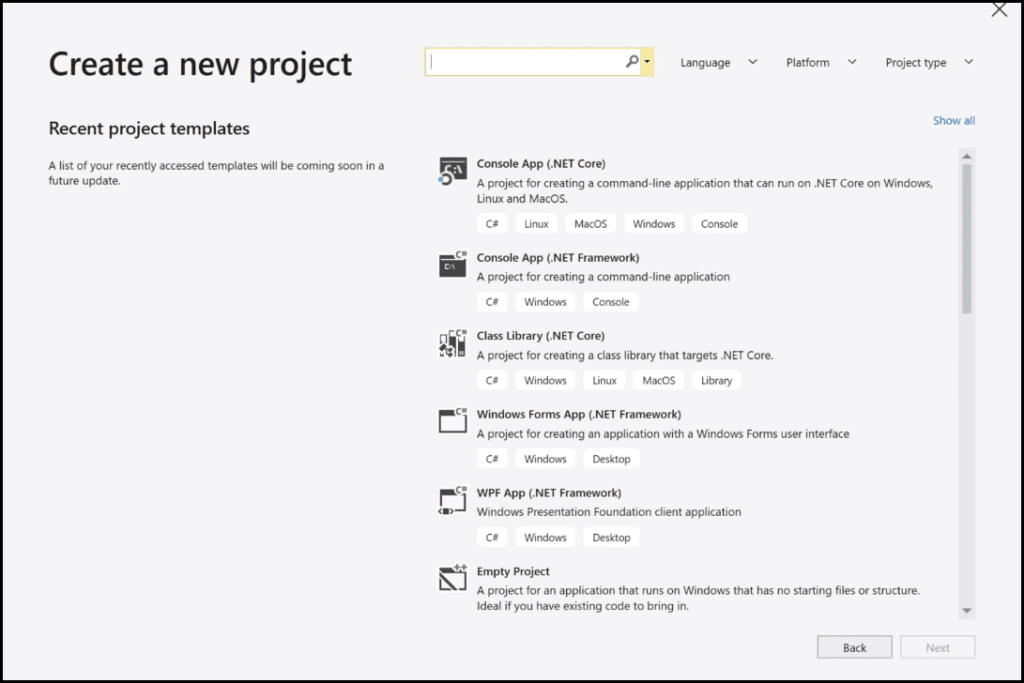 Image 3 - Create a new project window
- Just open the IDE without any code open by clicking on the Continue without code button at the bottom of the start window
[More Info]{.ion-info} If you would like to learn more about the story behind containers and what drives the need for them, we will know why companies moved from traditional solution architecture to Microservices and how this makes containers the perfect solution for running them. We will get a quick intro to clarify some definitions, tools, and keywords related to this ecosystem, such as the difference between VM, Container, and Hyper-V Container. Why we would prefer containers over VM and when the VM is better. We will understand the difference between container and image and know the lifecycle of creating a new image and why I do that, like adding more layers to the base image, pushing that to container images registry on the cloud, then pulling that from the registry to anywhere to have a new container. We will understand different technologies and services around containers, like Docker, Docker Swarm, Kubernetes, Azure Container Services (ACS), Azure Container Registry, etc. - have a look at this post - have a look at the this post.
UI Refresh
One of the most noticeable visual impacts you may see when you run Visual Studio 2019 is the updated blue theme. More than half of you use the blue theme, but it has looked the same since Visual Studio 2012. In Image 4, you can see an instance of Visual Studio, which looks quite different from Visual Studio 2017. As we can see, the clutter is reduced by minimizing the chrome and by compressing the menu bar to allow more space for what matters, such as the editor window. The editor window looks different with the new modern UX and updated classic blue theme from Visual Studio 2017.
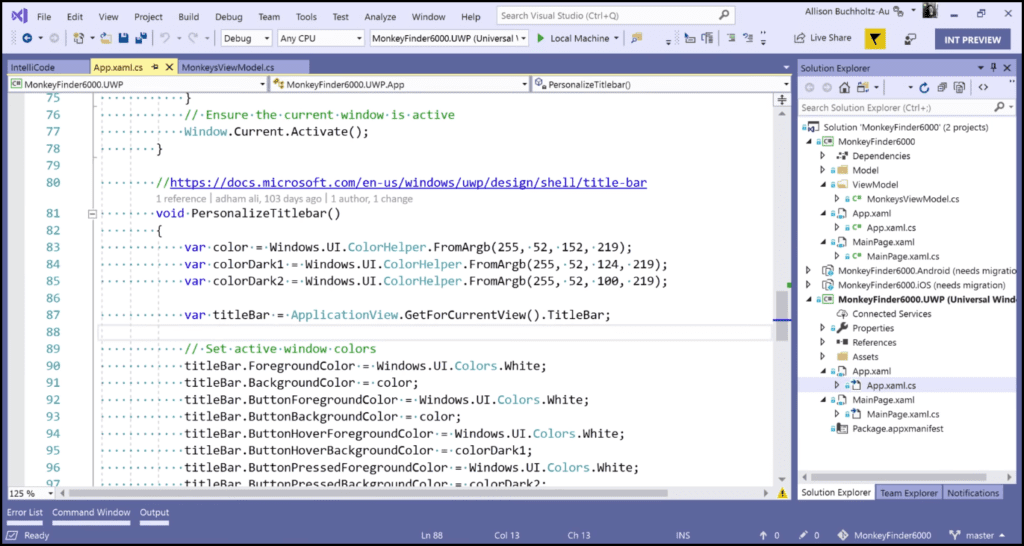 Image 4 - Instance of VS 2019
Search Improvements
You will notice that the uppermost layout of Visual Studio is reassessed, without drastically changing the workflow. The search UI is moved to increase discoverability. With the upcoming preview releases and updates, you will find that search in Visual Studio 2019 is more powerful and accurate. These are some of the improvements:
- In order to type in the search bar just hit the search bar located next to the Help menu, or use Ctrl + Q as a shortcut
- As you type, you will get results almost instantly. Even if you misspell something, you will still get relevant search results (Image 5 - Fuzzy search)
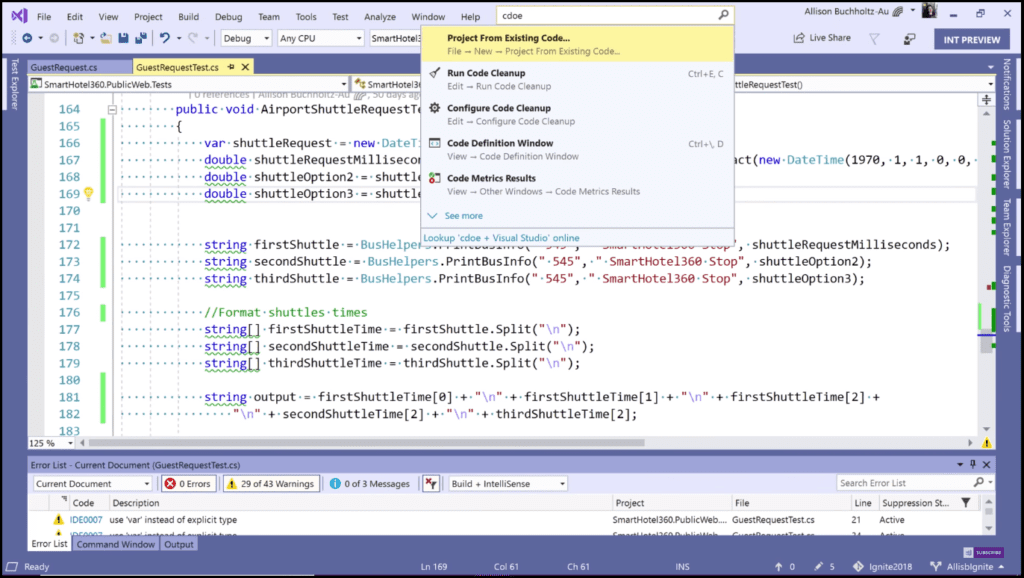 Image 5 - Fuzzy search
- If you take a closer look at any of the search results, you will notice that there are shortcuts displayed next to each search result to avoid additional search through menu commands
- In case you are not seeing what you are looking for, you can always quickly do an online search by clicking the Visual Studio online button located at the end of the search results
Document Health & Code Cleanup
The little light bulb at the bottom right corner collects all your issues in one place. An issue can be an error, a warning, or a suggestion. Errors and warnings you already know, but the suggestions are a new feature in Visual Studio 2019.
- Quickly understand the health of the open file - In the scroll bar, there is a warning indicator, which indicates the health of the document. It shows us if there are any errors, warnings, or suggestions in the document currently open. On hover, it will show the numbers of warnings, errors, or suggestions (Image 6). If there are any warnings, a yellow yield sign is shown. In case there are errors, a red sign is shown. If there are any suggestions, a blue sign is shown.
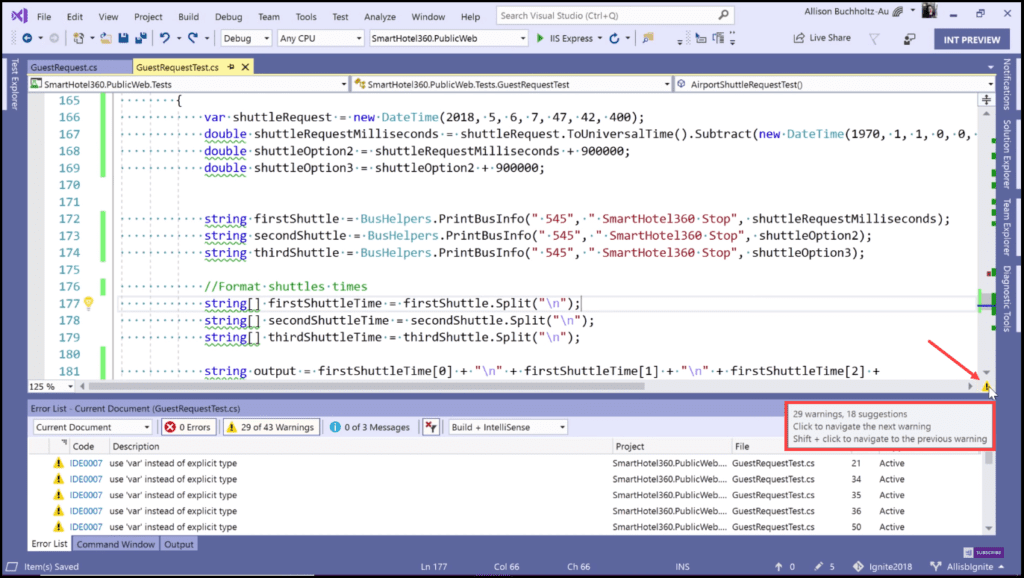 Image 6 - Warning indicator
- Navigate between errors, warnings, suggestions - On the right click on the sign, you can navigate through issues with two options: Go to the next issue in the file and Go to the previous issue in the file (Image 7).
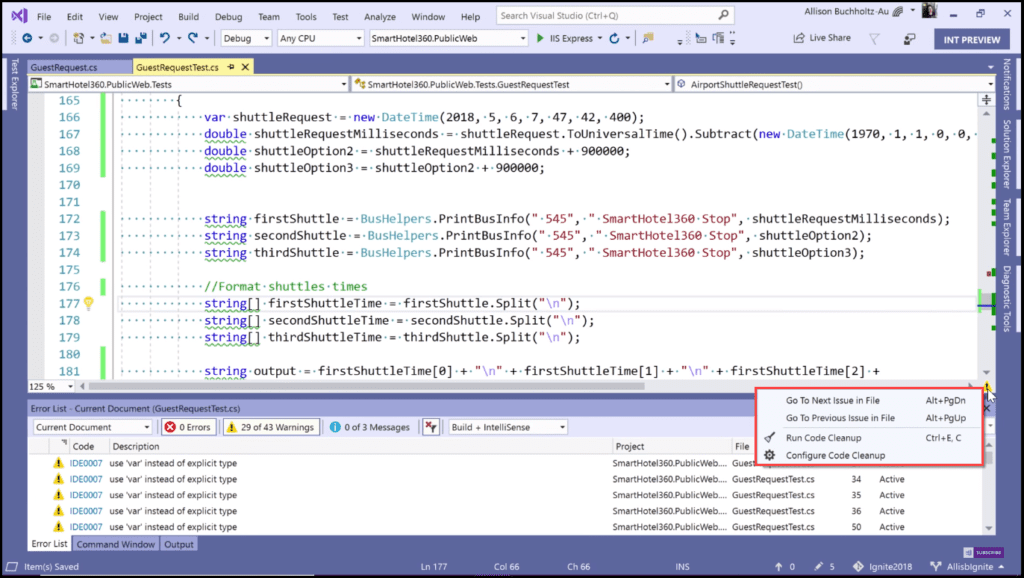 Image 7 - Warning indicator right-click menu
- Run and configure code cleanup: Ctrl + E, C
- Choose the rules to apply in Configure Code Cleanup - With Configure code cleanup, you can look through and understand which refactoring and code cleanup fixes you like to apply (Image 8).
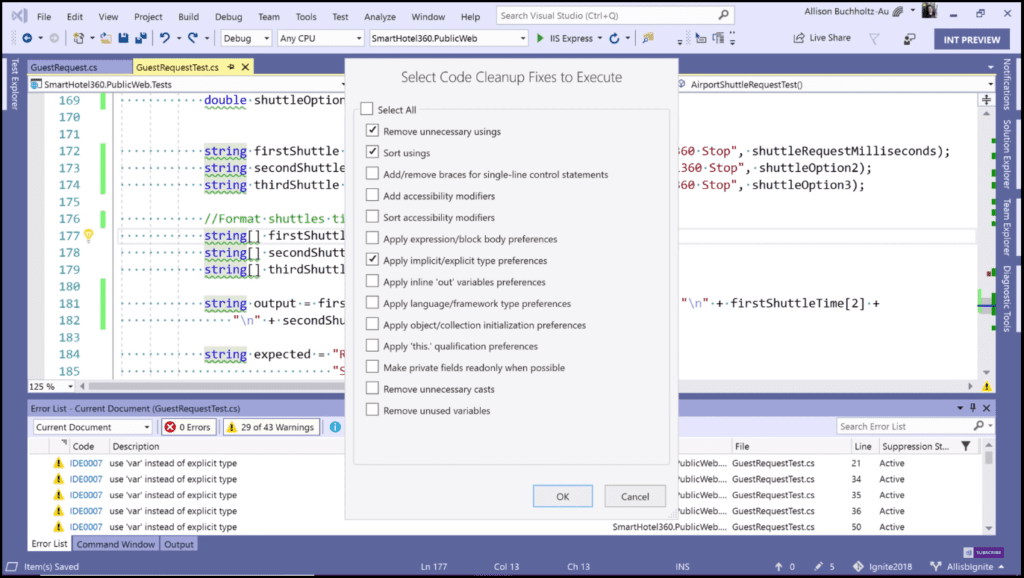 Image 8 - Configure Code Cleanup
- Change the direction of rule: Tools > Options > Text Editor > Code Style
Debugging Improvements
You can expect step improvements by up to 50%, depending on the size and complexity of the project. For those who spend a lot of time stepping through, there will be a significant improvement in performance. There is a window containing Autos, Locals, and Watch (Image 9). All three now have a search bar, which allows you to search through the items instead of scrolling through, which is especially useful if you have many items.
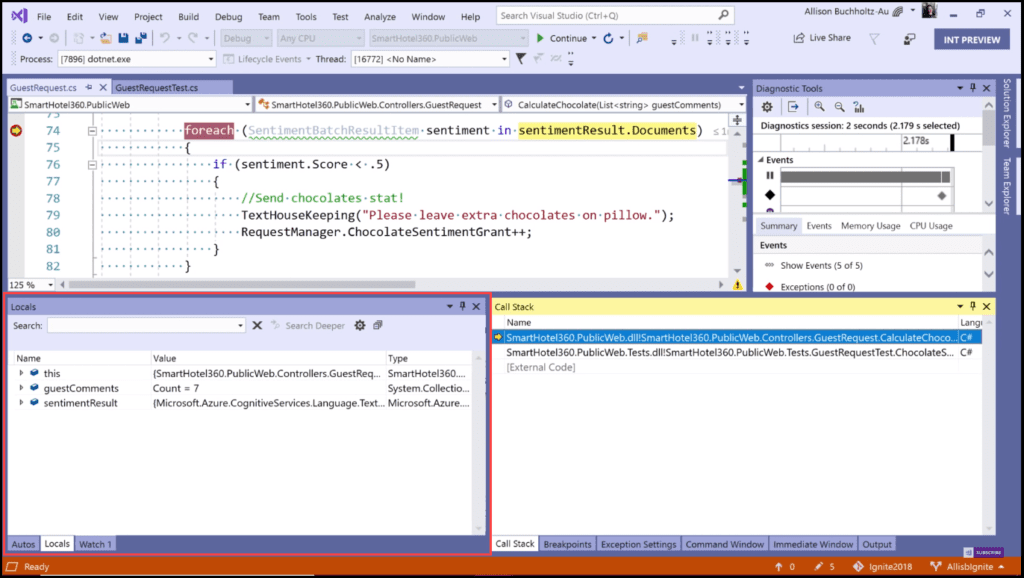 Image 9 - Autos, Locals, Watch
For example, go to the Locals Window and search for “string”. In the listed results, the first one is where “string” is first encountered (Image 10). In this case, it is a type but if “string” were in value or name, it would also return it in the search results. There is also a button to go to the next instance. If you want to dig deeper and expand any of the elements, there is a Search Deeper button, next to which there is an Options button.
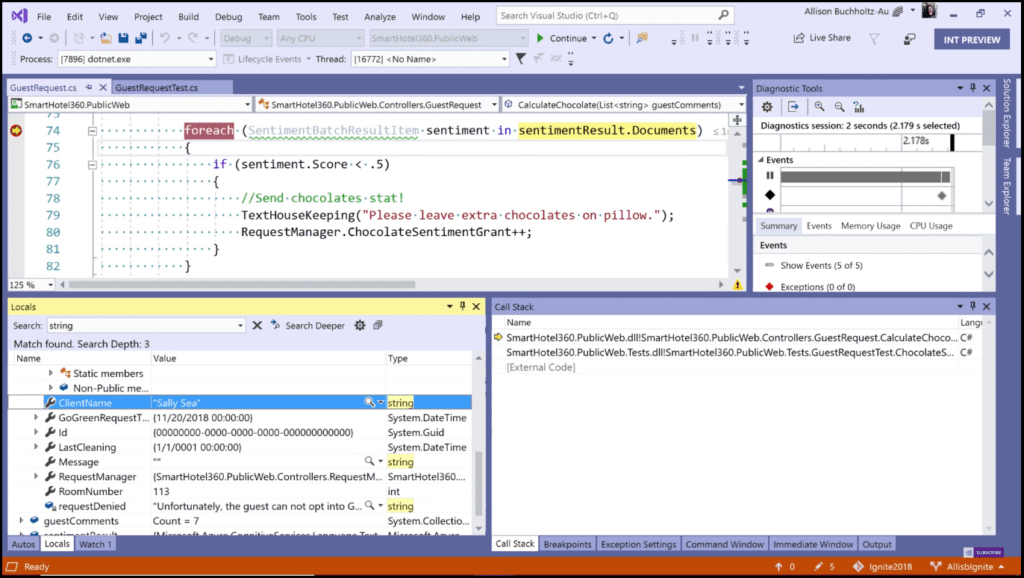 Image 10 - Search String
On clicking the Options button, a pop-up is displayed with the search options, where you can specify the search depth. It means how many times the items will be opened and expanded before it ends the search. In addition, you can limit the search by searching only the items that are currently expanded. This option is very useful if you have many items or if you want to scope the search to one particular object.
Conclusion
Whether you are new to coding or ready for your next project, Visual Studio 2019 streamlines your experience so you can get right down to focused work. You will find more screen space for your code and you can search for anything from one place. You can keep your code tidy with one-click code clean-up. When you are debugging, you will notice better stepping performance and you will get search capabilities within the Autos, Locals, and Watch windows to quickly find that elusive object or value. I hope that you will try out all of these new features and even more by downloading the Visual Studio 2019 preview from the following link. If you want to know the full range of things introduced in each preview release, you can also check out the release notes on the following link.