
In this post, we are going to see how easy it is to set up continuous integration and deployment (CI/CD) using GitHub Actions, all in the familiar Publish dialog. See how to build a CI/CD Pipeline from Visual Studio in this post.
Using this GitHub feature you can do CI/CD through a workflow defined in GitHub. If your project is hosted on GitHub, Visual Studio can help you to set it up through right-click and publish. In this post, you can see how to add CI/CD Azure Pipelines + Github.
If you have a piece of code and you have an application that you want to deploy somewhere, one way to do it is to right-click on your project in Visual Studio and publish it. Visual Studio will help you to build your code, by taking everything that you have on your local machine and push it on your deployment target. The alternative is that if you want your deployment to happen from source control and probably run some tests, that is what we call continuous integration and deployment.
You are gonna need at least Visual Studio 16.8 preview 3 since the GitHub Action Tooling feature exists since this version. You can download the latest preview here. Make sure that GitHub Actions support for publishing feature is enabled for all the builds in tools options. In my example, I have an ASP.NET core project which is source controlled using GitHub.
In this post, you can see how to sync your GitHub and Visual Studio Online. The first step is to right-click on the project and select publish. A dialog will be shown asking “Where are you publishing today?” with several destinations listed and in this example, we will see publishing our app to the Microsoft cloud Azure, displayed on Image 1.
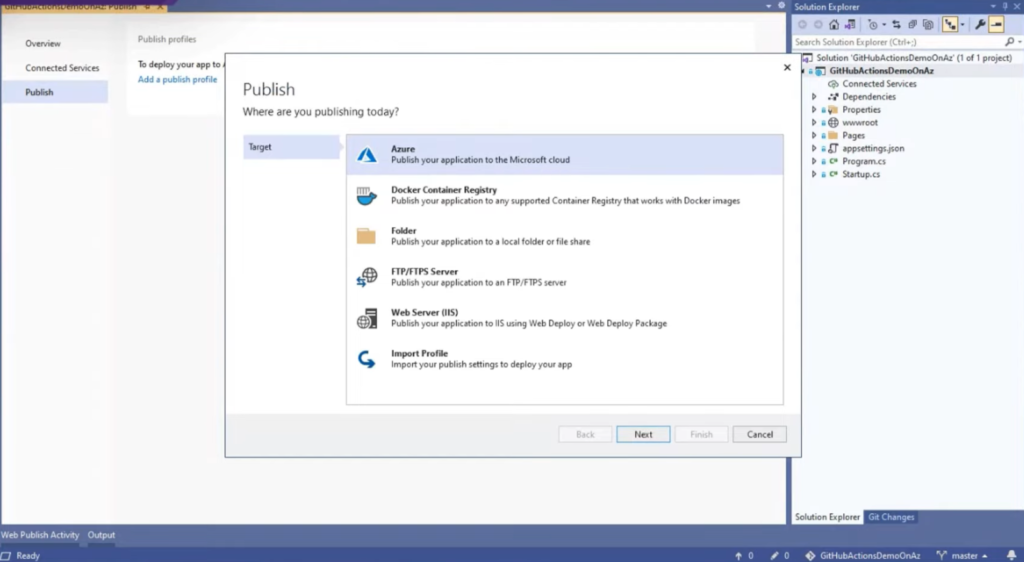 Image 1 - Publish dialog
On the next screen, the question “Which Azure service would you like to use to host your app?” will be shown with a list of services. In this example, we are going to deploy to Azure App Service on Linux, a target that is supported by GitHub Actions.
By clicking Next, Visual Studio will help us to pick the instance that we want to deploy by listing the already existing instances (and also a possibility to create a new one).
After choosing an existing instance (in this example), the VS will ask us “How would you like to deploy your application?”, listing two options, Publish (generates pubxml file) and CI/CD using GitHub Actions workflows (generates yml file).
The second option is the new one which is doing CI/CD through GitHub Actions. After choosing the new option, Visual Studio will create a working workflow that is applicable to our project.
Visual Studio knows exactly how to make our project work in the options that we have picked, knowing the type of project and the target that we picked in Azure. Next, it will download the best template, the best GitHub Action workflow, in order to make sure that we can have our application deployed to Azure through CI/CD.
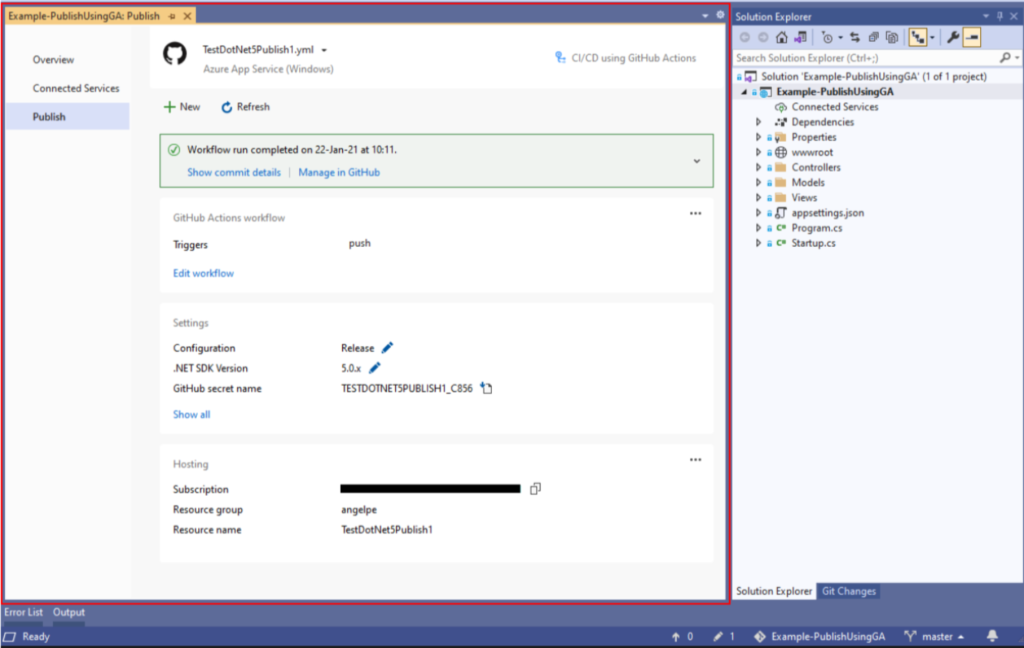 Image 2 - Summary page of the created workflow
In image 2 we can see the new workflow file created named the same as our project with extension .yml. Also, it shows the current status and what we have to do next. In the image, it is telling us that the workflow will not work until we commit and push the workflow and changes to our GitHub repository. Also displayed are some details about the GitHub Actions workflow, like Triggers and Publish profile secret where we can also see the option Edit workflow, which will lead us to yml editing experience in VS.
Also, the Configuration and .NET SDK versions are displayed in the section Settings. Hosting details are giving us information for Subscription, Resource group, Resource name, link to the site, etc. After clicking commit and push it will start working in the background. After a while, we can see a message that our Workflow run completed successfully with an option to download the workflow logs or we can open them in GitHub which is a link to the Actions tab of our Git repository. Here we have an option to Build and Deploy which will give us detailed steps of what was happening with an option to expand each of the steps, shown in Image 3.
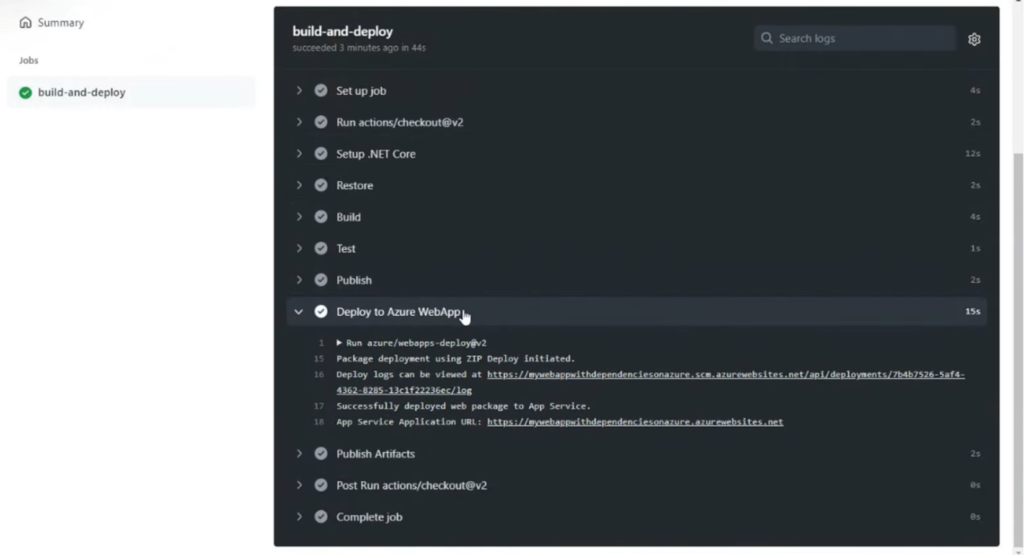 Image 3 - Detailed steps of Build and Deploy
In the Deploy to Azure step, we have a link directly to the application that we build.
The same thing is going to happen in the future when we make some changes and push them, without having to click right click and publish.
The next additional features that we expect in GitHub Actions are going to help us to be able to configure more settings in the summary page without having to go to the yml file. Also to support more project types and more deployment targets. Read more on What’s new with GitHub Actions tooling in Visual Studio.